Epson WF-C20590 Quick Reference - Document Capture Pro 2.0 - Page 5
Document Capture Pro 2.0 for Windows
 |
View all Epson WF-C20590 manuals
Add to My Manuals
Save this manual to your list of manuals |
Page 5 highlights
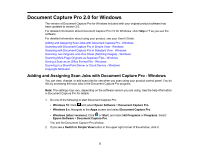
Document Capture Pro 2.0 for Windows The version of Document Capture Pro for Windows included with your original product software has been updated to version 2.0. For detailed information about Document Capture Pro 2.0 for Windows, click Help or ? as you use the software. For detailed information about using your product, see your User's Guide. Adding and Assigning Scan Jobs with Document Capture Pro - Windows Scanning with Document Capture Pro in Simple View - Windows Scanning with Document Capture Pro in Standard View - Windows Scanning Two Originals onto One Sheet (Stitching Images) - Windows Scanning Multi-Page Originals as Separate Files - Windows Saving a Scan as an Office Format File - Windows Scanning to a SharePoint Server or Cloud Service - Windows Copyright Attribution Adding and Assigning Scan Jobs with Document Capture Pro - Windows You can view, change, or add scan jobs for use when you scan using your product control panel. You do this by accessing the scan jobs in the Document Capture Pro program. Note: The settings may vary, depending on the software version you are using. See the help information in Document Capture Pro for details. 1. Do one of the following to start Document Capture Pro: • Windows 10: Click and select Epson Software > Document Capture Pro. • Windows 8.x: Navigate to the Apps screen and select Document Capture Pro. • Windows (other versions): Click or Start, and select All Programs or Programs. Select Epson Software > Document Capture Pro. You see the Document Capture Pro window. 2. If you see a Switch to Simple View button in the upper right corner of the window, click it. 5
-
 1
1 -
 2
2 -
 3
3 -
 4
4 -
 5
5 -
 6
6 -
 7
7 -
 8
8 -
 9
9 -
 10
10 -
 11
11 -
12
-
13
-
14
-
15
-
16
-
17
-
18
-
19
-
20
-
21
-
22
-
23
-
24
 |
 |
