Epson TM-U220 TM-U220 Technical Reference Guide - Page 72
Ethernet interface
 |
View all Epson TM-U220 manuals
Add to My Manuals
Save this manual to your list of manuals |
Page 72 highlights
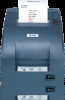
3.4.7.4 Ethernet interface The following view shows the part names of the UB-E01. 10BASE-T Ethernet interface connector LED (green) LED (red) Be sure not to push the LEDs by accident Switch If you press and hold this switch when the printer is on, the interface will be reset to the factory settings Before connecting any of the cables, make sure that both the printer and the host computer are turned off. 1. Make sure both the printer and the host computer are turned off. 2. Plug the 10BASE-T cable connector securely into the UB-E01's 10BASE-T Ethernet connector until you feel it click. CAUTION: Do not connect a telephone line , a display module cable, or a drawer kick cable to the UB-E01's 10BASE-T connector. Note: The display module connector on the TM printer cannot be used when the UB-E01 is installed. 3. Connect the power supply to the printer. 3-30 Setup Rev. H
-
 1
1 -
2
-
3
-
4
-
5
-
6
-
7
-
8
-
9
-
10
-
11
-
12
-
13
-
14
-
15
-
16
-
17
-
18
-
19
-
20
-
21
-
22
-
23
-
24
-
25
-
26
-
27
-
28
-
29
-
30
-
31
-
32
-
33
-
34
-
35
-
36
-
37
-
38
-
39
-
40
-
41
-
42
-
43
-
44
-
45
-
46
-
47
-
48
-
49
-
50
-
51
-
52
-
53
-
54
-
55
-
56
-
57
-
58
-
59
-
60
-
61
-
62
-
63
-
64
-
65
-
66
-
 67
67 -
 68
68 -
 69
69 -
 70
70 -
 71
71 -
 72
72 -
 73
73 -
 74
74 -
 75
75 -
 76
76 -
 77
77 -
78
-
79
-
80
-
81
-
82
-
83
-
84
-
85
-
86
-
87
-
88
-
89
-
90
-
91
-
92
-
93
-
94
-
95
-
96
-
97
-
98
-
99
-
100
-
101
-
102
-
103
-
104
-
105
-
106
-
107
-
108
-
109
-
110
-
111
-
112
-
113
-
114
-
115
-
116
-
117
-
118
-
119
-
120
-
121
-
122
-
123
-
124
-
125
-
126
-
127
-
128
-
129
-
130
-
131
-
132
-
133
-
134
-
135
-
136
-
137
-
138
-
139
-
140
-
141
-
142
-
143
-
144
-
145
-
146
-
147
-
148
-
149
-
150
-
151
-
152
-
153
-
154
 |
 |
