Epson TM-U220 TM-U220 Technical Reference Guide - Page 119
How to Install the Printer on a Wall with the WH-10
 |
View all Epson TM-U220 manuals
Add to My Manuals
Save this manual to your list of manuals |
Page 119 highlights
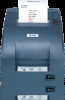
TM-U220 Technical Reference Guide Appendix B How to Install the Printer on a Wall with the WH-10 WH-10 is a option for the TM printer series, with it you can install a TM-U220 on a wall. This section describes how to install wall hanging TM-U220. See the "WH-10 installation Manual" for details. B.1 The Procedure B.1.1 Precautions ❏ Static electricity may cause cut paper to adhere to the printer case. (This static electricity will not affect the operation of the printer.) B.1.2 Unpacking Open the package and confirm that it contains all of the parts listed in the illustration. If any parts are missing or damaged, please contact your dealer for assistance. wall-mount (note: screws for wall-mount not included; see the installation section.) 1 4 23 1 4 32 1 4 23 1 4 32 brackets (2 pieces) control panel sheets Please attach the appropriate sheet. installation manual screws for brackets (3×12) (4 pieces) screws (3×10) screws (3×6) (5 pieces) Note: 4 of the screws are used for attaching the brackets roll paper holder for hanging bracket cam Note: Other parts are packed for other TM printer series. Depending on the conditions during storage and shipping, some rust may form around the edges of the wall-mount or brackets. This may be removed with sandpaper. Rev. H How to Install the Printer on a Wall with the WH-10 B-1
-
 1
1 -
2
-
3
-
4
-
5
-
6
-
7
-
8
-
9
-
10
-
11
-
12
-
13
-
14
-
15
-
16
-
17
-
18
-
19
-
20
-
21
-
22
-
23
-
24
-
25
-
26
-
27
-
28
-
29
-
30
-
31
-
32
-
33
-
34
-
35
-
36
-
37
-
38
-
39
-
40
-
41
-
42
-
43
-
44
-
45
-
46
-
47
-
48
-
49
-
50
-
51
-
52
-
53
-
54
-
55
-
56
-
57
-
58
-
59
-
60
-
61
-
62
-
63
-
64
-
65
-
66
-
67
-
68
-
69
-
70
-
71
-
72
-
73
-
74
-
75
-
76
-
77
-
78
-
79
-
80
-
81
-
82
-
83
-
84
-
85
-
86
-
87
-
88
-
89
-
90
-
91
-
92
-
93
-
94
-
95
-
96
-
97
-
98
-
99
-
100
-
101
-
102
-
103
-
104
-
105
-
106
-
107
-
108
-
109
-
110
-
111
-
112
-
113
-
 114
114 -
 115
115 -
 116
116 -
 117
117 -
 118
118 -
 119
119 -
 120
120 -
 121
121 -
 122
122 -
 123
123 -
 124
124 -
125
-
126
-
127
-
128
-
129
-
130
-
131
-
132
-
133
-
134
-
135
-
136
-
137
-
138
-
139
-
140
-
141
-
142
-
143
-
144
-
145
-
146
-
147
-
148
-
149
-
150
-
151
-
152
-
153
-
154
 |
 |
