Epson LightScene EV-100 Installation Manual for Lighting Track Mounts ELPMB54W - Page 8
Installation Procedure, Preparing the Projector,
 |
View all Epson LightScene EV-100 manuals
Add to My Manuals
Save this manual to your list of manuals |
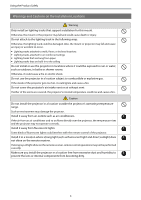
Page 8 highlights
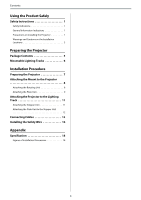
Installation Procedure Preparing the Projector Adjust the orientation of the projector to make installing easier. a Place the projector on a flat surface on a soft cloth. b Loosen the screw for the ball joint with a hexagonal wrench supplied with the projector. c Change the projector's orientation. You can change the orientation of the projector as shown below. d Tighten the screw for the ball joint with a hexagonal wrench to secure it in place. Make sure you tighten the screw completely so that the ball joint does not move during installation. 7
-
 1
1 -
2
-
 3
3 -
 4
4 -
 5
5 -
 6
6 -
 7
7 -
 8
8 -
 9
9 -
 10
10 -
 11
11 -
 12
12 -
 13
13 -
14
-
15
-
16
-
17
-
18
-
19
-
20
 |
 |

Installation Procedure
7
Preparing the Projector
Adjust the orientation of the projector to make installing easier.
a
Place the projector on a flat surface on a soft cloth.
b
Loosen the screw for the ball joint with a hexagonal wrench supplied with the projector.
c
Change the projector's orientation.
You can change the orientation of the projector as shown below.
d
Tighten the screw for the ball joint with a hexagonal wrench to secure it in place.
Make sure you tighten the screw completely so that the ball joint does not move during installation.