Epson LightScene EV-100 Installation Manual for Lighting Track Mounts ELPMB54W - Page 12
Attaching the Projector to the Lighting Track, Attaching the Stopper Unit
 |
View all Epson LightScene EV-100 manuals
Add to My Manuals
Save this manual to your list of manuals |
Page 12 highlights
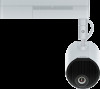
Installation Procedure Attaching the Projector to the Lighting Track Warning • Make sure you turn off the lighting track before performing installation work. Otherwise an electric shock could occur. • Make sure the lighting track is firmly secured. Otherwise, the mount or projector may fall and cause an injury or accident to occur. Attaching the Stopper Unit a Loosen the nut for the stopper unit. Loosen until the nut reached the end of the rotating shaft. b Insert the rotating shaft of the stopper unit into the groove on the lighting track. Push the rotating shaft up so that the tip of the shaft fits into the duct. c Rotate the stopper unit 90 degrees. The rotating shaft for the stopper unit fits into the groove on the lighting track. 11
-
 1
1 -
2
-
3
-
4
-
5
-
6
-
 7
7 -
 8
8 -
 9
9 -
 10
10 -
 11
11 -
 12
12 -
 13
13 -
 14
14 -
 15
15 -
 16
16 -
 17
17 -
18
-
19
-
20
 |
 |

Installation Procedure
11
Attaching the Projector to the Lighting Track
Warning
•
Make sure you turn off the lighting track before performing installation work. Otherwise an electric shock
could occur.
•
Make sure the lighting track is firmly secured. Otherwise, the mount or projector may fall and cause an injury
or accident to occur.
Attaching the Stopper Unit
a
Loosen the nut for the stopper unit.
Loosen until the nut reached the end of the rotating shaft.
b
Insert the rotating shaft of the stopper unit into the groove on the lighting track.
Push the rotating shaft up so that the tip of the shaft fits into the duct.
c
Rotate the stopper unit 90 degrees.
The rotating shaft for the stopper unit fits into the groove on the lighting track.