Dell Latitude 3180 Owners Manual
Dell Latitude 3180 Manual
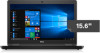 |
View all Dell Latitude 3180 manuals
Add to My Manuals
Save this manual to your list of manuals |
Dell Latitude 3180 manual content summary:
- Dell Latitude 3180 | Owners Manual - Page 1
Latitude 3180 Owner's Manual 1 Regulatory Model: P26T Regulatory Type: P26T002 May 2020 Rev. A03 - Dell Latitude 3180 | Owners Manual - Page 2
and tells you how to avoid the problem. WARNING: A WARNING indicates a potential for property damage, personal injury, or death. © 2018 - 2019 Dell Inc. or its subsidiaries. All rights reserved. Dell, EMC, and other trademarks are trademarks of Dell Inc. or its subsidiaries. Other trademarks may - Dell Latitude 3180 | Owners Manual - Page 3
microSD card...8 Base cover...8 Removing base cover...8 Installing base cover...10 Battery...10 Lithium-ion battery precautions...10 Removing battery - optional...10 Installing battery...11 Keyboard lattice and Keyboard...11 Removing keyboard...11 Installing keyboard...12 Solid State Drive - Dell Latitude 3180 | Owners Manual - Page 4
...37 Secure Boot screen options...38 Performance screen options...39 Power management screen options...39 POST behavior screen options...40 Wireless screen options...41 Memory specifications...41 System logs screen options...41 SupportAssist system resolution...42 Updating the BIOS in Windows ...42 - Dell Latitude 3180 | Owners Manual - Page 5
...46 Battery specifications...47 AC adapter specifications...47 Physical specifications...47 Environmental specifications...48 7 Troubleshooting...49 Enhanced Pre-Boot System Assessment - ePSA diagnostics 49 Running the ePSA Diagnostics...49 Real Time Clock reset...49 8 Contacting Dell...51 - Dell Latitude 3180 | Owners Manual - Page 6
can be replaced or, if troubleshooting and simple repairs as authorized in your product documentation, or as directed by the online or telephone service and support team. Damage due to servicing that is not authorized by Dell is not covered by your warranty. Read and follow the safety instructions - Dell Latitude 3180 | Owners Manual - Page 7
To avoid damage to the computer, use only the battery designed for this particular Dell computer. Do not use batteries designed for other Dell computers. 1. Connect any external devices, such as a port replicator or media base, and replace any cards, such as an ExpressCard. 2. Connect any telephone - Dell Latitude 3180 | Owners Manual - Page 8
• Plastic scribe NOTE: The #0 screw driver is for screws 0-1 and the #1 screw driver is for screws 2-4 microSD card Removing microSD Follow the procedure in After working inside your computer. Base cover Removing base cover 1. Follow the procedure in Before working inside your computer. 2. Remove - Dell Latitude 3180 | Owners Manual - Page 9
b. Pry the base cover from the edge. NOTE: You may need a 3c plastic scribe to pry the base cover from the edge. 4. Lift the base cover away from the computer. Disassembly and reassembly 9 - Dell Latitude 3180 | Owners Manual - Page 10
for assistance and further instructions. • If the battery gets stuck inside your computer as a result of swelling, do not try to release it as puncturing, bending, or crushing a lithium-ion battery can be dangerous. In such an instance, contact Dell technical support for assistance. See https - Dell Latitude 3180 | Owners Manual - Page 11
cable to the connector on the battery. 3. Replace the M2x3 screws to secure the battery to the computer. 4. Install the: a. base cover b. microSD card 5. Follow the procedure in After working inside your computer. Keyboard lattice and Keyboard Removing keyboard 1. Follow the procedure in Before - Dell Latitude 3180 | Owners Manual - Page 12
NOTE: The two release holes for the keyboard are indicated by the "KB" labeling. 4. Slide and lift the keyboard away from the computer. Installing keyboard 1. Align the keyboard trim with the tabs on the computer, and press it until it clicks into place. 12 Disassembly and reassembly - Dell Latitude 3180 | Owners Manual - Page 13
The image shows the press points on the keyboard. 2. Connect the keyboard cable on the system board. 3. Install the: a. battery b. base cover c. microSD card 4. Follow the procedure in After working inside your computer. Solid State Drive - optional Removing M.2 Solid State Drive (SSD) If the - Dell Latitude 3180 | Owners Manual - Page 14
Align the screw hole on the SSD card with the screw hole on the system board. 3. Replace the screw that secures the SSD card to the system board. 4. Install the: a. battery b. base cover c. microSD card 5. Follow the procedure in After working inside your computer. Audio board Removing audio board - Dell Latitude 3180 | Owners Manual - Page 15
Insert the audio board into the slot on the computer. 2. Replace the M2x3 screw that secure the audio board to the computer. 3. Connect the audio cable to the connector on the audio board. 4. Install the: a. battery b. base cover c. microSD card 5. Follow the procedure in After working inside your - Dell Latitude 3180 | Owners Manual - Page 16
connector port into the slot on the computer. 2. Replace the two M2x3 screws that secure the power connector port to the computer. 3. Connect the power connector cable to the connector on the system board. 4. Install the: a. battery b. base cover c. microSD card 5. Follow the procedure in After - Dell Latitude 3180 | Owners Manual - Page 17
your computer. Speaker Removing speaker 1. Follow the procedure in Before working inside your computer. 2. Remove the: a. microSD card b. base cover c. battery 3. To remove the speaker: a. Disconnect the speaker cable from the connector on the system board [1]. b. Remove the adhesive tape that - Dell Latitude 3180 | Owners Manual - Page 18
4. Remove the speaker from the computer. Installing speakers 1. Place the speakers into the slots on the computer. 2. Route the speaker cable through the retention clips through routing channel. 3. Affix the adhesive tape to secure the speaker cable on the computer. 4. Connect the speaker cable to - Dell Latitude 3180 | Owners Manual - Page 19
system board 1. Follow the procedure in Before working inside your computer. 2. Remove the: a. microSD card b. base cover c. battery d. SSD card 3. Disconnect the following cables: a. audio cable [1] b. keyboard cable [2] c. touch pad cable [3] 4. To disconnect the cable: a. Disconnect coin cell - Dell Latitude 3180 | Owners Manual - Page 20
5. To remove metal bracket: a. Remove the screw M2.0x3.0 and lift the metal bracket that secures the WLAN card on the system board [1, 2] b. Disconnect the WLAN cables [3]. c. Remove the screws M2.0x.30 and lift the metal bracket that secures the display cable on the computer [4, 5] d. Lift the - Dell Latitude 3180 | Owners Manual - Page 21
system board with the screw holders on the palm rest assembly. 2. Replace the M2.0x3.0 screws to secure the system board to the palm cable c. keyboard cable d. speaker cable e. audio cable f. coin cell battery cable g. camera cable 9. Install the: a. SSD card b. battery c. base cover d. microSD card - Dell Latitude 3180 | Owners Manual - Page 22
Display assembly Removing display assembly 1. Follow the procedure in Before working inside your computer. 2. Remove the: a. microSD card b. base cover c. battery 3. To remove display cable: a. Remove the screws M2.0x3.0 and lift the metal bracket that secures the display cable on the computer [1, - Dell Latitude 3180 | Owners Manual - Page 23
the display assembly away from the computer [2]. Installing display assembly 1. Place the display assembly to align with the screw holders on the computer. 2. Replace the screws that secure the display hinges to the palm-rest assembly. 3. Flip over the computer. 4. Connect the display cable to the - Dell Latitude 3180 | Owners Manual - Page 24
to the WLAN cable on the system board. 8. Install the: a. battery b. base cover c. microSD card 9. Follow the procedure in After working inside your computer until it clicks on to the display assembly. 3. Replace the screws to secure the display bezel to the display assembly. 4. Affix - Dell Latitude 3180 | Owners Manual - Page 25
computer Display panel Removing display panel 1. Follow the procedure in Before working inside your computer. 2. Remove the: a. microSD card b. base cover c. battery d. display assembly e. display bezel 3. Remove the M2.0x3.0 screws that secure the display panel to the display assembly [1] and lift - Dell Latitude 3180 | Owners Manual - Page 26
panel to align with the screw holders on the display assembly. 3. Replace the M2x3 screws to secure the display panel to the display assembly. 4. Install the: a. display bezel b. display assembly c. battery d. base cover e. microSD card 5. Follow the procedure in After working inside your computer - Dell Latitude 3180 | Owners Manual - Page 27
display hinge 1. Place the display hinge cover on the display assembly. 2. Replace the M2.5x2.5 screws to secure the display hinge cover to the display assembly. 3. Install the: a. display panel b. display bezel c. display assembly d. battery e. base cover f. microSD card 4. Follow the procedure in - Dell Latitude 3180 | Owners Manual - Page 28
on the display assembly. 2. Connect the camera cable to the connector on the display assembly. 3. Install the: a. display panel b. display bezel c. display assembly d. battery e. base cover f. microSD card 4. Follow the procedure in After working inside your computer 28 Disassembly and reassembly - Dell Latitude 3180 | Owners Manual - Page 29
cable or improperly connecting the cable to the power strip or electrical outlet may cause fire or equipment damage. Processors This laptop is shipped with the following processors: • Intel Celeron Processor N3350 (6 W, 2 M cache, up to 2.4 GHz) • Intel Pentium Processor N4200 (6 W, 2 M cache, up to - Dell Latitude 3180 | Owners Manual - Page 30
620 Memory features This laptop supports a maximum memory of 4 GB LPDDR3 1600 Mhz. Verifying system memory in system setup BIOS 1. Turn on or restart your system. 2. Perform the following actions after the Dell logo is displayed • With keyboard - Tap F2 until the Entering BIOS setup message appears - Dell Latitude 3180 | Owners Manual - Page 31
simplified the connection between host computers and peripheral devices like mice, keyboards, external drivers, and printers. Let's take a quick look on the data transfers and support for new transfer types • Backward USB 2.0 compatibility • New connectors and cable The topics below cover some of - Dell Latitude 3180 | Owners Manual - Page 32
to previous versions of Windows, which continue to require separate drivers for USB 3.0/USB 3.1 Gen 1 controllers. Microsoft announced that Windows 7 would have USB 3.1 Gen 1 support, perhaps not on its immediate release, but in a subsequent Service Pack or update. It is not out of the question - Dell Latitude 3180 | Owners Manual - Page 33
and confusion of multiple cables currently used in A/V systems • HDMI supports communication between the video source (such as a DVD player) and the DTV, enabling new functionality Realtek ALC3246 This laptop is shipped with integrated Realtek ALC3246 controller High Definition audio codec designed - Dell Latitude 3180 | Owners Manual - Page 34
Boot menu Press when the Dell™ logo appears to initiate a one-time boot menu with a list of the valid boot devices for the system. Diagnostics and BIOS Setup options are also included in this menu. The devices listed on the boot menu depend on the bootable devices in the system. This - Dell Latitude 3180 | Owners Manual - Page 35
screen options • Security screen options • Secure Boot screen options • Performance screen options • Power management screen options • POST behavior screen options • Wireless screen options • Memory specifications • System logs screen options • SupportAssist system resolution • Updating the BIOS - Dell Latitude 3180 | Owners Manual - Page 36
Dell logo appears, you can also press F12 and then select BIOS setup. General screen BIOS Version, Service Tag, Asset Tag, Ownership Tag, Ownership Date, Manufacture Date, Express Service This field configures the integrated USB controller. If Boot Support is enabled, the system is allowed to boot - Dell Latitude 3180 | Owners Manual - Page 37
Option Description • Enable Boot Support-enabled by default • Enable External USB Port-enabled by default NOTE: USB keyboard and mouse always work in the BIOS setup irrespective of these settings. USB PowerShare Audio Debug Memory Frequency Configuration Miscellaneous Devices This field - Dell Latitude 3180 | Owners Manual - Page 38
This option controls whether this system allows BIOS updated via UEFI capsule Firmware Updates update further changes are allowed CPU XD Support Admin Setup Lockout Master password lockout Allows is not enabled by default. Secure Boot screen options Option Secure Boot Enable Description This - Dell Latitude 3180 | Owners Manual - Page 39
file • Replace from File-Replaces the current key Reset All Keys-Resets to default setting • Delete All Keys-Deletes all the keys NOTE: If you disable the Custom Mode, all the changes made are erased and the keys restore to default settings. Performance screen options Option Multi-Core Support - Dell Latitude 3180 | Owners Manual - Page 40
to conserve battery power. • Enable USB Wake Support • Wake on Dell USB-C Battery Charge Configuration option. Sleep mode • OS Automatic selection Force S3-enabled by default POST behavior screen options Option Description Adapter Warnings Allows you to enable or disable the system setup (BIOS - Dell Latitude 3180 | Owners Manual - Page 41
type LPDDR3 SDRAM Speed 1600 MHz Minimum memory 2 GB Maximum memory 4 GB System logs screen options Option BIOS Events Thermal Events Power Events Description Allows you to view and clear the System Setup (BIOS) POST events. Allows you to view and clear the System Setup (Thermal) events - Dell Latitude 3180 | Owners Manual - Page 42
prior to updating the system BIOS, and then re-enabled after the BIOS update is completed. 1. Restart the computer. 2. Go to Dell.com/support. • Enter the Service Tag or Express Service Code and click Submit. • Click Detect Product and follow the instructions on screen. 3. If you are unable to - Dell Latitude 3180 | Owners Manual - Page 43
on or re-boot. 1. In the System BIOS or System Setup screen, select Security and press Enter. The Security screen is displayed. 2. Select System/Admin Password can contain the numbers 0 through 9. • Only lower case letters are valid, upper case letters are not allowed. • Only the following special - Dell Latitude 3180 | Owners Manual - Page 44
• Video specifications • Camera specifications • Communication specifications • Port and connector specifications • Keyboard specifications • Touchpad specifications • Battery specifications • AC adapter specifications • Physical specifications • Environmental specifications System specifications - Dell Latitude 3180 | Owners Manual - Page 45
Internal speaker amplifier 2 W (RMS) per channel Volume controls Hot keys Video specifications Feature Type GPU cards Data bus External display support Specification Integrated on system board, hardware accelerated • Intel HD Graphics 505 Pentium N4200 • Intel HD Graphics 500 Celeron N3450 and - Dell Latitude 3180 | Owners Manual - Page 46
Gen 1 with PowerShare • One USB 3.1 Gen 1 port • One microSD card Up to SD 3.0 Docking has two options: • Dell D1000 USB 3.0 Dock • Dell Entry USB 3.0 Dock Keyboard specifications Feature Number of keys Specification • United States: 82 keys • United Kingdom: 83 keys • Europe: 83 keys • Brazil - Dell Latitude 3180 | Owners Manual - Page 47
specifications Feature Type 42 Whr Length Weight Width Height Voltage Life span Temperature range Operating Non-operating Coin cell battery Specification 42 Whr 184.00 mm (7.24 inches) 185.00 g (0.185 kg) 97 mm (3.82 inches) 11.4 V DC 300 discharge per charge cycles • Charge: 0°C to - Dell Latitude 3180 | Owners Manual - Page 48
Environmental specifications Temperature Operating Storage Specifications 0°C to 35°C (32°F to 95°F) -40°C to 65°C (-40°F to 149°F) Relative humidity (maximum) Operating Storage Specifications 10 % to 90 % (non condensing) 5 % to 95 % (non condensing) Altitude (maximum) Operating Non-operating - Dell Latitude 3180 | Owners Manual - Page 49
you of problems encountered during when the Dell logo is displayed. 3. In the boot menu screen, use Up reset real time clock. NOTE: If AC power is disconnected from the system during the process or the power button is held longer than 40 seconds, the RTC reset process is aborted. Troubleshooting - Dell Latitude 3180 | Owners Manual - Page 50
Tag • Admin Password • System Password • HDD Password • TPM on and Active • Key Databases • System Logs The following items may or may not reset based on your custom BIOS setting selections: • The Boot List • Enable Legacy OROMs • Secure Boot Enable • Allow BIOS Downgrade 50 Troubleshooting - Dell Latitude 3180 | Owners Manual - Page 51
options. Availability varies by country and product, and some services may not be available in your area. To contact Dell for sales, technical support, or customer service issues: 1. Go to Dell.com/support. 2. Select your support category. 3. Verify your country or region in the Choose a Country
-
 1
1 -
 2
2 -
 3
3 -
 4
4 -
 5
5 -
 6
6 -
 7
7 -
8
-
9
-
10
-
11
-
12
-
13
-
14
-
15
-
16
-
17
-
18
-
19
-
20
-
21
-
22
-
23
-
24
-
25
-
26
-
27
-
28
-
29
-
30
-
31
-
32
-
33
-
34
-
35
-
36
-
37
-
38
-
39
-
40
-
41
-
42
-
43
-
44
-
45
-
46
-
47
-
48
-
49
-
50
-
51
 |
 |

Latitude 3180
Owner's Manual
1
Regulatory Model: P26T
Regulatory Type: P26T002
May 2020
Rev. A03