DELPHI SA10046 Installation Guide - Page 13
Screw Mount recommended, Adhesive Mount optional
 |
UPC - 689604154939
View all DELPHI SA10046 manuals
Add to My Manuals
Save this manual to your list of manuals |
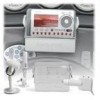
Page 13 highlights
Screw Mount (recommended) 1. After selecting the mounting location, Adhesive Mount (optional) Note: The adhesive used on the mounting 3. If necessary, warm the ball-joint mount's 13 adhesive pad by using a hair dryer or sim- hold the solid mounting plate in the pad is not easily repositioned when installed, ilar means. Remove the liner from the desired position and mark the holes so please use care when choosing the location adhesive pad and adhere to the selected for drilling. and placing the mount. surface. Make sure you accurately place the 2. Drill 7/64" starter holes. Applying 1. Clean the mounting surface with the pad on the first try since in many cases it masking tape over the area to be drilled enclosed Surface Preparation Cleaning will bond almost immediately. 3M recom- will help reduce splintering of the gelcoat Kit. Wipe with the towelette in only one mends a 72-hour curing time for maximum and fiberglass. direction. Do not wipe the surface in a adhesion before attaching a load (e.g., 3. Secure base of mount with the stainless circular motion or back and forth. Dry area Delphi XM SKYFi Marine Kit) to the mount. screws provided. 4. To provide a finished look, apply a small bead of white silicone around the base. Caution: Be sure to route the antenna cable and modulator cords away from controls so they will not interfere with your ability to control the boat. Failure to do so may compromise operation of the boat resulting in personal injury, death, and/or property damage. with a clean, dry cloth, wiping in the same direction and then repeat this cleaning process. Allow to air dry thoroughly. 2. Clean the same surface with the enclosed Alcohol Prep Pad. Wipe in the same direction and manner as with the towelette. Dry the area with a clean, dry cloth, wiping in one direction. Allow to air dry thoroughly. Ensure that the surface is at least 60°F. Note: You can also mount the splashproof case directly to a flat surface using the enclosed extra adhesive pad. Follow these mounting directions, making sure you adhere the correct side of the case. Caution: Never use a commercial heat gun or paint-stripping gun. This could result in damage to the unit and/or to your boat.
-
 1
1 -
2
-
3
-
4
-
5
-
6
-
7
-
 8
8 -
 9
9 -
 10
10 -
 11
11 -
 12
12 -
 13
13 -
 14
14 -
 15
15 -
 16
16
 |
 |
