DELPHI SA10046 Installation Guide - Page 12
Marine Mount Installation
 |
UPC - 689604154939
View all DELPHI SA10046 manuals
Add to My Manuals
Save this manual to your list of manuals |
Page 12 highlights
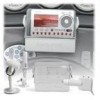
12 Marine Mount Installation Your Delphi XM SKYFi Marine Kit comes with a marine ball-joint mount that can be installed as follows: 1. Attach the splash-proof case to the or access to controls. Do not install the ball-joint mount on a leather surface. Also be sure to identify access routes for the cables, XM Universal Audio Adaptor access, and antenna cable. ball-joint mount. Use the four stainless The marine ball-joint mount can be mounted machine screws provided to attach the in one of two ways: it may be screwed in mount to the back of the splash-proof case place using the solid mounting plate or it can (see figure 8). be attached with the adhesive pad. Decide 2. Identify a hard, flat-as-possible surface to which method is appropriate, and follow the allow the optimum viewing position for instructions on page 13. See figure 9. the primary user while avoiding areas that could be easily bumped into by passengers. This position should be chosen to minimize glare or direct sunlight on the display. Do not install the ball-joint mount where it could block your vision Warning: Take note of all fuel lines, cables, and electrical wiring near where you are installing the antenna to avoid damaging these lines and wiring and to avoid the risk of injury and or property damage. Use extreme caution when cutting or drilling around these areas. Always wear protective eyewear when using tools. Figure 9. Install the mount to a flat surface using either the adhesive pad or screw mount. Note: Extension piece may be removed, creating additional mounting location options. A shorter screw is provided if you wish to attach your mount without the extension piece.
-
 1
1 -
2
-
3
-
4
-
5
-
6
-
 7
7 -
 8
8 -
 9
9 -
 10
10 -
 11
11 -
 12
12 -
 13
13 -
 14
14 -
 15
15 -
 16
16
 |
 |
