Brother International TD-4550DNWB Users Guide - Page 80
Print the Transferred Templates After Changing (Advanced Templated Printing)
 |
View all Brother International TD-4550DNWB manuals
Add to My Manuals
Save this manual to your list of manuals |
Page 80 highlights
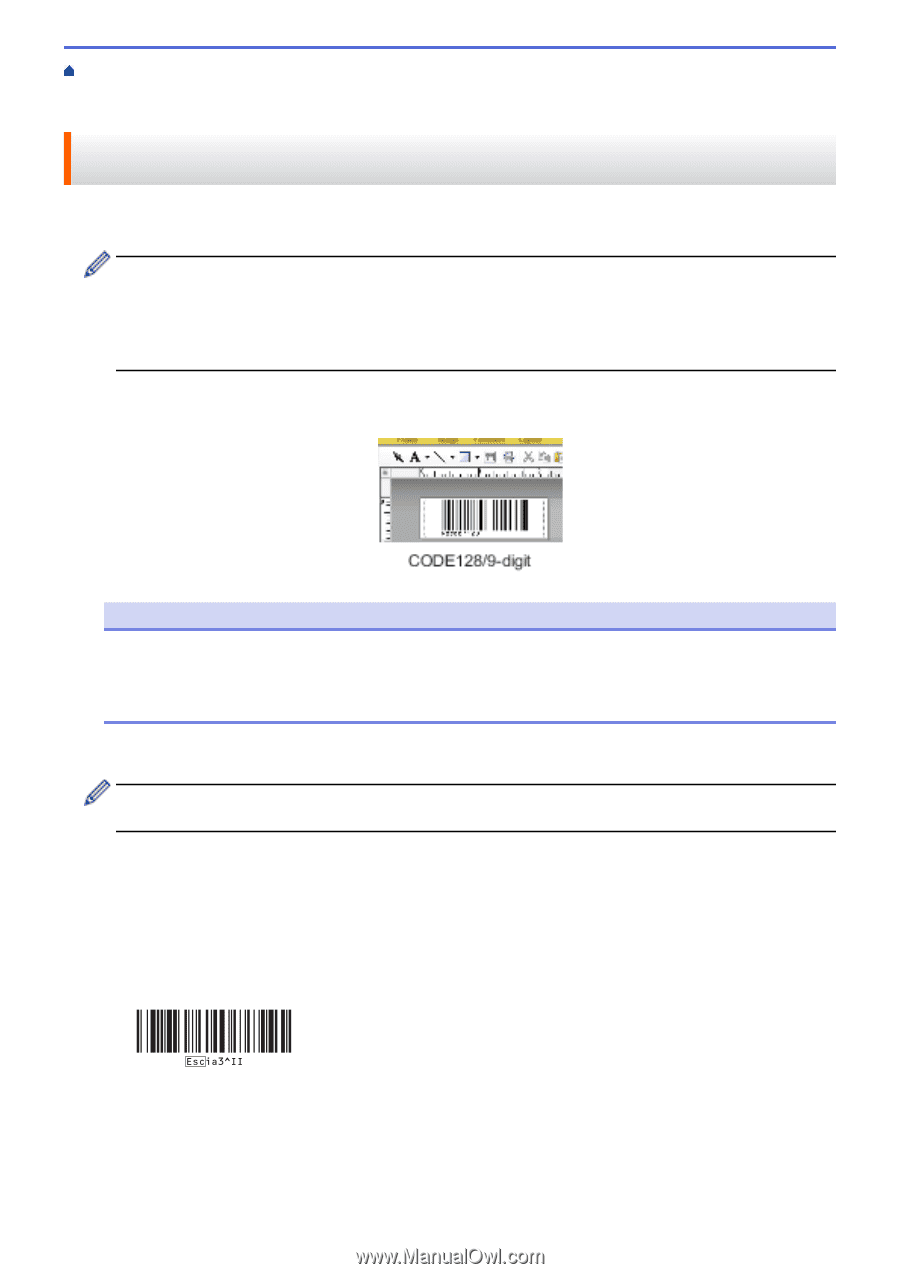
Home > Print Labels Using Barcode Scanner or Other Devices (P-touch Template) > Try the P-touch Template Function Using the Barcode List > Print the Transferred Templates After Changing (Advanced Templated Printing) Print the Transferred Templates After Changing (Advanced Templated Printing) You can download a template and scan a barcode to print a copy or insert the scanned data into a different template. • For more information on the barcodes scanned using various settings, see Related Information. • If a barcode has a different protocol than the barcode template already registered with the printer, you may be unable to create or print the barcode. • Depending on the Barcode Scanner model, some barcode symbols and protocols may not be supported by this printer. 1. Use P-touch Transfer Manager to transfer a template or label layout from the computer to the printer. For more detailed information, see Related Information. NOTE It is important to design a template to meet the barcode symbology or protocol requirements, especially for the label size and barcode position in the label to fit the maximum number and type of characters being inserted from the barcode scanner. A barcode in the template cannot be created or scanned if the barcode with the inserted data does not fit entirely within the label printable image area. 2. When you transfer data to the Configurations folder in P-touch Transfer Manager, select the folder containing the data you want to transfer. You can add a custom folder under Configurations, and drag-and-drop a transferred template into the custom folder to manage different sets of templates. When a template is transferred to the Configurations folder in P-touch Transfer Manager, the Key Assign number is automatically assigned. You can specify a Key Assign number between 1 and 10 for any templates downloaded into the printer. 3. Select the transferred template, and then click Transfer to download the template to the Key Assign number in the printer. 4. Scan the following barcode: • P-touch template command (Initialize + begin specifying settings) 5. From the following barcode list, scan each barcode to send a command or setting to the printer: • Basic settings 76
-
 1
1 -
2
-
3
-
4
-
5
-
6
-
7
-
8
-
9
-
10
-
11
-
12
-
13
-
14
-
15
-
16
-
17
-
18
-
19
-
20
-
21
-
22
-
23
-
24
-
25
-
26
-
27
-
28
-
29
-
30
-
31
-
32
-
33
-
34
-
35
-
36
-
37
-
38
-
39
-
40
-
41
-
42
-
43
-
44
-
45
-
46
-
47
-
48
-
49
-
50
-
51
-
52
-
53
-
54
-
55
-
56
-
57
-
58
-
59
-
60
-
61
-
62
-
63
-
64
-
65
-
66
-
67
-
68
-
69
-
70
-
71
-
72
-
73
-
74
-
 75
75 -
 76
76 -
 77
77 -
 78
78 -
 79
79 -
 80
80 -
 81
81 -
 82
82 -
 83
83 -
 84
84 -
 85
85 -
86
-
87
-
88
-
89
-
90
-
91
-
92
-
93
-
94
-
95
-
96
-
97
-
98
-
99
-
100
-
101
-
102
-
103
-
104
-
105
-
106
-
107
-
108
-
109
-
110
-
111
-
112
-
113
-
114
-
115
-
116
-
117
-
118
-
119
-
120
-
121
-
122
-
123
-
124
-
125
-
126
-
127
-
128
-
129
-
130
-
131
-
132
-
133
-
134
-
135
-
136
-
137
-
138
-
139
-
140
-
141
-
142
-
143
-
144
-
145
-
146
-
147
-
148
-
149
-
150
-
151
-
152
-
153
-
154
-
155
-
156
-
157
-
158
-
159
-
160
-
161
-
162
-
163
-
164
-
165
-
166
-
167
-
168
-
169
-
170
-
171
-
172
-
173
-
174
-
175
-
176
-
177
-
178
-
179
-
180
-
181
-
182
-
183
-
184
-
185
-
186
-
187
-
188
-
189
-
190
-
191
-
192
-
193
-
194
-
195
-
196
-
197
 |
 |