BenQ SW271C User Manual - Page 21
How to assemble your monitor hardware, Attach the monitor base.
 |
View all BenQ SW271C manuals
Add to My Manuals
Save this manual to your list of manuals |
Page 21 highlights
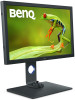
Quick Start Guide How to assemble your monitor hardware • If the computer is turned on you must turn it off before continuing. Do not plug-in or turn-on the power to the monitor until instructed to do so. • The following illustrations are for your reference only. The location and available input and output jacks may vary depending on the purchased model. Apart from that, printed Quick Start Guide on the monitor screen is available to SW321C only. • The supported timing may vary by input signal. Download Resolution file from the website (see Product support on page 3). Refer to "Preset display modes" in Resolution file for more information. Avoid finger pressure on the screen surface. 1. Attach the monitor base. Please be careful to prevent damage to the monitor. Placing the screen surface on an object like a stapler or a mouse will crack the glass or damage the LCD substrate voiding your warranty. Sliding or scraping the monitor around on your desk will scratch or damage the monitor surround and controls. Protect the monitor and screen by clearing a flat open area on your desk and placing a soft item like the monitor packaging bag on the desk for padding. (SW321C only) Gently lay the screen face up on a flat clean padded surface so you can follow the instructions printed on the quick start guide. Attach the monitor stand to the monitor base as illustrated. Make sure to align the arrow on the end of the stand to the one on the monitor. Turn the stand clockwise until you cannot go further. How to assemble your monitor hardware 21
-
 1
1 -
2
-
3
-
4
-
5
-
6
-
7
-
8
-
9
-
10
-
11
-
12
-
13
-
14
-
15
-
 16
16 -
 17
17 -
 18
18 -
 19
19 -
 20
20 -
 21
21 -
 22
22 -
 23
23 -
 24
24 -
 25
25 -
 26
26 -
27
-
28
-
29
-
30
-
31
-
32
-
33
-
34
-
35
-
36
-
37
-
38
-
39
-
40
-
41
-
42
-
43
-
44
-
45
-
46
-
47
-
48
-
49
-
50
-
51
-
52
-
53
-
54
-
55
-
56
-
57
-
58
-
59
-
60
-
61
-
62
-
63
-
64
-
65
-
66
-
67
-
68
-
69
-
70
 |
 |
