2012 Yamaha Motorsports Royal Star Venture S Owners Manual - Page 22
2012 Yamaha Motorsports Royal Star Venture S Manual

Page 22 highlights
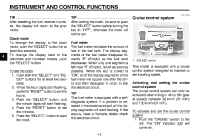
INSTRUMENT AND CONTROL FUNCTIONS EAU11843 TIP After resetting the fuel reserve tripmeter, the display will return to the prior mode. Clock mode To change the display to the clock mode, push the "SELECT" button for at least two seconds. To change the display back to the odometer and tripmeter modes, push the "SELECT" button. To set the clock 1. Push both the "SELECT" and "RESET" buttons for at least two seconds. 2. When the hour digits start flashing, push the "RESET" button to set the hours. 3. Push the "SELECT" button, and the minute digits will start flashing. 4. Push the "RESET" button to set the minutes. 5. Push the "SELECT" button to start the clock. TIP After setting the clock, be sure to push the "SELECT" button before turning the key to "OFF", otherwise the clock will not be set. Fuel meter The fuel meter indicates the amount of fuel in the fuel tank. The display segments of the fuel meter disappear towards "E" (Empty) as the fuel level decreases. When only one segment is left near "E" (Empty), refuel as soon as possible. When the key is turned to "ON", all of the display segments of the fuel meter will appear one after the other and then disappear in order to test the electrical circuit. TIP This fuel meter is equipped with a selfdiagnosis system. If a problem is detected in the electrical circuit, all the display segments will start flashing. If this occurs, have a Yamaha dealer check the electrical circuit. Cruise control system 4 1. "CRUISE" switch This model is equipped with a cruise control system designed to maintain a set traveling speed. Activating and setting the cruise control system The cruise control system can only be activated when riding in 4th or 5th gear at speeds between 50 km/h (31 mi/h) and 130 km/h (81 mi/h). To activate and set the cruise control system 1. Push the "CRUISE" switch to the left. The "ON" indicator light will come on. 4-5
-
 1
1 -
2
-
3
-
4
-
5
-
6
-
7
-
8
-
9
-
10
-
11
-
12
-
13
-
14
-
15
-
16
-
 17
17 -
 18
18 -
 19
19 -
 20
20 -
 21
21 -
 22
22 -
 23
23 -
 24
24 -
 25
25 -
 26
26 -
 27
27 -
28
-
29
-
30
-
31
-
32
-
33
-
34
-
35
-
36
-
37
-
38
-
39
-
40
-
41
-
42
-
43
-
44
-
45
-
46
-
47
-
48
-
49
-
50
-
51
-
52
-
53
-
54
-
55
-
56
-
57
-
58
-
59
-
60
-
61
-
62
-
63
-
64
-
65
-
66
-
67
-
68
-
69
-
70
-
71
-
72
-
73
-
74
-
75
-
76
-
77
-
78
-
79
-
80
-
81
-
82
-
83
-
84
-
85
-
86
-
87
-
88
-
89
-
90
-
91
-
92
-
93
-
94
-
95
-
96
-
97
-
98
-
99
-
100
-
101
-
102
-
103
-
104
-
105
-
106
-
107
-
108
-
109
-
110
-
111
-
112
-
113
-
114
-
115
-
116
-
117
-
118
-
119
-
120
-
121
-
122
-
123
-
124
-
125
-
126
 |
 |
