2012 Yamaha Motorsports RS Vector L-TX Owners Manual - Page 47
2012 Yamaha Motorsports RS Vector L-TX Manual

Page 47 highlights
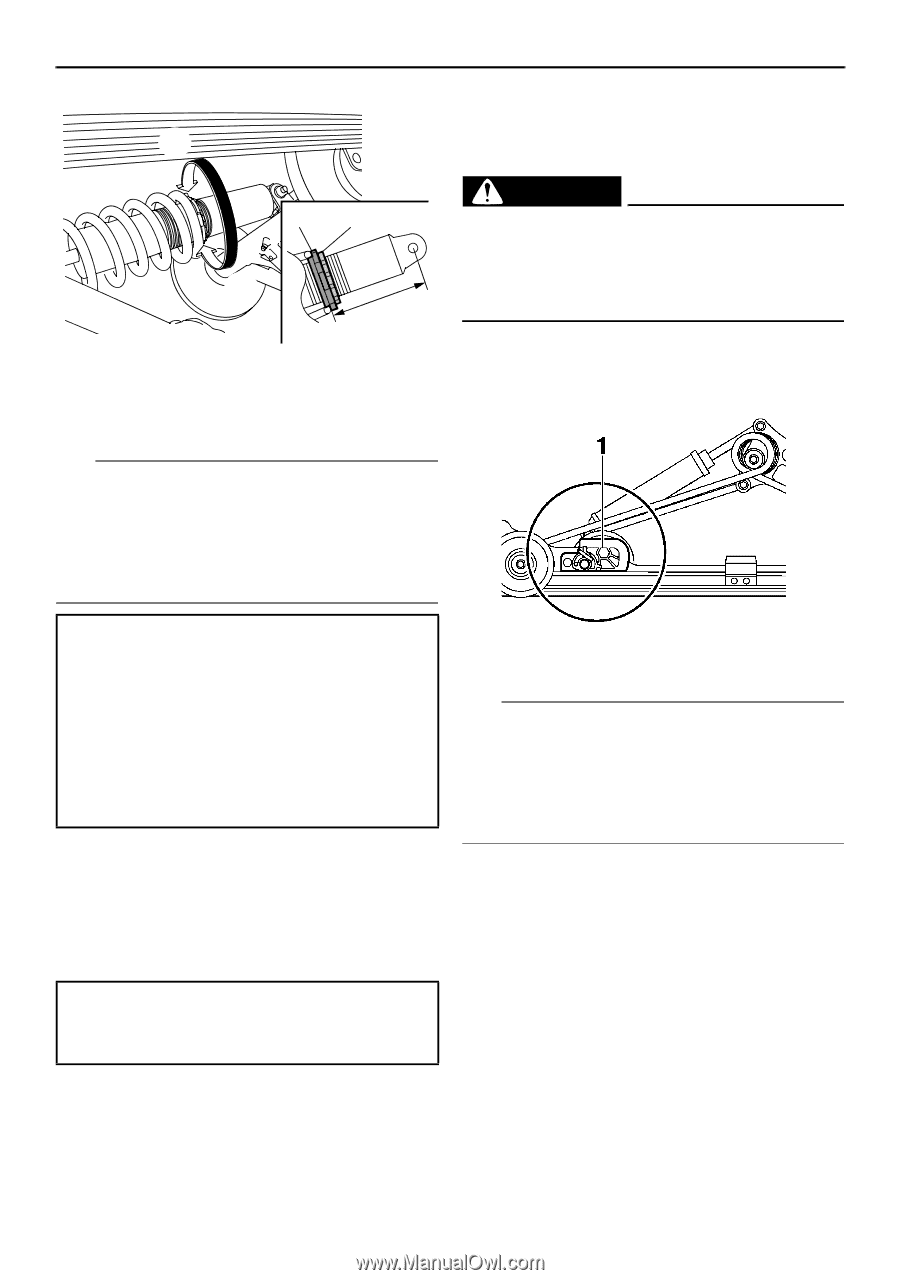
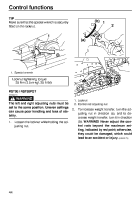
Control functions ESU13094 (a) 1 (b) 2 1. Spring preload adjusting nut 2. Distance A 3. Locknut Adjusting the 2-up adjusting blocks (RST90) EWS00760 WARNING 3 Make sure that the 2-up adjusting blocks are installed in the same position on both sides of the snowmobile, otherwise poor handling and loss of stability may result. The spring force can be adjusted by changing the position of the 2-up adjusting blocks. TIP The spring preload setting is determined by measuring distance A, shown in the illustration. The longer distance A is, the higher the spring preload; the shorter distance A is, the lower the spring preload. Spring preload setting*: Minimum (soft): 147.5 mm (5.81 in) Standard: 157.5 mm (6.20 in) Maximum (hard): 182.0 mm (7.17 in) * Distance A changes 1.5 mm (0.06 in) with each full turn of the adjusting nut. 3. Tighten the locknut to the specified torque. NOTICE: Always tighten the locknut against the adjusting nut, and then tighten the locknut to the specified torque. [ECS00860] Tightening torque: Locknut: 42 Nm (4.2 m·kgf, 30 ft·lbf) 1. 2-up adjusting block TIP G G Be sure to make this adjustment when there is no load (rider or cargo) on the snowmobile. Use the special tools included in the owner's tool kit to make the adjustment. Insert the special tools into the 2-up adjusting block as shown. 1. 41
-
 1
1 -
2
-
3
-
4
-
5
-
6
-
7
-
8
-
9
-
10
-
11
-
12
-
13
-
14
-
15
-
16
-
17
-
18
-
19
-
20
-
21
-
22
-
23
-
24
-
25
-
26
-
27
-
28
-
29
-
30
-
31
-
32
-
33
-
34
-
35
-
36
-
37
-
38
-
39
-
40
-
41
-
 42
42 -
 43
43 -
 44
44 -
 45
45 -
 46
46 -
 47
47 -
 48
48 -
 49
49 -
 50
50 -
 51
51 -
 52
52 -
53
-
54
-
55
-
56
-
57
-
58
-
59
-
60
-
61
-
62
-
63
-
64
-
65
-
66
-
67
-
68
-
69
-
70
-
71
-
72
-
73
-
74
-
75
-
76
-
77
-
78
-
79
-
80
-
81
-
82
-
83
-
84
-
85
-
86
-
87
-
88
-
89
-
90
-
91
-
92
-
93
-
94
-
95
-
96
-
97
-
98
-
99
-
100
-
101
-
102
-
103
-
104
-
105
-
106
-
107
-
108
-
109
-
110
-
111
-
112
-
113
-
114
-
115
-
116
-
117
-
118
-
119
-
120
-
121
-
122
-
123
-
124
-
125
-
126
-
127
-
128
-
129
-
130
-
131
-
132
-
133
-
134
-
135
-
136
-
137
-
138
-
139
-
140
-
141
-
142
 |
 |