2012 Yamaha Motorsports RS Vector L-TX Owners Manual
2012 Yamaha Motorsports RS Vector L-TX Manual

2012 Yamaha Motorsports RS Vector L-TX manual content summary:
- 2012 Yamaha Motorsports RS Vector L-TX | Owners Manual - Page 1
OWNER'S MANUAL Read this manual carefully before operating this vehicle. RS90PB RS90PLTB RST90B RST90PGTB LIT-12628-03-03 8HV-28199-10 - 2012 Yamaha Motorsports RS Vector L-TX | Owners Manual - Page 2
ESU10041 Read this manual carefully before operating this vehicle. This manual should stay with this vehicle if it is sold. - 2012 Yamaha Motorsports RS Vector L-TX | Owners Manual - Page 3
sporting and touring snowmobiles. It represents the high degree of craftsmanship and reliability that have made Yamaha a leader in these fields. This manual will give you an understanding of the operation, inspection, and basic maintenance of this snowmobile. If you have any questions concerning the - 2012 Yamaha Motorsports RS Vector L-TX | Owners Manual - Page 4
information ESU10151 Particularly important information is distinguished in this manual by the following notations. This is the safety alert symbol. It is used to alert you to potential personal injury hazards. Obey all safety messages - 2012 Yamaha Motorsports RS Vector L-TX | Owners Manual - Page 5
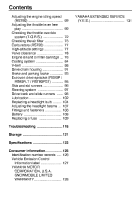
Contents Location of the important labels ...1 Safety information ...6 Description ...9 Control functions ...12 Main switch ...12 Starter (choke) lever (RST90) ...12 Throttle lever ...12 Throttle override system (T.O.R.S.) ...13 Multi-function meter unit ...14 High beam indicator light ...17 Low - 2012 Yamaha Motorsports RS Vector L-TX | Owners Manual - Page 6
a headlight bulb ...104 Adjusting the headlight beams ...107 Fittings and fasteners ...108 Battery ...108 Replacing a fuse ...109 Troubleshooting ...116 Storage ...121 Specifications ...123 Consumer information...126 Identification number records ...126 Vehicle Emission Control Information label - 2012 Yamaha Motorsports RS Vector L-TX | Owners Manual - Page 7
Location of the important labels ESU10216 Read and understand all of the labels on your vehicle. They contain important information for safe and proper operation of your vehicle. Never remove any labels from your vehicle. If a label becomes difficult to read or comes off, a replacement label is - 2012 Yamaha Motorsports RS Vector L-TX | Owners Manual - Page 8
Location of the important labels RS90P / RS90PLT 13 10 11 12 17 17 RST90 14 15 11 12 16 RST90PGT 14 10 17 17 10 15 11 12 16 2 17 17 - 2012 Yamaha Motorsports RS Vector L-TX | Owners Manual - Page 9
loss if crankcase breather hoses are not installed correctly. Inspect hoses and clamps for correct installation after battery service or air box removal. See Service Manual. ATTENTION Des dommages graves risquent de survenir par suite de fuites d'huile résultant d'un mauvais branchement des tuyaux - 2012 Yamaha Motorsports RS Vector L-TX | Owners Manual - Page 10
1.38 in)/100 N (10 kg, 22 lb) * FOR MORE INFO: SEE SERVICE MANUAL FOR THIS MODEL. * SPECIFICATIONS SUBJECT TO CHANGE WITHOUT NOTICE. 9 RS90P / RS90PLT SPECIFICATIONS Manual. FILS DE BRANCHEMENT DES CÂBLES DE DÉMARRAGE • Effectuer le branchement des câbles de démarrage conformément aux instructions - 2012 Yamaha Motorsports RS Vector L-TX | Owners Manual - Page 11
Location of the important labels 13 RS90PLT 14 RST90 / RST90PGT LOAD LIMIT / CHARGE LIMITE 10kg {22lbs} 8ET-24897-00 15 RST90 / RST90PGT LOAD LIMIT / CHARGE LIMITE 20kg {44lbs} 8FM-24897-01 16 RST90 / RST90PGT MAX. TOWING FORCE MAX. VERTICAL FORCE FORCE DE REMORQUAGE MAX. FORCE VERTICALE MAX. - 2012 Yamaha Motorsports RS Vector L-TX | Owners Manual - Page 12
the OPERATOR ONLY. Passengers are prohibited. Carrying a passenger can cause loss of control. Before you operate your snowmobile G G Read the Owner's Manual and all labels. Become familiar with all of the operating controls and their function. Consult a Yamaha dealer about any control or function - 2012 Yamaha Motorsports RS Vector L-TX | Owners Manual - Page 13
Safety information G G Always ride with other snowmobilers when going on a ride. You may need help if you run out of fuel, have an accident, or damage your snowmobile. Many surfaces such as ice and hardpacked snow require much longer stopping distances. Be alert, plan ahead and begin decelerating - 2012 Yamaha Motorsports RS Vector L-TX | Owners Manual - Page 14
Safety information clothes dryers, and the like. Allow the engine to cool off before storing the snowmobile in an enclosed space. 8 - 2012 Yamaha Motorsports RS Vector L-TX | Owners Manual - Page 15
Description ESU10261 RS90P 1,2,3 4 5,6,7 8,9 10 13 12 11 RS90PLT 1,2,3 4 5,6,7 8,9 10 13 1. Battery 2. Main fuse 3. Air filter 4. Oil filler cap 5. Fuse box 6. Coolant reservoir 7. Coolant recovery tank 8. Storage compartment 9. Tool kit 10. Tail/brake light 11. Slide rail suspension 12. Drive - 2012 Yamaha Motorsports RS Vector L-TX | Owners Manual - Page 16
Description 10,12 1,2,3,4 20 5,6 RST90 7 8 9 19 13 14 17 1,2,3 RST90PGT 4 5,6 16 7 8 15 18 9 10,11,12 13 14 17 1. Battery 2. Main fuse 3. Air filter 4. Oil filler cap 5. Fuse box 6. Coolant reservoir 7. Passenger grip warmer switch 8. Passenger grip 9. Backrest 10. Storage compartment 11. - 2012 Yamaha Motorsports RS Vector L-TX | Owners Manual - Page 17
(RS90P / RS90PLT / RST90PGT) 6. Engine stop switch 7. Throttle lever TIP G G The snowmobile you have purchased may differ slightly from those shown in the figures of this manual. Design and specifications are subjected to change without notice. 11 - 2012 Yamaha Motorsports RS Vector L-TX | Owners Manual - Page 18
Control functions ESU13740 Main switch The main switch controls the ignition and lighting systems. The various positions are described below. 1 2 3 1. Starter (choke) lever TIP Refer to the "Starting the engine" section on page 48 for proper operation. 1. Off 2. On 3. Start Off The ignition - 2012 Yamaha Motorsports RS Vector L-TX | Owners Manual - Page 19
ESU13750 TIP If the T.O.R.S. is activated, the warning light and engine trouble warning indicator flash, and the two-digit code "84" displays ( has been corrected and that the engine can be operated without a problem before restarting the engine. Continuing to operate with a malfunction could cause - 2012 Yamaha Motorsports RS Vector L-TX | Owners Manual - Page 20
and all segments of the meter unit display come on and go off. 12 3 FHI 4 5 6 7 8 9 10 E LO EPS 1. Warning light " " 2. Engine trouble warning indicator " 3. Two-digit code "84" ESU14101 " Multi-function meter unit RS90P / RS90PLT / RST90PGT The multi-function meter unit is equipped with the - 2012 Yamaha Motorsports RS Vector L-TX | Owners Manual - Page 21
it by pushing the "SELECT" button, and then push the "RESET" button for at least 1 second. If you do not reset the fuel reserve tripmeter manually, it will reset itself automatically, and the display will return to the prior mode after the snowmobile has been refueled and traveled 5 km (3 mi). TIP - 2012 Yamaha Motorsports RS Vector L-TX | Owners Manual - Page 22
Control functions If the engine oil is changed before the oil change tripmeter appears in the display (i.e., before the periodic oil change interval has been reached), the tripmeter must be reset after the oil change for the next periodic oil change to be indicated at the correct time. In that case, - 2012 Yamaha Motorsports RS Vector L-TX | Owners Manual - Page 23
G an odometer G a tripmeter (which shows the distance traveled since it was last set to zero) G warning indicators (which show engine trouble, coolant temperature, fuel level, and oil level warnings) G indicator lights (which show high beam and low coolant temperature conditions) G a warning - 2012 Yamaha Motorsports RS Vector L-TX | Owners Manual - Page 24
snowmobile at low speeds when the low coolant temperature indicator light is on. If the engine speed is too high, the warning light and engine trouble warning indicator flash and the two-digit code "86" flashes in the error code display. When this occurs, maximum engine speed is reduced to protect - 2012 Yamaha Motorsports RS Vector L-TX | Owners Manual - Page 25
Control functions ESU10426 Fuel meter and grip/thumb warmer level indicator The fuel meter and grip/thumb warmer level indicator have eight segments which show the amount of fuel remaining in the fuel tank, the grip warmer level, or the thumb warmer level. RS90P / RS90PLT / RST90PGT RS90P / - 2012 Yamaha Motorsports RS Vector L-TX | Owners Manual - Page 26
Control functions When the thumb warmer adjusting switch is pressed, the thumb warmer indicator comes on and the display switches to the thumb warmer level. See "Grip/thumb warmer adjusting switch" on page 24 for detailed information. RS90P / RS90PLT / RST90PGT RS90P / RS90PLT / RST90PGT 1 1. Grip - 2012 Yamaha Motorsports RS Vector L-TX | Owners Manual - Page 27
, broken lead, or short circuit is detected by the self-diagnosis device of the snowmobile to warn the rider of any of the above problems. If this occurs, have a Yamaha dealer inspect the snowmobile as soon as possible. RS90P / RS90PLT / RST90PGT 1. Fuel level warning indicator " 2. Warning light - 2012 Yamaha Motorsports RS Vector L-TX | Owners Manual - Page 28
Control functions If the oil level warning indicator and the warning light do not go off, check the engine oil level in the oil tank (see page 78 for engine oil level checking procedures), and add engine oil if necessary. If the oil level warning indicator and the warning light still remain on, have - 2012 Yamaha Motorsports RS Vector L-TX | Owners Manual - Page 29
is overheating. This model is equipped with a self-diagnosis device for various electrical circuits. If a problem is detected in any of those circuits, the warning light and the engine trouble warning indicator flash, and an error code displays (RS90P / RS90PLT / RST90PGT) or flashes slowly (RST90 - 2012 Yamaha Motorsports RS Vector L-TX | Owners Manual - Page 30
During the first few rides, practice using the stop switch so that you can react quickly in an emergency. 1. Warning light " " 2. Engine trouble warning indicator " 3. Error code display ESU10661 " Headlight beam switch "LIGHTS" Push the headlight beam switch to change the headlight to high beam - 2012 Yamaha Motorsports RS Vector L-TX | Owners Manual - Page 31
Control functions RS90P / RS90PLT / RST90PGT 1 See "Fuel meter and grip/thumb warmer level indicator" on page 19 for detailed information. ESU10696 Auxiliary DC jack The auxiliary DC jack is located in the front panel and can be used for accessories. TIP The auxiliary DC jack can only be used if - 2012 Yamaha Motorsports RS Vector L-TX | Owners Manual - Page 32
Control functions 3. After using the auxiliary DC jack, be sure to remove the accessory power plug from the jack and to close the auxiliary DC jack cap. 1 2 ECS00122 NOTICE G G To avoid circuit overload and a possible fuse blowing, do not use accessories requiring more than the maximum rated - 2012 Yamaha Motorsports RS Vector L-TX | Owners Manual - Page 33
end does not project out over the handlebar end. This will help prevent brake lever damage when the snowmobile is placed on its side for service. ESU10581 Parking brake lever When parking the snowmobile or starting the engine, apply the parking brake by moving the parking brake lever to the left - 2012 Yamaha Motorsports RS Vector L-TX | Owners Manual - Page 34
Control functions 3 2 1 1. Pull out. 2. Slide to "REV" (reverse). 3. Release. ECS00072 1. Pull out. 2. Slide to "REV" (reverse). 3. Release. RST90 NOTICE Do not use the shift lever while the snowmobile is moving, otherwise the drive train could be damaged. ESU14092 Drive guard EWS00402 WARNING - 2012 Yamaha Motorsports RS Vector L-TX | Owners Manual - Page 35
Control functions The drive guard is designed to protect the Vbelt clutch and V-belt in case parts break or come loose. The drive guard is located behind the left side cover (RS90P / RS90PLT / RST90PGT), or under the shroud (RST90). [See page 63 (RS90P / RS90PLT / RST90PGT) or page 67 (RST90) for - 2012 Yamaha Motorsports RS Vector L-TX | Owners Manual - Page 36
Control functions RS90P / RS90PLT / RST90PGT 1 2 1 1. V-belt holder 1. Passenger grip 2. Passenger grip adjusting knob RST90 To change the passenger grip position 1. 2. 3. Remove the passenger grip adjusting knob by turning it counterclockwise. Move the passenger grip to the desired position. - 2012 Yamaha Motorsports RS Vector L-TX | Owners Manual - Page 37
Control functions RST90 1 2 1. 2. 3. 4. Passenger grip warmer switch Off "HI" (high) "LO" (low) 1. Footrest 2. Screw ECS00131 NOTICE G RST90PGT 1 G Make sure that the screws are tightened securely after changing the position of the footrests. Do not overtighten the screws, otherwise the - 2012 Yamaha Motorsports RS Vector L-TX | Owners Manual - Page 38
RS90P / RS90PLT / RST90PGT) RS90P / RS90PLT The storage compartment is located behind the seat. Use the storage compartment to store the tool kit, manuals, spare parts, or other small items. 1. Backrest 2. Backrest adjusting knob To open the storage compartment Turn the fastener 1/2 turn in either - 2012 Yamaha Motorsports RS Vector L-TX | Owners Manual - Page 39
hook the storage compartment latches. Storage pouch The storage pouch is located inside the storage compartment. Use the storage pouch to store the tool kit, manuals, spare parts, or other small items. 2 1 1 1. Storage compartment latch 2. Storage compartment lid 1. Storage pouch 33 - 2012 Yamaha Motorsports RS Vector L-TX | Owners Manual - Page 40
Control functions ECS00781 NOTICE Before starting the engine, make sure that the tool kit is securely fastened and that the storage pouch zipper is completely closed. ESU10823 Storage areas (RST90) This snowmobile is equipped with a storage compartment, rear storage area, and rear carrier. 1. Rear - 2012 Yamaha Motorsports RS Vector L-TX | Owners Manual - Page 41
Control functions 3 4 1 1 2 1. Backrest 2. Rear carrier 3 1. 2. 3. 4. Hole Rear carrier Bolt Carrier lock bracket 3. Remove the passenger seat lock knob, and then remove the passenger seat. 5. 6. 1. Passenger seat 2. Passenger seat lock knob Slide the rear carrier backward until it stops. - 2012 Yamaha Motorsports RS Vector L-TX | Owners Manual - Page 42
Control functions 3. Align the holes in the backrest bracket with the bolts on the carrier lock bracket, and then place the backrest on the carrier lock bracket. 1. Carrier lock lever ESU10863 Tow hitch bracket (RST90 / RST90PGT) 1. Hole ECS00241 NOTICE To prevent premature wear of the V-belt, - 2012 Yamaha Motorsports RS Vector L-TX | Owners Manual - Page 43
WARNING Gasoline and gasoline vapors are extremely flammable. To avoid fires and explosions and to reduce the risk of injury when refueling, follow these instructions. Make sure there is sufficient gasoline in the tank. 1. Before refueling, turn off the engine and be sure that nobody is on the - 2012 Yamaha Motorsports RS Vector L-TX | Owners Manual - Page 44
damping performance. G Do not dispose of a damaged or worn out shock absorber yourself. Take the shock absorber to a Yamaha dealer for any service. NOTICE G G G G Oxygenated fuels (gasohol) containing a maximum 10% of ethanol (E10) can be used, although richer jetting may be required to prevent - 2012 Yamaha Motorsports RS Vector L-TX | Owners Manual - Page 45
Control functions 1. 2. Loosen the locknut. To increase the spring preload and thereby harden the suspension, turn the adjusting nut in direction (a). To decrease the spring preload and thereby soften the suspension, turn the adjusting nut in direction (b). 3. Tighten the locknut to the specified - 2012 Yamaha Motorsports RS Vector L-TX | Owners Manual - Page 46
Control functions TIP The spring preload setting is determined by measuring distance A, shown in the illustration. The longer distance A is, the higher the spring preload; the shorter distance A is, the lower the spring preload. Spring preload setting*: Minimum (soft): RST90 111.5 mm (4.39 in) - 2012 Yamaha Motorsports RS Vector L-TX | Owners Manual - Page 47
Control functions ESU13094 (a) 1 (b) 2 1. Spring preload adjusting nut 2. Distance A 3. Locknut Adjusting the 2-up adjusting blocks (RST90) EWS00760 WARNING 3 Make sure that the 2-up adjusting blocks are installed in the same position on both sides of the snowmobile, otherwise poor handling and - 2012 Yamaha Motorsports RS Vector L-TX | Owners Manual - Page 48
Control functions (b) (a) 1 1. 2. 3. 4. 2-up position (rider and passenger) Solo rider position Special tool Lock pin 1. Compression damping force adjusting knob 2. 3. 4. Pull the lock pin and turn the special tools to change the block position. Release the lock pin. Remove the special tools - 2012 Yamaha Motorsports RS Vector L-TX | Owners Manual - Page 49
Control functions 1 Min 3 Max 4 (b) (a) 1 1. Rebound damping force adjusting knob 1. 2. 3. 4. 5. 2 5 Rebound damping force setting: Minimum (soft): 20 click(s) in direction (b)* Standard: 11 click(s) in direction (b)* Maximum (hard): 3 click(s) in direction (b)* * With the adjusting knob fully - 2012 Yamaha Motorsports RS Vector L-TX | Owners Manual - Page 50
Control functions TIP Make sure that the special wrench is securely fitted on the locknut. (b) 1 2 1 (a) 1. Special wrench Locknut tightening torque: 35 Nm (3.5 m·kgf, 25 ft·lbf) RST90 / RST90PGT EWS00770 WARNING The left and right adjusting nuts must be set to the same position. Uneven - 2012 Yamaha Motorsports RS Vector L-TX | Owners Manual - Page 51
Control functions 1 2 3 5 1. 2. 3. 4. 5. 4 Locknut Control rod adjusting nut Standard position Adjustable range Red paint area 3. Tighten the locknut while holding the adjusting nut in place. NOTICE: Always tighten the locknut against the adjusting nut, and then tighten the locknut to the - 2012 Yamaha Motorsports RS Vector L-TX | Owners Manual - Page 52
inspection and maintenance procedures and schedules described in the Owner's Manual. EWS00191 WARNING Failure to inspect or maintain the vehicle operate the vehicle if you find any problem. If a problem cannot be corrected by the procedures provided in this manual, have the vehicle inspected by a - 2012 Yamaha Motorsports RS Vector L-TX | Owners Manual - Page 53
Pre-operation checks ITEM CHECKS Check the deflection. Adjust if necessary. Check for wear and damage. If necessary, have a Yamaha dealer replace track. PAGE Drive track 98 Slide runners Steering Lights, signals and switches Throttle lever Throttle override system (T.O.R.S.) • Check for wear - 2012 Yamaha Motorsports RS Vector L-TX | Owners Manual - Page 54
Operation ESU13500 Read the Owner's Manual carefully to become familiar with all controls. If there is a control or function you do not understand, ask your Yamaha dealer. EWS00201 WARNING Failure to - 2012 Yamaha Motorsports RS Vector L-TX | Owners Manual - Page 55
Operation 1 1 2 1. Start 4. 5. Warm up the engine until it runs smoothly. Be sure the low coolant temperature indicator light has gone out before operation. (See page 18 for detailed information about the indicator light.) Apply the parking brake. 1. Run position 2. Off position 3. Fully open - 2012 Yamaha Motorsports RS Vector L-TX | Owners Manual - Page 56
must be changed and the oil filter cartridge replaced. If any engine trouble should occur during the engine break-in period, immediately have a Yamaha riding safely. Before operating the snowmobile, read this Owner's Manual completely and understand the operation of the controls. ESU11310 Break- - 2012 Yamaha Motorsports RS Vector L-TX | Owners Manual - Page 57
control of the throttle and brake, and master turning techniques in this area before trying more difficult terrain. Set the parking brake and follow the instructions on page 48 to start the engine. Once the engine has warmed up, you are ready to begin riding your snowmobile. G Many surfaces such - 2012 Yamaha Motorsports RS Vector L-TX | Owners Manual - Page 58
of your snowmobile. Riding uphill EWS00231 WARNING Operation on slopes can lead to loss of control if proper techniques are not used. Follow these instructions to reduce your risk of an accident. Do not try steeper or more difficult inclines until you have developed your skill on gentle slopes - 2012 Yamaha Motorsports RS Vector L-TX | Owners Manual - Page 59
WARNING Driving across the face of a slope ("sidehilling") can lead to overturn or loss of control if proper techniques are not used. Follow these instructions to reduce your risk of an accident. Do not try steeper or more difficult inclines until you have developed your skill on gentle slopes - 2012 Yamaha Motorsports RS Vector L-TX | Owners Manual - Page 60
Operation track, slide runners, and drive sprockets. Operation of the snowmobile on the following surfaces should be avoided at all times: G Dirt G Sand G Rocks G Grass G Bare pavement Other surfaces that should be avoided for the sake of drive track and slide runner life are: G Glare ice surfaces G - 2012 Yamaha Motorsports RS Vector L-TX | Owners Manual - Page 61
Operation around the already weakened area. To minimize possible damage, consult your stud manufacturer for installation and stud pattern recommendations. Yamaha does not recommend track studding. ESU11395 RS90P / RS90PLT / RST90PGT Driving EWS00300 1 2 3 WARNING Be sure to read the "SAFETY - 2012 Yamaha Motorsports RS Vector L-TX | Owners Manual - Page 62
Operation 1 1. Pull out. 2. Slide to "REV" (reverse). 3. Release. 1. Off G TIP The reverse buzzer beeps while the shift lever is in reverse. 2. While squeezing the brake lever, release the parking brake by moving the parking brake lever to the right, and then release the brake lever. Push down - 2012 Yamaha Motorsports RS Vector L-TX | Owners Manual - Page 63
Operation G G If transporting the snowmobile in an open trailer or truck, put a tight fitting cover on the snowmobile. A cover specifically designed for your snowmobile is best. This will help keep foreign objects out of the cooling vents, and also help protect the snowmobile against damage from - 2012 Yamaha Motorsports RS Vector L-TX | Owners Manual - Page 64
has moving parts that can catch on body parts or clothing, and electrical parts that can cause shocks or fires. G Running the engine while servicing can lead to eye injury, burns, fire, or carbon monoxide poisoning-possibly leading to death. See page 6 for more information about carbon monoxide - 2012 Yamaha Motorsports RS Vector L-TX | Owners Manual - Page 65
Periodic maintenance and adjustment ESU11461 Periodic maintenance chart for the emission control system Items marked with an asterisk should be performed by a Yamaha dealer as they require special tools, data and technical skills. INITIAL ITEM REMARKS 1 month or 800 km (500 mi) (40 hr) EVERY - 2012 Yamaha Motorsports RS Vector L-TX | Owners Manual - Page 66
Periodic maintenance and adjustment ESU11564 General maintenance and lubrication chart INITIAL ITEM REMARKS 1 month or 800 km (500 mi) (40 hr) EVERY Seasonally or 4000 km (2500 mi) (200 hr) PAGE Engine oil * Engine oil filter cartridge Cooling system • Change (warm engine before draining). • - 2012 Yamaha Motorsports RS Vector L-TX | Owners Manual - Page 67
Periodic maintenance and adjustment INITIAL ITEM REMARKS 1 month or 800 km (500 mi) (40 hr) EVERY Seasonally or 4000 km (2500 mi) (200 hr) PAGE * * * Slide runners Skis and ski runners Steering system • Check for wear and damage. • Replace if necessary. • Check for wear and damage. • Replace if - 2012 Yamaha Motorsports RS Vector L-TX | Owners Manual - Page 68
owner's tool kit is located in the storage pouch. (See page 32 for information on how to access the storage compartment.) The service information included in this manual and the tools provided in the owner's tool kit are intended to assist you in the performance of preventive maintenance and minor - 2012 Yamaha Motorsports RS Vector L-TX | Owners Manual - Page 69
Periodic maintenance and adjustment ESU14143 TIP If you do not have a torque wrench available during a service operation requiring one, take your snowmobile to a Yamaha dealer to check the torque settings and adjust them if necessary. Removing and installing the shroud and - 2012 Yamaha Motorsports RS Vector L-TX | Owners Manual - Page 70
Periodic maintenance and adjustment 1. Shroud stay 2. Left and right side covers To remove a side cover 1. Remove the shroud. (See the above procedure.) 2. Loosen the fasteners, pull outward on the areas shown, and then slide the side cover forward to remove it. Fit the projections on the side - 2012 Yamaha Motorsports RS Vector L-TX | Owners Manual - Page 71
cover 3. 4. Tighten the quick fastener screws. Pass the brake hose, throttle cable, parking brake cable and wire harness through the cable guide, place the cable guide in the original position, and then install the screws. 1. Quick fastener screw 2. Top cover 1 5. Lift up the rear of the top - 2012 Yamaha Motorsports RS Vector L-TX | Owners Manual - Page 72
, and then remove the cover. 1 1 1. Auxiliary DC jack coupler 3. Remove the screws, and then remove the cable guide. 2 1 1. Top cover 2. Main switch coupler 2 1. Screw 2. Cable guide To install the top cover 1. Connect the main switch coupler. 2. Place the top cover in the original position - 2012 Yamaha Motorsports RS Vector L-TX | Owners Manual - Page 73
stay rubber covers in their original position. Pass the brake hose, throttle cable, parking brake cable and wire harness through the cable guide, place the cable guide in the original position, and then install the screws. Connect the auxiliary DC jack coupler. Install the left side cover and the - 2012 Yamaha Motorsports RS Vector L-TX | Owners Manual - Page 74
For example, a very white center electrode porcelain color could indicate an intake track air leak or carburetion problem for that cylinder. Do not attempt to diagnose such problems yourself. Instead, take the snowmobile to a Yamaha dealer for inspection and possible repairs. You should periodically - 2012 Yamaha Motorsports RS Vector L-TX | Owners Manual - Page 75
Periodic maintenance and adjustment Spark plug gap: 0.7-0.8 mm (0.028-0.031 in) When installing the spark plug, always clean the gasket surface. Wipe off any grime from the threads and tighten the spark plug to the specified torque. Spark plug tightening torque: 13 Nm (1.3 m·kgf, 9.4 ft·lbf) - 2012 Yamaha Motorsports RS Vector L-TX | Owners Manual - Page 76
Periodic maintenance and adjustment 5. 6. Loosen the locknut. To increase the throttle lever free play, turn the adjusting bolt in direction (a). To decrease the throttle lever free play, turn the adjusting bolt in direction (b). 1 2 1 (a) 2 (b) 1. Slot 2. Projection 9. Fit the weatherstrip on - 2012 Yamaha Motorsports RS Vector L-TX | Owners Manual - Page 77
Periodic maintenance and adjustment 2. 3. 4. Open the shroud. Loosen the locknut. To increase the throttle lever free play, turn the adjusting bolt in direction (a). To decrease the throttle lever free play, turn the adjusting bolt in direction (b). 2 1 (b) (a) 1 3 1. Locknut 2. Throttle lever - 2012 Yamaha Motorsports RS Vector L-TX | Owners Manual - Page 78
Periodic maintenance and adjustment (b) (a) 2 1 3 1 1. Weatherstrip 1. Locknut 2. Throttle lever free play adjusting bolt 3. Throttle lever free play Throttle lever free play: 2.0-3.0 mm (0.08-0.12 in) 7. 8. Tighten the locknut. Install the headlight unit, making sure to fit the slots on its - 2012 Yamaha Motorsports RS Vector L-TX | Owners Manual - Page 79
Periodic maintenance and adjustment Check the T.O.R.S. for proper operation. 1. Start the engine. TIP Refer to the "Starting the engine" section on page 48. 2. Hold the pivot point of the throttle lever away from the throttle switch by putting your thumb (above) and forefinger (below) between the - 2012 Yamaha Motorsports RS Vector L-TX | Owners Manual - Page 80
Periodic maintenance and adjustment RS90P / RS90PLT 1. 2. Place the snowmobile on a level surface and apply the parking brake. Remove the shroud, the left and right side covers, and the top cover. (See page 63 for removal procedures.) Remove the headlight unit bolt on each side of the snowmobile. 1 - 2012 Yamaha Motorsports RS Vector L-TX | Owners Manual - Page 81
Periodic maintenance and adjustment 8. Install the headlight unit, making sure to fit the slots on its bottom onto the projections on its stay. 3. Remove the air filter case cover by unhooking the case fastener and the case cover fasteners. 2 1 1 2 1. Slot 2. Projection 1. Air filter case fastener - 2012 Yamaha Motorsports RS Vector L-TX | Owners Manual - Page 82
Periodic maintenance and adjustment 5. 6. Place the air filter element frame in the original position. Install the air filter case cover and attach the air filter case by hooking all the fasteners. Close the shroud. Place the snowmobile on a level surface and apply the parking brake. Remove the - 2012 Yamaha Motorsports RS Vector L-TX | Owners Manual - Page 83
system does not need to be adjusted, even for operation at high altitude. RST90: Your snowmobile can be adjusted to overcome most of the problems found in highaltitude riding. Carburetor adjustments are the most important. Less air at high altitude makes the air/fuel ratio too rich, which can - 2012 Yamaha Motorsports RS Vector L-TX | Owners Manual - Page 84
Periodic maintenance and adjustment Remember: Less air at higher altitude means there is less horsepower available, even with the optimal air/fuel ratio. Expect acceleration and top speed to be reduced at higher altitudes. To overcome operating with less power at high altitudes, your snowmobile may - 2012 Yamaha Motorsports RS Vector L-TX | Owners Manual - Page 85
Periodic maintenance and adjustment 3. Remove the shroud and the right side cover (RS90P / RS90PLT / RST90PGT), or open the shroud (RST90). [See page 63 (RS90P / RS90PLT / RST90PGT) or page 67 (RST90) for the procedures.] Disconnect the oil level gauge coupler. NOTICE: Disconnect the oil level gauge - 2012 Yamaha Motorsports RS Vector L-TX | Owners Manual - Page 86
Periodic maintenance and adjustment 6. If the engine oil is below the "L" level mark, add sufficient oil of the recommended type to raise it to the "H" level mark. (See page 123 for the recommended oil.) NOTICE: When adding the engine oil, be careful not to fill above the "H" level mark on the - 2012 Yamaha Motorsports RS Vector L-TX | Owners Manual - Page 87
Periodic maintenance and adjustment RS90P / RS90PLT / RST90PGT RST90 1 2 1. Oil level gauge coupler 2. Oil filler cap 1. Cylinder head cap RST90PGT RST90 1 1. Cylinder head cap 1. Oil level gauge coupler 2. Oil filler cap RS90P / RS90PLT / RST90PGT 8. Remove the oil filler cap and the cylinder - 2012 Yamaha Motorsports RS Vector L-TX | Owners Manual - Page 88
Periodic maintenance and adjustment RST90 2 1 1 1. Engine oil drain bolt (oil tank) 2. Gasket 1. Oil filter cartridge TIP An oil filter wrench is available at a Yamaha dealer. 12. Apply a thin coat of engine oil to the Oring of the new oil filter cartridge. 9. Place an oil pan under the engine - 2012 Yamaha Motorsports RS Vector L-TX | Owners Manual - Page 89
Periodic maintenance and adjustment Tightening torques: Engine oil drain bolt (crankcase): 10 Nm (1.0 m·kgf, 7.2 ft·lbf) Engine oil drain bolt (oil tank): 16 Nm (1.6 m·kgf, 12 ft·lbf) 15. Add 2.0 L (2.11 US qt, 1.76 Imp.qt) of the recommended engine oil to the oil tank, and then install and tighten - 2012 Yamaha Motorsports RS Vector L-TX | Owners Manual - Page 90
Periodic maintenance and adjustment the engine off and make sure that the engine oil drain bolts, the cylinder head cap, and the oil filler cap are installed correctly. 20. Turn the engine off, and then connect the oil level gauge coupler. NOTICE: If oil is leaking or the oil level warning indicator - 2012 Yamaha Motorsports RS Vector L-TX | Owners Manual - Page 91
Periodic maintenance and adjustment RST90PGT 1 2 1 1. Coolant reservoir cap 1. Coolant recovery tank 2. "COLD LEVEL" mark RS90P / RS90PLT To check the coolant level 1. 2. Place the snowmobile on a level surface and apply the parking brake. Remove the top cover and the right side cover. (See page - 2012 Yamaha Motorsports RS Vector L-TX | Owners Manual - Page 92
Periodic maintenance and adjustment 2 1 TIP If you find any leaks, consult a Yamaha dealer. 7. Check the coolant level in the coolant reservoir. If it is not full, remove the coolant reservoir cap, fill the reservoir with the recommended coolant, and then install the cap. Install the top cover and - 2012 Yamaha Motorsports RS Vector L-TX | Owners Manual - Page 93
Periodic maintenance and adjustment RST90 2. Remove the shroud, the right side cover, and the top cover (RST90PGT), or open the shroud (RST90). [See page 63 (RST90PGT) or page 67 (RST90) for the procedures.] Remove the coolant reservoir cap and add coolant until it reaches the "COLD LEVEL" mark. 3. - 2012 Yamaha Motorsports RS Vector L-TX | Owners Manual - Page 94
Periodic maintenance and adjustment RST90 7. 8. Install the coolant reservoir cap. Install the top cover, the right side cover, and the shroud (RST90PGT), or close the shroud (RST90). ESU13913 V-belt EWS00402 WARNING G RST90PGT G Coming in contact with the rotating Vbelt or clutch parts can - 2012 Yamaha Motorsports RS Vector L-TX | Owners Manual - Page 95
Periodic maintenance and adjustment 2. Remove the shroud and the left side cover (RS90P / RS90PLT / RST90PGT), or open the shroud (RST90), and then remove the drive guard. (See page 28 for drive guard removal procedures.) Remove the screws and the bolts, and then pull the left lower cover outward to - 2012 Yamaha Motorsports RS Vector L-TX | Owners Manual - Page 96
Periodic maintenance and adjustment Standard V-belt position: From 1.5 mm (0.06 in) above the edge of the secondary sheave assembly to 0.5 mm (0.02 in) below the edge 8. If the V-belt position is incorrect, adjust it by removing or adding a spacer on each V-belt position adjusting bolt. 1. V-belt - 2012 Yamaha Motorsports RS Vector L-TX | Owners Manual - Page 97
Periodic maintenance and adjustment 9. Tighten the V-belt position adjusting bolts. V-belt position adjusting bolt tightening torque: 10 Nm (1.0 m·kgf, 7.2 ft·lbf) 10. Install the V-belt over the primary sheave assembly. 11. Rotate the secondary sliding sheave clockwise and push it so that it - 2012 Yamaha Motorsports RS Vector L-TX | Owners Manual - Page 98
Periodic maintenance and adjustment RST90 Recommended drive chain oil: SAE 75W or 80W API GL-3 Gear oil 5. Install the dipstick, making sure to align the notch in the dipstick handle with the projection on the drive chain housing. 1. Dipstick 1 4. Remove the dipstick and check that the oil is - 2012 Yamaha Motorsports RS Vector L-TX | Owners Manual - Page 99
a failure in the brake system. Do not operate the snowmobile if you find any problems in the brake system. You could lose braking ability, which could lead to an accident snowmobile is placed on its side for service. Checking the parking brake pads Check the parking brake pads for wear according - 2012 Yamaha Motorsports RS Vector L-TX | Owners Manual - Page 100
Periodic maintenance and adjustment 1. Remove the shroud and the right side cover (RS90P / RS90PLT / RST90PGT), or open the shroud (RST90). [See page 63 (RS90P / RS90PLT / RST90PGT) or page 67 (RST90) for the procedures.] Check the parking brake pads for wear by measuring the thickness of the pads. - 2012 Yamaha Motorsports RS Vector L-TX | Owners Manual - Page 101
Periodic maintenance and adjustment Parking brake pad to brake disc clearance (a) + (b): 1.5-2.0 mm (0.059-0.079 in) 7. 8. Tighten the parking brake pad adjusting bolt locknut. Install the right side cover and the shroud (RS90P / RS90PLT / RST90PGT), or close the shroud (RST90). G G Refill with - 2012 Yamaha Motorsports RS Vector L-TX | Owners Manual - Page 102
Periodic maintenance and adjustment To measure the drive sprocket wear Measure the drive sprocket tooth width at the measuring line shown. If the tooth width is 13 mm (0.51 in) or less, replace the drive sprocket. 1 2 1 3 1. Drive sprocket tooth 2. Measuring line 3. Drive sprocket tooth width - 2012 Yamaha Motorsports RS Vector L-TX | Owners Manual - Page 103
Periodic maintenance and adjustment RST90 To adjust the handlebar height 1. Remove the handlebar cover. 1. Distance A 2. Distance B Ski toe-out (distance A - distance B): 0.0-15.0 mm (0.00-0.59 in) 1. Handlebar cover 2. Loosen the handlebar bolts. TIP Move the front tip of each ski fully - 2012 Yamaha Motorsports RS Vector L-TX | Owners Manual - Page 104
to allow the drive track to spin, a suitable stand must be used to support the rear of the snowmobile. Never allow anyone to hold the rear of the is damaged to the depth where fabric reinforcement material is visible or support rods are broken. Otherwise, track damage or failure could result in - 2012 Yamaha Motorsports RS Vector L-TX | Owners Manual - Page 105
Periodic maintenance and adjustment Adjust or replace if necessary. (See the following section for more details.) 1. Spring scale Checking the drive track alignment 1. Lift the rear of the snowmobile onto a suitable stand to raise the drive track off the ground. 2. Start the engine and rotate the - 2012 Yamaha Motorsports RS Vector L-TX | Owners Manual - Page 106
Periodic maintenance and adjustment Shifted to right 1 1. Rear axle nut 2. 3. 4. Lift the rear of the snowmobile onto a suitable stand to raise the drive track off the ground. Start the engine and rotate the drive track one or two turns. Stop the engine. Loosen the locknut on the left and the - 2012 Yamaha Motorsports RS Vector L-TX | Owners Manual - Page 107
Periodic maintenance and adjustment 6. Tighten the locknuts to their specified torque. Locknut tightening torque: 59 Nm (5.9 m·kgf, 43 ft·lbf) 7. Recheck alignment and deflection. If necessary, repeat steps 3 to 6 until the proper adjustment is achieved. Lower the snowmobile to the ground. Tighten - 2012 Yamaha Motorsports RS Vector L-TX | Owners Manual - Page 108
Periodic maintenance and adjustment Shifted to left 1. 2. 3. 4. 5. Forward Gap Slide runner Drive track Slide metal 1. Slide runner 2. Wear limit height Slide runner wear limit height: 10.5 mm (0.41 in) ECS00350 5. Adjust the drive track deflection to specification. NOTICE: The right and left - 2012 Yamaha Motorsports RS Vector L-TX | Owners Manual - Page 109
Periodic maintenance and adjustment 1 1 1. Lubrication point 1. Grease nipple RS90P 1 1. Throttle cable end 1. Grease nipple RS90PLT 1 1. Grease nipple 1. Grease nipple 103 - 2012 Yamaha Motorsports RS Vector L-TX | Owners Manual - Page 110
Periodic maintenance and adjustment RST90 1 1. Grease nipple 1. Screw 2. Headlight access panel RST90PGT 3. 4. Disconnect the headlight coupler. Remove the bulb holder cover. 1 1 1. Grease nipple ESU14181 2 Replacing a headlight bulb RS90P / RS90PLT 1. 2. Remove the top cover. (See page 63 - 2012 Yamaha Motorsports RS Vector L-TX | Owners Manual - Page 111
Periodic maintenance and adjustment the glass part of the bulb or its life and illumination will be affected. If the glass is oil stained, thoroughly clean it with a cloth moistened with alcohol or lacquer thinner. [ECS00621] 1. Bulb holder 1 5. 1. Do not touch the glass part of the bulb. Bulb - 2012 Yamaha Motorsports RS Vector L-TX | Owners Manual - Page 112
Periodic maintenance and adjustment 6. Unhook the bulb holder, and then remove the burnt-out bulb. 2 1 1. Headlight unit bolt 2. Windshield stay bolt 1 1. Bulb holder 3. Unhook the headlight unit as shown, then lift it up and move it forward, away from the handlebar. NOTICE: Be careful not to - 2012 Yamaha Motorsports RS Vector L-TX | Owners Manual - Page 113
Periodic maintenance and adjustment 2. Use a Phillips screwdriver to turn the headlight beam adjusting screw and adjust the headlight beams. To lower the headlight beams, turn the headlight beam adjusting screw in direction (a). To raise the headlight beams, turn the headlight beam adjusting screw - 2012 Yamaha Motorsports RS Vector L-TX | Owners Manual - Page 114
Periodic maintenance and adjustment Batteries produce explosive gases. Keep sparks, flame, cigarettes, etc. away. Ventilate when charging or using in an enclosed space. Always shield your eyes when working near batteries. KEEP OUT OF THE REACH OF CHILDREN. Charge or have a Yamaha dealer charge the - 2012 Yamaha Motorsports RS Vector L-TX | Owners Manual - Page 115
Periodic maintenance and adjustment ESU14193 Replacing a fuse EWS00550 RST90PGT WARNING Be sure to use the specified fuse. A wrong fuse could cause electrical system damage or A FIRE HAZARD. ECS00631 2 1 NOTICE Be sure to turn the main switch to the off position and disconnect the negative - 2012 Yamaha Motorsports RS Vector L-TX | Owners Manual - Page 116
Periodic maintenance and adjustment 7. 2 1 Lift up the air filter case, disconnect the ISC (Idle Speed Control) unit inlet hose and cylinder head breather hose from the case, and then remove the case. 1 1. Air filter case fastener 2. Air temperature sensor coupler 5. Loosen the joint clamp - 2012 Yamaha Motorsports RS Vector L-TX | Owners Manual - Page 117
Periodic maintenance and adjustment RS90P / RS90PLT 1 1 1. Negative battery lead 10. Replace the blown fuse with one of the proper amperage. 2 3 4 5 6 7 1 2 3 4 1. 2. 3. 4. Spare fuse Fuel injection system fuse Main fuse EPS fuse 1. 2. 3. 4. 5. 6. 7. 8. 8 Fuse box "IGN" (ignition) fuse "FAN - 2012 Yamaha Motorsports RS Vector L-TX | Owners Manual - Page 118
Periodic maintenance and adjustment RST90PGT 1 2 7 3 4 5 6 7 1. 2. 3. 4. 5. 6. 7. Fuse box "IGN" (ignition) fuse "S/H" (helmet shield heater jack) fuse "HEAD" (headlight) fuse "SIG" (signaling system) fuse "DC" (auxiliary DC jack) fuse Spare fuse Specified fuses: Main fuse: 40.0 A EPS fuse: 40 - 2012 Yamaha Motorsports RS Vector L-TX | Owners Manual - Page 119
Periodic maintenance and adjustment RST90 The main fuse is located under the air filter case. The fuse box, which contains the fuses for the individual circuits, is located behind the right side cover. 1. Open the shroud. 2. Remove the right side cover. (See page 63 for removal procedures.) 3. - 2012 Yamaha Motorsports RS Vector L-TX | Owners Manual - Page 120
Periodic maintenance and adjustment 1. Oil tank breather hose clamp 2. Oil tank breather hose 1. Crankcase breather hose clamp (air filter case side) 6. Slide the crankcase breather hose clamp (crankcase side) up, and then disconnect the crankcase breather hose from the engine. 8. 9. - 2012 Yamaha Motorsports RS Vector L-TX | Owners Manual - Page 121
Periodic maintenance and adjustment 10. Connect the negative battery lead. 11. Install the air filter case by reversing the removal steps 3-7. NOTICE: Be sure to connect the breather hoses securely when installing the air filter case. [ECS00641] 1 TIP When installing the air filter case, connect - 2012 Yamaha Motorsports RS Vector L-TX | Owners Manual - Page 122
Troubleshooting ESU14163 Engine turns over but does not start 1. Fuel system No fuel supplied to combustion chamber • No fuel in tank: Supply fuel. ↓ • Clogged fuel line: - 2012 Yamaha Motorsports RS Vector L-TX | Owners Manual - Page 123
Troubleshooting 3. G Compression Insufficient • Loose cylinder head nuts: Tighten nuts properly. ↓ • Worn or damaged gasket: Replace gasket. ↓ • Worn or damaged piston and cylinder: Ask a Yamaha dealer to - 2012 Yamaha Motorsports RS Vector L-TX | Owners Manual - Page 124
Troubleshooting 4. Pull the red (+) connecting lead cover to expose the terminal through the slit in the cover, and then connect the red (+) jumper cable to the - 2012 Yamaha Motorsports RS Vector L-TX | Owners Manual - Page 125
Troubleshooting G G Seized engine: Seizure is caused by poor lubrication, inadequate fuel, or a Yamaha dealer to check. Oily or dirty V-belt or primary and secondary sheave assembly surfaces: Clean. Problem with driveline: See "V-belt twists" above. V-belt twists G Engine power is low G G G G - 2012 Yamaha Motorsports RS Vector L-TX | Owners Manual - Page 126
Troubleshooting G Worn or damaged drive track: Ask a Yamaha dealer to check. 120 - 2012 Yamaha Motorsports RS Vector L-TX | Owners Manual - Page 127
Storage ESU13940 Long-term storage requires some preventive procedures to guard against deterioration. make sure that it does not leave any marks. If the windshield is scratched, use a quality plastic polishing compound after washing. Cleaning Thoroughly clean the snowmobile, inside and out, to - 2012 Yamaha Motorsports RS Vector L-TX | Owners Manual - Page 128
storage period. [ECS00681] cover-condensation could be trapped underneath which could increase the chances of rusting. Returning to service after storage When returning your snowmobile to service, install the V-belt and battery and adjust the drive track. Remove the spark plugs and clean or replace - 2012 Yamaha Motorsports RS Vector L-TX | Owners Manual - Page 129
× 2.61 in) Idling speed: RS90P 1250-1350 r/min RS90PLT 1250-1350 r/min RST90 1300-1500 r/min RST90PGT 1250-1350 r/min Engine oil: Recommended grade: API service SG type or higher, JASO standard MA 123 - 2012 Yamaha Motorsports RS Vector L-TX | Owners Manual - Page 130
Specifications Overall reduction ratio: RS90P 6.02-1.58 : 1 RS90PLT 6.18-1.63 : 1 RST90 6.74-1.77 : 1 RST90PGT 6.44-1.70 : 1 Sheave distance: 267.0-270.0 mm (10.51-10.63 in) Sheave offset: 13.5-16.5 mm (0.53-0.65 in) Engagement speed (Subject to change according to elevation settings.): RS90P 3100- - 2012 Yamaha Motorsports RS Vector L-TX | Owners Manual - Page 131
Specifications Tail/brake light: RS90P LED RS90PLT LED RST90PGT LED Meter lighting: RST90 14 V, 50 mA × 6 Meter lighting: RS90P LED RS90PLT LED RST90PGT LED High beam indicator light: RST90 14 V, 80 mA × 1 High beam indicator light: RS90P LED RS90PLT LED RST90PGT LED Warning light: RS90P LED RS90PLT - 2012 Yamaha Motorsports RS Vector L-TX | Owners Manual - Page 132
Consumer information ESU12481 Identification number records Record the frame serial number, engine serial number (Primary ID), and key identification number in the spaces provided for assistance when ordering spare parts from a Yamaha dealer. Also, record and keep the ID numbers in a separate place - 2012 Yamaha Motorsports RS Vector L-TX | Owners Manual - Page 133
Consumer information RST90PGT ESU13461 Vehicle Emission Control Information label RS90P / RS90PLT 1 1 1. Vehicle Emission Control Information label The Vehicle Emission Control Information label is affixed at the location in the illustration. This label shows specifications related to exhaust - 2012 Yamaha Motorsports RS Vector L-TX | Owners Manual - Page 134
and maintain the snowmobile as specified in the appropriate Owner's Manual. WARRANTY TRANSFER: To transfer any remaining warranty from the original . An inspection and registration fee will be charged for this service. EMISSION CONTROL SYSTEM WARRANTY Yamaha Motor Corporation, USA also warrants - 2012 Yamaha Motorsports RS Vector L-TX | Owners Manual - Page 135
of having the dealer do them? A. Yes, if you are a qualified snowmobile mechanic and follow the procedures specified in the Owner's and Service Manual. We do recommend, however, that items requiring special tools or equipment be done by a Yamaha snowmobile dealer. Q. Under what conditions is the - 2012 Yamaha Motorsports RS Vector L-TX | Owners Manual - Page 136
machine requires warranty service, you must take it to any authorized Yamaha snowmobile dealer within the continental United States. Be sure to bring your warranty identification card or other valid proof of the original date of purchase. If a question or problem arises regarding warranty, first - 2012 Yamaha Motorsports RS Vector L-TX | Owners Manual - Page 137
Consumer information ESU12511 YAMAHA EXTENDED SERVICE (Y.E.S.) 131 - 2012 Yamaha Motorsports RS Vector L-TX | Owners Manual - Page 138
Index A Air filter, checking...73 Auxiliary DC jack ...25 B Backrest (RST90 / RST90PGT) ...31 Battery...108 Brake and parking brake ...93 Brake lever ...26 Break-in...50 C Carburetors (RST90)...77 Center shock absorber and rear torsion springs, adjusting spring preload (RST90 / RST90PGT)...39 - 2012 Yamaha Motorsports RS Vector L-TX | Owners Manual - Page 139
override system (T.O.R.S.) ...13 Throttle override system (T.O.R.S.), checking...72 Tool kit...62 Tow hitch bracket (RST90 / RST90PGT)...36 Transporting ...56 Troubleshooting ...116 Two-up (2-up) adjusting blocks, adjusting (RST90)...41 V Valve clearance...78 V-belt...88 V-belt holders ...29 Vehicle - 2012 Yamaha Motorsports RS Vector L-TX | Owners Manual - Page 140
- 2012 Yamaha Motorsports RS Vector L-TX | Owners Manual - Page 141
Yamaha engineering teams that know your Yamaha from the inside out. Genuine Yamaha Service Manuals - Get the same factory manual for your vehicle that the technicians at your authorized Yamaha dealer use. Service manuals are available through your Yamaha dealer or you can order them directly through - 2012 Yamaha Motorsports RS Vector L-TX | Owners Manual - Page 142
PRINTED IN JAPAN 2011.05-0.8×1 CR PRINTED ON RECYCLED PAPER
-
 1
1 -
 2
2 -
 3
3 -
 4
4 -
 5
5 -
 6
6 -
 7
7 -
8
-
9
-
10
-
11
-
12
-
13
-
14
-
15
-
16
-
17
-
18
-
19
-
20
-
21
-
22
-
23
-
24
-
25
-
26
-
27
-
28
-
29
-
30
-
31
-
32
-
33
-
34
-
35
-
36
-
37
-
38
-
39
-
40
-
41
-
42
-
43
-
44
-
45
-
46
-
47
-
48
-
49
-
50
-
51
-
52
-
53
-
54
-
55
-
56
-
57
-
58
-
59
-
60
-
61
-
62
-
63
-
64
-
65
-
66
-
67
-
68
-
69
-
70
-
71
-
72
-
73
-
74
-
75
-
76
-
77
-
78
-
79
-
80
-
81
-
82
-
83
-
84
-
85
-
86
-
87
-
88
-
89
-
90
-
91
-
92
-
93
-
94
-
95
-
96
-
97
-
98
-
99
-
100
-
101
-
102
-
103
-
104
-
105
-
106
-
107
-
108
-
109
-
110
-
111
-
112
-
113
-
114
-
115
-
116
-
117
-
118
-
119
-
120
-
121
-
122
-
123
-
124
-
125
-
126
-
127
-
128
-
129
-
130
-
131
-
132
-
133
-
134
-
135
-
136
-
137
-
138
-
139
-
140
-
141
-
142
 |
 |

OWNER’S MANUAL
RS90PB
RS90PLTB
RST90B
RST90PGTB
8HV-28199-10
LIT-12628-03-03
Read this manual carefully
before operating this vehicle.