2012 Yamaha Motorsports Grizzly 300 Automatic Owners Manual - Page 115
2012 Yamaha Motorsports Grizzly 300 Automatic Manual

Page 115 highlights
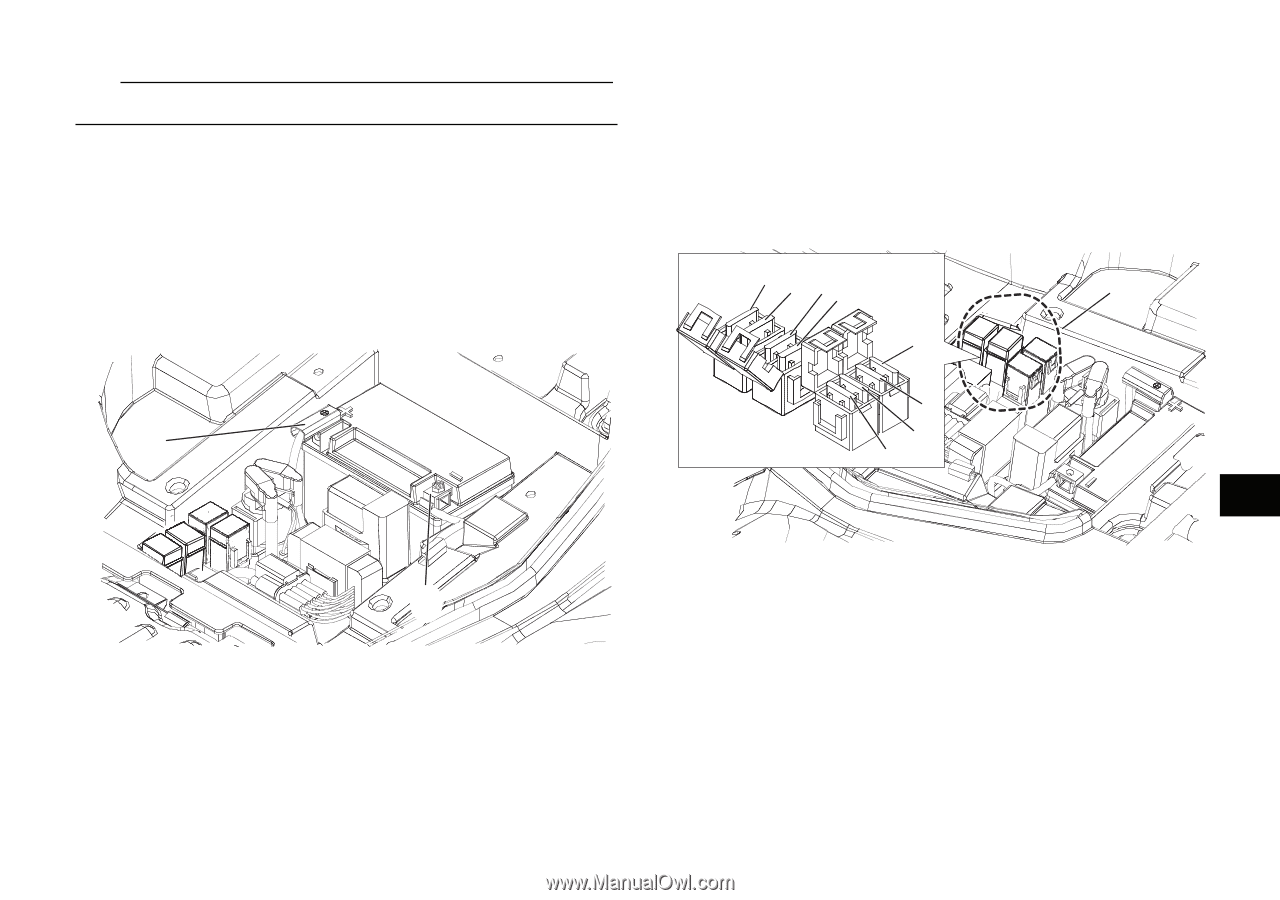
To install the battery TIP Be sure the battery is fully charged. 1. Place the battery in its compartment. 2. Connect the positive battery lead first, then connect the negative battery lead by installing their bolt. NOTICE: When installing the battery, the main switch must be off, and the positive lead must be connected before the negative lead. 4. Install the seat. (See page 4-12.) Replacing a fuse The fuse boxes are located under the seat. (See page 4-12.) 6 78 9 1 2 3 4 8 1 5 2 1. Positive battery lead (red) 2. Negative battery lead (black) 3. Install the battery holding plate by installing the bolts. 8-43 1. 2. 3. 4. 5. 6. 7. 8. 9. Fuse box Main fuse Spare fuse (Main fuse) Fan fuse Spare fuse Ignition fuse Headlight fuse Signaling system fuse Spare fuse
-
 1
1 -
2
-
3
-
4
-
5
-
6
-
7
-
8
-
9
-
10
-
11
-
12
-
13
-
14
-
15
-
16
-
17
-
18
-
19
-
20
-
21
-
22
-
23
-
24
-
25
-
26
-
27
-
28
-
29
-
30
-
31
-
32
-
33
-
34
-
35
-
36
-
37
-
38
-
39
-
40
-
41
-
42
-
43
-
44
-
45
-
46
-
47
-
48
-
49
-
50
-
51
-
52
-
53
-
54
-
55
-
56
-
57
-
58
-
59
-
60
-
61
-
62
-
63
-
64
-
65
-
66
-
67
-
68
-
69
-
70
-
71
-
72
-
73
-
74
-
75
-
76
-
77
-
78
-
79
-
80
-
81
-
82
-
83
-
84
-
85
-
86
-
87
-
88
-
89
-
90
-
91
-
92
-
93
-
94
-
95
-
96
-
97
-
98
-
99
-
100
-
101
-
102
-
103
-
104
-
105
-
106
-
107
-
108
-
109
-
 110
110 -
 111
111 -
 112
112 -
 113
113 -
 114
114 -
 115
115 -
 116
116 -
 117
117 -
 118
118 -
 119
119 -
 120
120 -
121
-
122
-
123
-
124
-
125
-
126
-
127
-
128
-
129
-
130
-
131
-
132
-
133
-
134
-
135
-
136
-
137
-
138
-
139
-
140
-
141
-
142
-
143
-
144
-
145
-
146
 |
 |