2010 Yamaha Motorsports V Star Silverado Owners Manual - Page 77
2010 Yamaha Motorsports V Star Silverado Manual

Page 77 highlights
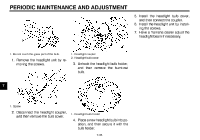
PERIODIC MAINTENANCE AND ADJUSTMENT 2. Lift the wheel up between the fork legs. TIP Make sure that there is enough space between the brake pads before inserting the brake disc and that the slot in the speedometer gear unit fits over the retainer on the fork leg. EAU25080 Tightening torque: Wheel axle: 59 Nm (5.9 m·kgf, 43 ft·lbf) Rear wheel EAU25142 6. Tighten the front wheel axle pinch bolt to the specified torque. Tightening torque: Front wheel axle pinch bolt: 20 Nm (2.0 m·kgf, 14 ft·lbf) To remove the rear wheel EWA10821 WARNING To avoid injury, securely support the vehicle so there is no danger of it falling over. 1. Loosen the axle nut. 7. While applying the front brake, push down hard on the handlebars several times to check if the front fork compresses and rebounds smoothly. 8. Connect the speedometer cable. 7 1. Speedometer gear unit 2. Speedometer cable 3. Retainer 1. Axle nut 3. Insert the wheel axle. 4. Lower the front wheel so that it is on the ground, and then put the sidestand down. 5. Tighten the wheel axle to the specified torque. 7-36 2. Disconnect the brake torque rod from the brake shoe plate by removing the bolt and nut. 3. Loosen the brake torque rod nut at the swingarm.
-
 1
1 -
2
-
3
-
4
-
5
-
6
-
7
-
8
-
9
-
10
-
11
-
12
-
13
-
14
-
15
-
16
-
17
-
18
-
19
-
20
-
21
-
22
-
23
-
24
-
25
-
26
-
27
-
28
-
29
-
30
-
31
-
32
-
33
-
34
-
35
-
36
-
37
-
38
-
39
-
40
-
41
-
42
-
43
-
44
-
45
-
46
-
47
-
48
-
49
-
50
-
51
-
52
-
53
-
54
-
55
-
56
-
57
-
58
-
59
-
60
-
61
-
62
-
63
-
64
-
65
-
66
-
67
-
68
-
69
-
70
-
71
-
 72
72 -
 73
73 -
 74
74 -
 75
75 -
 76
76 -
 77
77 -
 78
78 -
 79
79 -
 80
80 -
 81
81 -
 82
82 -
83
-
84
-
85
-
86
-
87
-
88
-
89
-
90
-
91
-
92
-
93
-
94
-
95
-
96
-
97
-
98
-
99
-
100
-
101
-
102
 |
 |
