2009 Yamaha Motorsports VMAX Owners Manual - Page 25
2009 Yamaha Motorsports VMAX Manual

Page 25 highlights
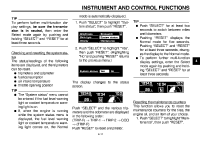
INSTRUMENT AND CONTROL FUNCTIONS 3. Push "RESET" and the hour digits start flashing. 4. Push "SELECT" to increment the hours. 5. Push "RESET", and the minute digits start flashing. 6. Push "SELECT" to increment the minutes. 7. Push "RESET" to start the clock. 8. Push "RESET" again to return to the previous menu. Resetting all the brightness and shift timing indicator light functions: This resets ALL settings made to the brightness and shift timing indicator light functions. 1. Push "SELECT" to highlight "Display". 3. Push "SELECT" to highlight the desired brightness level. 4. Push "RESET" to set the selected brightness level. 5. Push "RESET" to return to the previous menu. 6. Push "SELECT" to scroll to " ", then push "RESET". This allows you to select another item in the menu. Setting the clock 1. Push "SELECT" to highlight "Display". 4. Push "RESET", then push "SELECT" to highlight "Yes". 2 3 5. Push "RESET" to reset the brightness and shift timing light indicator values to the factory setting. The display returns to the Normal mode. TIP To perform further multi-function display settings, enter the Select mode again by pushing and holding "SELECT" and "RESET" for at least three seconds. Using the stopwatch The stopwatch can be activated as follows. 1. Push "SELECT" to highlight "Stopwatch". 4 5 6 7 8 9 2. Push "RESET"; the screen is displayed. following 2. Push "RESET". 3. Push "SELECT" to highlight "All reset". 4-9
-
 1
1 -
2
-
3
-
4
-
5
-
6
-
7
-
8
-
9
-
10
-
11
-
12
-
13
-
14
-
15
-
16
-
17
-
18
-
19
-
 20
20 -
 21
21 -
 22
22 -
 23
23 -
 24
24 -
 25
25 -
 26
26 -
 27
27 -
 28
28 -
 29
29 -
 30
30 -
31
-
32
-
33
-
34
-
35
-
36
-
37
-
38
-
39
-
40
-
41
-
42
-
43
-
44
-
45
-
46
-
47
-
48
-
49
-
50
-
51
-
52
-
53
-
54
-
55
-
56
-
57
-
58
-
59
-
60
-
61
-
62
-
63
-
64
-
65
-
66
-
67
-
68
-
69
-
70
-
71
-
72
-
73
-
74
-
75
-
76
-
77
-
78
-
79
-
80
-
81
-
82
-
83
-
84
-
85
-
86
-
87
-
88
-
89
-
90
-
91
-
92
-
93
-
94
-
95
-
96
-
97
-
98
-
99
-
100
-
101
-
102
-
103
-
104
-
105
-
106
-
107
-
108
-
109
-
110
-
111
-
112
-
113
-
114
 |
 |
