2014 Kawasaki KLX140L Owners Manual
2014 Kawasaki KLX140L Manual

2014 Kawasaki KLX140L manual content summary:
- 2014 Kawasaki KLX140L | Owners Manual - Page 1
- 2014 Kawasaki KLX140L | Owners Manual - Page 2
Quick Reference Guide This Quick Reference Guide will assist you in finding the information you're looking for. GENERAL INFORMATION MAINTENANCE AND ADJUSTMENT TROUBLESHOOTING GUIDE STORAGE j j j j A Table of Contents is included after the Foreword. - 2014 Kawasaki KLX140L | Owners Manual - Page 3
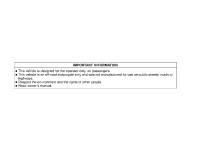
IMPORTANT INFORMATION vehicle is designed for the operator only, no passengers. • This This vehicle • highways. is an off-road motorcycle only and was not manufactured for use on public streets, roads or the environment and the rights of other people. • Respect Read owner's manual. • - 2014 Kawasaki KLX140L | Owners Manual - Page 4
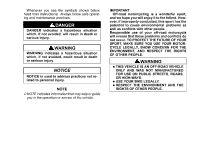
shown below, heed their instructions! Always follow safe operating sport has the potential to cause environmental problems as well as conflicts with other people. Responsible use of . ○NOTE indicates information that may help or guide you in the operation or service of the vehicle. NOTE • • FOR USE - 2014 Kawasaki KLX140L | Owners Manual - Page 5
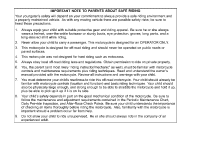
techniques. Read and understand the owner's manual provided with the motorcycle. Review all instructions and warnings with your child. You riding the motorcycle. Also, familiarity with the motorcycle is important should a problem occur far from help. Do not allow your child to ride unsupervised. - 2014 Kawasaki KLX140L | Owners Manual - Page 6
10. Encourage your child not to ride beyond his or her skill lever or faster than conditions safely allow. Have them practice advanced riding maneuvers under controlled conditions. 11. Tell someone where you and your child are planning to ride and when you Intend to return. Discuss the ride with - 2014 Kawasaki KLX140L | Owners Manual - Page 7
WARNING Engine exhaust, some of its constituents, and certain vehicle components contain or emit chemicals known to the State of California to cause cancer and birth defects or other reproductive harm. - 2014 Kawasaki KLX140L | Owners Manual - Page 8
. By giving your motorcycle the proper care and maintenance outlined in this manual, you will be helping to ensure it a long, trouble-free life. Before starting to ride your motorcycle, please read this manual thoroughly in order to know your motorcycle's capabilities, its limitations, and above - 2014 Kawasaki KLX140L | Owners Manual - Page 9
...Wheels ...Hoses Inspection ...Battery ...Fuse ...Tightening Torques of Nuts and Bolts...Cleaning Your Motorcycle...Lubrication...TROUBLESHOOTING GUIDE...STORAGE ...Before Storage ...After Storage ...ENVIRONMENTAL PROTECTION ...WIRING DIAGRAM ...YOUR WARRANTY/OWNER SATISFACTION ...REPORTING SAFETY - 2014 Kawasaki KLX140L | Owners Manual - Page 10
SPECIFICATIONS 9 SPECIFICATIONS DIMENSIONS Overall length Overall width Overall height Wheelbase Road clearance Curb Mass Fuel tank capacity ENGINE Type Bore × stroke Displacement Compression ratio Carburetor Starting system Ignition system Ignition timing Lubrication system Spark plug Spark plug - 2014 Kawasaki KLX140L | Owners Manual - Page 11
10 SPECIFICATIONS TRANSMISSION Transmission type Clutch type Drive system Gear ratios: 1st gear 2nd gear 3rd gear 4th gear 5th gear Primary reduction ratio Final reduction ratio Overall ratio (top gear) Engine oil: Capacity Type Viscosity FRAME Type Steering angle Castor Trail Tubular, semi-double - 2014 Kawasaki KLX140L | Owners Manual - Page 12
SPECIFICATIONS 11 Tire size, type: Front Rear Rim size: Front Rear Suspension: Front Rear Front suspension travel Rear wheel travel Front fork oil: Type Amount (per fork leg) BRAKES Type (Front & Rear) ELECTRICAL EQUIPMENT Battery B: KLX140B Specifications are subject to change without notice. 12 V - 2014 Kawasaki KLX140L | Owners Manual - Page 13
12 GENERAL INFORMATION j GENERAL INFORMATION Location of Labels All warning labels which are on your vehicle are repeated here. Read labels on your vehicle and understand them thoroughly. They contain information which is important for your safety and the safety of anyone else who may operate your - 2014 Kawasaki KLX140L | Owners Manual - Page 14
GENERAL INFORMATION 13 j 2. 3. 4. 5. 6. Brake Fluid (Rear) Rear Shock Absorber Warning (KLX140A) Important Information Noise Emission Control Information Vehicle Emission Control Information - 2014 Kawasaki KLX140L | Owners Manual - Page 15
14 GENERAL INFORMATION j 7. Battery Poison/Danger - 2014 Kawasaki KLX140L | Owners Manual - Page 16
GENERAL INFORMATION 15 1) 3) KLX140A j 2) 4) - 2014 Kawasaki KLX140L | Owners Manual - Page 17
16 GENERAL INFORMATION 5) 7) j 6) - 2014 Kawasaki KLX140L | Owners Manual - Page 18
GENERAL INFORMATION 17 j Location of Parts 1. Clutch Lever 2. Engine Stop Switch 3. Choke Knob 4. Front Brake Fluid Reservoir 5. Front Brake Lever 6. Throttle Grip 7. Starter Button 8. Fuel Tank Cap - 2014 Kawasaki KLX140L | Owners Manual - Page 19
18 GENERAL INFORMATION j 9. Front Fork 10. Fuel Tank 11. Fuel Tap 12. Carburetor 13. Seat 14. Air Cleaner Element 15. Brake Disc 16. Brake Caliper 17. Engine Oil Drain Plug 18. Side Stand 19. Drive Chain 20. Swingarm 21. Chain Guide 22. Rear Shock Absorber - 2014 Kawasaki KLX140L | Owners Manual - Page 20
GENERAL INFORMATION 19 j 23. Muffler 24. Fuse 25. Battery 26. Rear Axle Nut 27. Chain Adjuster 28. Rear Brake Fluid Reservoir 29. Oil Filler Cap/Dipstick 30. Rear Brake Pedal - 2014 Kawasaki KLX140L | Owners Manual - Page 21
20 GENERAL INFORMATION j Side Stand The motorcycle is equipped with a side stand. Fuel Tap The fuel tap has three position: OFF, ON, and RES (reserve). For normal operation, turn the fuel tap lever to the ON position. If the fuel runs out with the tap in the ON position, the last approximately 1.1 - 2014 Kawasaki KLX140L | Owners Manual - Page 22
GENERAL INFORMATION 21 ○Since riding distance is limited when on RES, refuel at the earliest opportunity. ○Make certain that the fuel tap lever is turned to ON (not RES), after filling up the fuel tank. NOTE j Fuel The required of fuel is specified under "Fuel Requirements". The capacity of the - 2014 Kawasaki KLX140L | Owners Manual - Page 23
Cap Fuel Tank Top Level Filler Neck Use clean, fresh unleaded gasoline with a minimum Antiknock Index of 87. The Antiknock Index is posted on service station pumps in the U.S.A. The octane rating of a gasoline is a measure of its resistance to detonation or "knocking". The Antiknock Index is an - 2014 Kawasaki KLX140L | Owners Manual - Page 24
to severe engine damage. Gasoline quality is important. Fuels of low quality or not meeting standard industry specifications may result in unsatisfacOperating problems tory performance. that result from the use of poor quality or non-recommended fuel may not be covered under your warranty. Gasoline - 2014 Kawasaki KLX140L | Owners Manual - Page 25
"gasohol" in the fuel system. Before storage it is recommended that you drain all fuel from the fuel system. See the Storage section in this manual. Engine Stop Switch The engine stop switch is located on the left side of the handlebar. The engine stop switch must be in the position - 2014 Kawasaki KLX140L | Owners Manual - Page 26
GENERAL INFORMATION 25 j Starter Button This motorcycle has the starter button. The starter button operates the electric starter when the clutch lever pulled in. Starting the Engine • Turn the fuel tap lever to the ON position. A. ON Position A. Starter Button • Shift the transmission into - 2014 Kawasaki KLX140L | Owners Manual - Page 27
26 GENERAL INFORMATION that the engine stop switch is in the • Check position. j NOTICE Do not operate the starter continuously for more than 5 seconds, or the starter will overheat and the battery power will drop temporarily. Wait 15 seconds between each operation of the starter to let it cool - 2014 Kawasaki KLX140L | Owners Manual - Page 28
GENERAL INFORMATION 27 ○When the clutch lever is pulled, the motorcycle can be started with the transmission in any gear. NOTE NOTICE Do not let the engine idle longer than five minutes, or engine overheating and damage may occur. j A. Starter Button after the engine has started, do not push • - 2014 Kawasaki KLX140L | Owners Manual - Page 29
28 GENERAL INFORMATION j Moving Off that the side stand is up. • Check Shift into gear. • Open the 1st throttle slowly. • Shifting Gears This motorcycle is equipped with a 5-speed "return shift" transmission. The neutral is located halfway between 1st and 2nd gear. "Return shift" means that when - 2014 Kawasaki KLX140L | Owners Manual - Page 30
GENERAL INFORMATION 29 NOTICE When changing gears, press firmly on the shift pedal to ensure proper shifting. Careless, incomplete shifting can cause the transmission to jump out of gear and lead to engine damage. j Stopping the Motorcycle For maximum deceleration, close the throttle and apply - 2014 Kawasaki KLX140L | Owners Manual - Page 31
30 GENERAL INFORMATION j Stopping the Engine the transmission into the neutral position. • Shift Close the throttle completely. • position. Push the engine stop switch to the • Break-In The first one hour that the motorcycle is ridden is designed as the break-in period. If the motorcycle is not - 2014 Kawasaki KLX140L | Owners Manual - Page 32
GENERAL INFORMATION 31 j Daily Pre-Ride Checks Check the following items each day before you ride. The time required is minimal, and habitual performance of these checks will help ensure a safe, reliable ride. If any irregularities are found during these checks, refer to the appropriate section and - 2014 Kawasaki KLX140L | Owners Manual - Page 33
32 GENERAL INFORMATION Frame Tires ...Overall condition good No wear or damage Air pressure correct Air valve cap installed Spokes ...No looseness Drive Chain ...Overall condition good Chain slack correct Oil if necessary Front and Rear Brakes ...Function properly Lever and pedal play correct No - 2014 Kawasaki KLX140L | Owners Manual - Page 34
MAINTENANCE AND ADJUSTMENT 33 MAINTENANCE AND ADJUSTMENT The maintenance and adjustments outlined in this chapter must be carried out in accordance with the Periodic Maintenance Chart to keep the vehicle in good running condition. The initial maintenance is vitally important and must not be - 2014 Kawasaki KLX140L | Owners Manual - Page 35
make sure that the recommended maintenance is carried out according to the instructions in this Owner's Manual at your own expense. You should keep a maintenance record for Owner's Manual carefully and keep it valid by complying with the owner's obligations it contains. To obtain warranty service, - 2014 Kawasaki KLX140L | Owners Manual - Page 36
MAINTENANCE AND ADJUSTMENT 35 TAMPERING WITH NOISE CONTROL SYSTEM PROHIBITED: Federal law prohibits the following acts or the causing thereof: (1) the removal or rendering inoperative by any person other than for purposes of maintenance, repair, or replacement, of any device or element of design - 2014 Kawasaki KLX140L | Owners Manual - Page 37
the motorcycle in good running condition. † : Replace, add, adjust, clean or torque if necessary. (K) : Should be serviced by referring to the Service Manual or an authorized Kawasaki dealer. ○ : Emission-related Item 1. Periodic Inspection (Engine Related Item) FREQUENCY OPERATION Initial 5 hours - 2014 Kawasaki KLX140L | Owners Manual - Page 38
and rim runout - check † C H A S S I S (K) Drive chain wear - check † Drive chain - inspect and adjust † Drive chain - lubricate Drive chain guide and slipper - inspect † Front fork - inspect and clean † Nuts, bolts, fasteners - inspect † Steering play - inspect † (K) Steering stem bearing - grease - 2014 Kawasaki KLX140L | Owners Manual - Page 39
38 MAINTENANCE AND ADJUSTMENT FREQUENCY OPERATION Battery - inspect † Battery terminal - inspect † Chassis parts - lubricate C H A S S I S Side stand - inspect † (K) Wheel bearing - check † (K) Swingarm and Uni-track linkage pivot - inspect (K) Swingarm and Uni-track linkage pivot - grease (K) Rear - 2014 Kawasaki KLX140L | Owners Manual - Page 40
MAINTENANCE AND ADJUSTMENT 39 3. Periodic Replacement (Engine and Chassis Related Item) FREQUENCY Initial OPERATION Engine oil - change Oil filter - replace (K) Brake hose - replace (K) Fuel hose - replace (K) Brake fluid - change (K) Brake master cylinder cup and dust seal - replace (K) Brake - 2014 Kawasaki KLX140L | Owners Manual - Page 41
seizure, accident, and injury. Check the oil level before each ride and change the oil according to the periodic maintenance chart in the Owner's Manual. Oil Level Inspection the motorcycle so that it is perpendicular • Situate to the ground. the oil has just been changed, start the engine • If - 2014 Kawasaki KLX140L | Owners Manual - Page 42
MAINTENANCE AND ADJUSTMENT 41 NOTICE Be careful not to allow any dirt or foreign materials to enter the engine. the cap and check the oil level by the dip• Unscrew stick on the cap. The oil level should be between the "H" (High) and "L" (Low) lines on the dipstick. ○Do not pinch the O-ring when - 2014 Kawasaki KLX140L | Owners Manual - Page 43
42 MAINTENANCE AND ADJUSTMENT WARNING Engine oil is a toxic substance. Dispose of used oil properly. Contact your local authorities for approved disposal methods or possible recycling. the oil filter is replaced, remove the oil filter • When cover and take off the cover with O-ring. j the oil - 2014 Kawasaki KLX140L | Owners Manual - Page 44
-40 *Kawasaki Performance Oils and Lubricants have been specifically engineered for your vehicle. Consistent use of these products meets or exceeds warranty and service requirements and can help to extend the life of your Kawasaki. NOTE Engine Oil Capacity 0.93 L (0.98 US qt) [When filter is not - 2014 Kawasaki KLX140L | Owners Manual - Page 45
44 MAINTENANCE AND ADJUSTMENT Spark Plug The spark plug should be taken out periodically for inspection and regapping. Measure the gap with a wire-type thickness gauge. If incorrect, adjust the gap to the specified value by bending the outer electrode. Spark Plug Gap CR7HSA 0.6 ~ 0.7 mm (0.024 ~ 0. - 2014 Kawasaki KLX140L | Owners Manual - Page 46
MAINTENANCE AND ADJUSTMENT 45 If the plug is oily or has carbon built up on it, clean it. The plug may also be cleaned using a high flash -point solvent and a nonmetal brush (nylon etc.). If the spark plug electrodes are corroded, or damaged, or if the insulator is cracked, replace the plug. The - 2014 Kawasaki KLX140L | Owners Manual - Page 47
46 MAINTENANCE AND ADJUSTMENT Air Cleaner A clogged air cleaner restricts the air intake, increases fuel consumption, reduces engine power, and can cause spark plug fouling. Inspect the air intake system, which includes the air filter and air duct to the carburetor, and the duct clamps and - 2014 Kawasaki KLX140L | Owners Manual - Page 48
MAINTENANCE AND ADJUSTMENT 47 the bolts and remove the air cleaner • Remove cover. the wing bolt, and take out the air cleaner • Remove element. j A. Air Cleaner Cover B. Bolts A. Air Cleaner Element B. Wing Bolt a clean, lint-free towel on the air cleaner • Cover housing to keep dirt from - 2014 Kawasaki KLX140L | Owners Manual - Page 49
48 MAINTENANCE AND ADJUSTMENT WARNING A clogged air cleaner may allow dirt and dust to enter the carburetor and the throttle may stick resulting in a hazardous operating condition. Clean the air filter according to the periodic maintenance chart; more often if the vehicle is used in extremely dusty - 2014 Kawasaki KLX140L | Owners Manual - Page 50
MAINTENANCE AND ADJUSTMENT 49 cause tearing. In this case, too much oil is better than too little. Finally pat the inside of the element with a paper towel to remove any excess oil. Before installation, check the element for damage such as tears, hardening, or shrinkage. If damaged, replace the - 2014 Kawasaki KLX140L | Owners Manual - Page 51
50 MAINTENANCE AND ADJUSTMENT an air cleaner element with its pointing end • Install facing toward the rear of the motorcycle. Oil Draining j the hose or plug to see if any oil or water • Inspect has run down. A. Pointing end the wing bolt. • Install Install the air cleaner cover. • Install the - 2014 Kawasaki KLX140L | Owners Manual - Page 52
MAINTENANCE AND ADJUSTMENT 51 Throttle Cable Inspect the throttle grip for smooth operation in all steering positions. Check and adjust the throttle cable in accordance with the Periodic Maintenance Chart. Check that the throttle grip has 2 ∼ 3 mm (0.08 ∼ 0.12 in.) of play and turns smoothly. - 2014 Kawasaki KLX140L | Owners Manual - Page 53
52 MAINTENANCE AND ADJUSTMENT the rubber boot. • Install the free play cannot be set by adjusting the upper • If cable adjuster, use the adjuster on the lower end the rubber boot off the top of the carburetor • Pull and make the necessary free play adjustment with the adjuster on the lower end of - 2014 Kawasaki KLX140L | Owners Manual - Page 54
MAINTENANCE AND ADJUSTMENT 53 if the throttle grip moves smoothly from full • Check open to close, and the throttle closes quickly and • • completely in all steering positions by the return spring. If not, check the throttle cable routing, grip free play, and cable damage. Then lubricate the - 2014 Kawasaki KLX140L | Owners Manual - Page 55
54 MAINTENANCE AND ADJUSTMENT the choke knob fully up and set it where the • Pull knob stops. the rubber boot off the adjuster, and adjust • Pull with the adjuster so that the knob can be pushed back with a finger. j A. Choke Knob A. Rubber Boot B. Adjuster ○ If you over-tighten the adjuster, it - 2014 Kawasaki KLX140L | Owners Manual - Page 56
MAINTENANCE AND ADJUSTMENT 55 Idle Speed The following procedure covers the idling adjustment, which should be performed whenever the idle speed is disturbed. the idling speed 1 350 ∼ 1 450 r/min (rpm) • Adjust by turning the idling adjusting screw. j Idling Adjustment • Thoroughly warm up the - 2014 Kawasaki KLX140L | Owners Manual - Page 57
56 MAINTENANCE AND ADJUSTMENT Clutch Clutch Lever Adjustment Proper clutch lever play is 2 ∼ 3 mm (0.08 ∼ 0.12 in.). Lever play increases with cable stretch and friction plate wear, requiring periodic adjustment. When the clutch lever play is out of specification, first try adjusting it at the - 2014 Kawasaki KLX140L | Owners Manual - Page 58
MAINTENANCE AND ADJUSTMENT 57 the locknut. • Tighten the engine, check that the clutch does not • Start slip and it releases properly. • Slide the dust cover back into place. Valve Clearance Valve and valve seat wear decreases valve clearance, upsetting valve timing. j WARNING Too much cable play - 2014 Kawasaki KLX140L | Owners Manual - Page 59
58 MAINTENANCE AND ADJUSTMENT Spark Arrester This vehicle is equipped with a spark arrester. It must be properly maintained to ensure its efficiency. In accordance with the Periodic Maintenance Chart, clean the spark arrester. • Remove the muffler end mounting bolts. j NOTICE The spark arrester - 2014 Kawasaki KLX140L | Owners Manual - Page 60
MAINTENANCE AND ADJUSTMENT 59 • Take off the spark arrester mounting bolts. • Remove the spark arrester. j A. Spark Arrester Mounting Bolts A. Spark Arrester B. Gasket a wire brush, remove the carbon off the inside • With of the spark arrester and muffler. the gasket to the new one. • Replace - 2014 Kawasaki KLX140L | Owners Manual - Page 61
60 MAINTENANCE AND ADJUSTMENT Drive Chain For safety and to prevent excessive wear, the drive chain must be checked, adjusted, and lubricated before riding. If the chain becomes badly worn or maladjusted - either too loose or too tight - it could jump off the sprockets or break. Chain Slack - 2014 Kawasaki KLX140L | Owners Manual - Page 62
MAINTENANCE AND ADJUSTMENT 61 addition to checking the slack, rotate the rear • In wheel to inspect the drive chain for damaged • rollers, loose pins and links and the sprockets for unevenly or excessively worn and damaged teeth. If there are any such defects, replace the drive chain and/or the - 2014 Kawasaki KLX140L | Owners Manual - Page 63
it if necessary. a new cotter pin through the axle, and • Install spread its ends. ter of the 21st pin. If the length exceeds the service limit, the chain should be replaced. Since overworn sprockets will cause a new chain to wear faster, inspect both the engine and rear sprockets whenever the - 2014 Kawasaki KLX140L | Owners Manual - Page 64
without a master link clip is installed at the factory. ○The drive system was designed for use with NOTE Chain Guide Wear Inspection inspect the drive chain guide and replace • Visually it if excessively worn or damaged. j a DAIDO D.I.D 428H (KLX140A: 122-link, KLX140B: 126-link) chain. For - 2014 Kawasaki KLX140L | Owners Manual - Page 65
64 MAINTENANCE AND ADJUSTMENT Chain Slipper Wear Inspection aged. inspect the front end of the chain slippers • Visually on the swingarm and replace them if worn or dam- Sprocket Wear Inspection Sprocket Tooth Wear j inspect the sprocket teeth and replace the • Visually sprocket if its teeth are - 2014 Kawasaki KLX140L | Owners Manual - Page 66
MAINTENANCE AND ADJUSTMENT 65 Lubrication of the drive chain is necessary after riding in the rain or mud, or any time the chain appears dry with a high quality lubricant for drive chains. Apply lubricant to the side of the rollers so that it will penetrate to the rollers and bushings. Wipe off any - 2014 Kawasaki KLX140L | Owners Manual - Page 67
66 MAINTENANCE AND ADJUSTMENT the handlebar holder nuts, turn the han• Loosen dlebar holders 180°, and securely tighten the nuts. the gap at the rear with the punch mark on • Align the handlebar. j A. Handlebar Holders B. Handlebar Holder Nuts the handlebar on the handlebar holders. • Put Mount - 2014 Kawasaki KLX140L | Owners Manual - Page 68
MAINTENANCE AND ADJUSTMENT 67 the front brake for the proper brake effect, • Check or no brake drag. Brakes Disc and disc pad wear is automatically compensated for and has no effect on the brake lever or pedal action. There are no parts on the brakes that require adjustment except brake lever - 2014 Kawasaki KLX140L | Owners Manual - Page 69
68 MAINTENANCE AND ADJUSTMENT the braking power and check that there is no • Test brake drag. NOTICE Do not spill brake fluid onto any painted surface. Do not use fluid from a container that has been left open or that has been unsealed for a long time. Check for fluid leakage around the brake - 2014 Kawasaki KLX140L | Owners Manual - Page 70
MAINTENANCE AND ADJUSTMENT 69 the brake fluid in the front or rear reservoir is be• If low the minimum level line, check for fluid leaks in the brake line and fill the reservoir to the maximum level line. (The step inside the front and rear reservoirs indicate the maximum level.) j A. Rear - 2014 Kawasaki KLX140L | Owners Manual - Page 71
70 MAINTENANCE AND ADJUSTMENT Inspect the brake pads for wear in accordance with the Periodic Maintenance chart. If the thickness of any pad in any (front or rear) brake caliper is less than 1 mm (0.04 in.), have both pads in the caliper replaced as a set. Pad replacement should be done by an - 2014 Kawasaki KLX140L | Owners Manual - Page 72
MAINTENANCE AND ADJUSTMENT 71 Steering The steering should always be kept adjusted so that the handlebar will turn freely but not have excessive play. Steering Adjustment Steering Inspection check the steering adjustment, raise the front • To wheel off the ground using a jack (special tool). the - 2014 Kawasaki KLX140L | Owners Manual - Page 73
72 MAINTENANCE AND ADJUSTMENT the steering stem locknut with a stem nut • Turn wrench (special tool) to obtain the proper adjustment. • Install the handlebar. j ○Tighten the two clamp bolts alternately two times to ensure even tightening torque. the handlebar and apply the specified • Install - 2014 Kawasaki KLX140L | Owners Manual - Page 74
oil seal, leading to an oil leak. Clean the sliding surface after each ride. the brake lever, pump the front fork back • Holding and forth manually to check for smooth operation. inspect the front fork for oil leakage, scor• Visually ing or scratches on the outer surface of the inner necessary - 2014 Kawasaki KLX140L | Owners Manual - Page 75
74 MAINTENANCE AND ADJUSTMENT Rear Suspension Rear Shock Absorber Inspection j NOTICE Sticking muds or dusts on the sliding surface of the rear shock absorber could damage to the oil seal, leading to an oil leak. Clean the sliding surface after each ride. the seat down and up by 4 or 5 times, and - 2014 Kawasaki KLX140L | Owners Manual - Page 76
MAINTENANCE AND ADJUSTMENT 75 Rebound Damping Adjuster Settings NOTICE Do not force the rebound and compression damping force adjusters beyond the fully seated position, or the adjusting mechanism may be damaged. j To adjust the rear shock absorber compression damping, turn the compression - 2014 Kawasaki KLX140L | Owners Manual - Page 77
76 MAINTENANCE AND ADJUSTMENT Compression Damping Adjuster Setting The compression damping adjuster is a 4-stage adjustable. The rear shock absorber can be adjusted by changing the spring preload for various riding and loading conditions. If the spring action feels too soft or too stiff, have it - 2014 Kawasaki KLX140L | Owners Manual - Page 78
MAINTENANCE AND ADJUSTMENT 77 Wheels Tire air pressure affects traction, handling, and tire life. Adjust the tire air pressure to suit track conditions and rider preference, but keep it close within the recommended range. To check the tire air pressure, remove the air valve cap, and make sure to - 2014 Kawasaki KLX140L | Owners Manual - Page 79
78 MAINTENANCE AND ADJUSTMENT There is a bead protector on the both wheels. The bead protector prevents the tire and tube from slipping on the rim and damaging the valve stem. Valve stem damage may cause the tube to leak, necessitating tube replacement. In order to keep the tire and tube in position - 2014 Kawasaki KLX140L | Owners Manual - Page 80
MAINTENANCE AND ADJUSTMENT 79 Rim Runout j A. Axial Rim Runout Measurement A. Rim B. Radial Runout C. Axial Runout Rim Runout Maximum Limit Axial 2.0 mm (0.08 in.) Radial A. Radial Rim Runout Measurement - 2014 Kawasaki KLX140L | Owners Manual - Page 81
80 MAINTENANCE AND ADJUSTMENT Hoses Inspection Check the brake and fuel hoses for cracks or deterioration, and the connections for looseness in accordance with the Periodic Maintenance Chart. Inspect the brake hose and fittings for deterioration, cracks and signs of leakage by bending or twisting - 2014 Kawasaki KLX140L | Owners Manual - Page 82
MAINTENANCE AND ADJUSTMENT 81 Battery The battery installed in this motorcycle is a sealed type, so it is not necessary to check the battery electrolyte level or add distilled water. However, in order to maximize battery life and ensure that it will provide the power needed to start the motorcycle - 2014 Kawasaki KLX140L | Owners Manual - Page 83
do not drive for four weeks or more, disconnect the battery from the vehicle. ○If you charge the sealed battery, never fail to observe the instructions shown in the label on the battery. NOTE - 2014 Kawasaki KLX140L | Owners Manual - Page 84
MAINTENANCE AND ADJUSTMENT 83 WARNING Battery posts, terminals and related accessories contain lead and lead compounds, chemicals known to the State of California to cause cancer and reproductive harm. Wash hands after handling. • Remove the bolt and remove the seat. j Battery Removal • Remove - 2014 Kawasaki KLX140L | Owners Manual - Page 85
84 MAINTENANCE AND ADJUSTMENT the cables from the battery, first from • Disconnect the (-) terminal and then the (+) terminal. Battery Installation j the battery in the battery case. • Place the battery holder and tighten the bolts. • Install Connect the red cable to the (+) terminal, and then • - 2014 Kawasaki KLX140L | Owners Manual - Page 86
MAINTENANCE AND ADJUSTMENT 85 Fuse The main fuse (10 A) is mounted on the starter relay under the seat. If a fuse fails during operation, inspect the electrical system to determine the cause, and then replace it with a new fuse of proper amperage. WARNING Substituting fuses can cause wiring to - 2014 Kawasaki KLX140L | Owners Manual - Page 87
86 MAINTENANCE AND ADJUSTMENT Tightening Torques of Nuts and Bolts Before the first ride of each day of operation, check the tightness of the nuts and bolts shown below. Check also that all cotter pins are in place and in good condition. j Location of nuts and bolts 1. 2. 3. 4. 5. 6. 7. 8. 9. - 2014 Kawasaki KLX140L | Owners Manual - Page 88
MAINTENANCE AND ADJUSTMENT 87 j 18. 19. 20. 21. 22. 23. 24. 25. Spark Plug Cylinder Head Bolts Muffler End Mounting Bolts Spark Arrester Mounting Bolts Rear Master Cylinder Mounting Bolts Steering Head Nut Front Master Cylinder Mounting Bolts Rear Brake Disk Mounting Bolts 26. 27. 28. 29. 30. 31 - 2014 Kawasaki KLX140L | Owners Manual - Page 89
88 MAINTENANCE AND ADJUSTMENT Tighten all nuts and bolts to the proper torque using an accurate torque wrench. An insufficiently tightened nut or bolt may become damaged or fall out, possibly resulting in damage to the motorcycle and injury to the rider. An overtightened nut or bolt may become - 2014 Kawasaki KLX140L | Owners Manual - Page 90
MAINTENANCE AND ADJUSTMENT 89 Part Name Brake Caliper Bolts Brake Disc Mounting Bolts Engine Bracket Nut/Bolt Engine Mounting Bolts Front Axle Nut Front Fork Clamp Bolts Handlebar Clamp Bolts Side Stand Bolt Side Stand Nut Swingarm Pivot Shaft Nut Rear Axle Nut Rear Brake Pedal Pivot Bolt Rear Frame - 2014 Kawasaki KLX140L | Owners Manual - Page 91
90 MAINTENANCE AND ADJUSTMENT Part Name Rear Shock Absorber Lower Nut Rear Shock Absorbor Lower Bolt Spokes Steering Stem Head Nut Steering Stem Locknut UNI-TRAK® Arm Bolt UNI-TRAK® Rod Bolts Rear Sprocket Nuts Front Brake Master Cylinder Clamp Bolts Rear Brake Master Cylinder Mounting Bolts N·m 29 - 2014 Kawasaki KLX140L | Owners Manual - Page 92
such as ammo- j WARNING Build-up of debris or flammable material in and around the vehicle chassis, engine, and exhaust can cause mechanical problems and increase the risk of fire. When operating the vehicle in conditions that allow debris or flammable material to collect in and around the - 2014 Kawasaki KLX140L | Owners Manual - Page 93
92 MAINTENANCE AND ADJUSTMENT washing, rinse your motorcycle thoroughly • After with clean water to remove any residue (residue the boot is damaged, replace it with a new one. • If If the boot is not positioned in the groove correctly, replace it in the correct position. j • • from the detergent - 2014 Kawasaki KLX140L | Owners Manual - Page 94
months or as conditions require. Avoid surfaces with "satin" or "flat" finishes. Always use nonabrasive products and apply them according to the instructions on the container. To clean the semi-gloss finish; Painted Surfaces Chrome and uncoated aluminum parts can be treated with a chrome/aluminum - 2014 Kawasaki KLX140L | Owners Manual - Page 95
94 MAINTENANCE AND ADJUSTMENT If your motorcycle has leather accessories, special care must be taken. Use a leather cleaner/treatment to clean and care for leather accessories. Washing leather parts with detergent and water will damage them, shortening their life. Vinyl parts should be washed with - 2014 Kawasaki KLX140L | Owners Manual - Page 96
MAINTENANCE AND ADJUSTMENT 95 brake pedal • Rear brake rod joints • Rear • Foot peg Apply an aerosol cable lubricant with a pressure lubricator on all cables: Clutch cable Throttle cable Hot starter cable Cable Lubrication • • • j - 2014 Kawasaki KLX140L | Owners Manual - Page 97
96 MAINTENANCE AND ADJUSTMENT end of clutch cable • Upper Upper end of throttle cable • Upper end • Shift pedal of hot starter cable • Apply grease to the following points: Lubricate the drive chain after riding through rain or on wet track, or any time that the chain appears dry with a high quality - 2014 Kawasaki KLX140L | Owners Manual - Page 98
TROUBLESHOOTING GUIDE 97 TROUBLESHOOTING GUIDE ○This troubleshooting guide is not exhaustive and does not give every possible cause for each problem listed. It is meant simply as a quick guide to assist you in troubleshooting for some of the more common difficulties. Starting failure or - 2014 Kawasaki KLX140L | Owners Manual - Page 99
98 TROUBLESHOOTING GUIDE Clutch not operating smoothly - Clutch slipping Friction plate worn Clutch springs weak Shock absorption too hard Tire air pressure too high j • • Clutch doesn't disengaging properly - 2014 Kawasaki KLX140L | Owners Manual - Page 100
STORAGE 99 STORAGE Before Storage When the motorcycle is to be stored for any length of time, it should be prepared for storage as follows. Clean the entire vehicle thoroughly. Run the engine for about five minutes to warm the oil, then stop it and drain the engine oil. WARNING Gasoline is - 2014 Kawasaki KLX140L | Owners Manual - Page 101
100 STORAGE the motorcycle to keep dust and dirt away • Cover from it. After Storage the plastic bag from the muffler. • Remove Make sure the spark plug is tight. • j ○Fit the plug cap securely onto the spark plug, and pull the cap lightly to make sure that it is properly installed. the fuel tank - 2014 Kawasaki KLX140L | Owners Manual - Page 102
ENVIRONMENTAL PROTECTION 101 ENVIRONMENTAL PROTECTION Kawasaki subscribes to the guidelines of Tread Lightly! a program dedicated to protecting the great outdoors through education and fostering responsible enjoyment of public lands. When using your Kawasaki motorcycle, please follow these Tread - 2014 Kawasaki KLX140L | Owners Manual - Page 103
102 WIRING DIAGRAM WIRING DIAGRAM - 2014 Kawasaki KLX140L | Owners Manual - Page 104
Am I Responsible For? You are responsible for maintaining your vehicle according to the maintenance schedule shown in this owner's manual. You are responsible for notifying your dealer immediately if there is a problem, and you, as the owner, will need to authorize the dealer to inspect the unit. - 2014 Kawasaki KLX140L | Owners Manual - Page 105
, be sure to record your service in the Maintenance Record section of this Owner's Manual. Keep all receipts for the service and/or items necessary to perform vehicle if there is a failure, investigating the cause of the problem, and getting any needed authorization from Kawasaki if the repair is - 2014 Kawasaki KLX140L | Owners Manual - Page 106
by a Kawasaki dealer. What if I am not Satisfied With My Warranty Service? If you aren't satisfied with your dealership's repair work or operations, dealership and work with it in resolving your problem. Want to Contact Kawasaki? This owner's manual should answer most of your questions about your - 2014 Kawasaki KLX140L | Owners Manual - Page 107
106 YOUR WARRANTY/OWNER SATISFACTION Please send your correspondence to: Consumer Services Kawasaki Motors Corp., U.S.A. P.O. Box 25252 Santa Ana, CA 92799-5252 (949) 460-5688 - 2014 Kawasaki KLX140L | Owners Manual - Page 108
it finds that a safety defect exists in a group of vehicles, if may order a recall and remedy campaign. However, the CPSC cannot become involved in individual problems between you, your dealer, or Kawasaki Motors Corporation, U.S.A. - 2014 Kawasaki KLX140L | Owners Manual - Page 109
108 MAINTENANCE RECORD MAINTENANCE RECORD Owner Name...Address ...Phone Number ...Engine Number ...Vehicle Number...Selling Dealer Name ...Address ...Phone Number ...Warranty Start Date ...Note: Keep this information and a spare key in a secure location. Date Odometer Reading Maintenance Performed - 2014 Kawasaki KLX140L | Owners Manual - Page 110
MAINTENANCE RECORD 109 Date Odometer Reading Maintenance Performed Dealer Name Dealer Address - 2014 Kawasaki KLX140L | Owners Manual - Page 111
110 MAINTENANCE RECORD Date Odometer Reading Maintenance Performed Dealer Name Dealer Address - 2014 Kawasaki KLX140L | Owners Manual - Page 112
MAINTENANCE RECORD 111 Date Odometer Reading Maintenance Performed Dealer Name Dealer Address - 2014 Kawasaki KLX140L | Owners Manual - Page 113
112 MAINTENANCE RECORD Date Odometer Reading Maintenance Performed Dealer Name Dealer Address - 2014 Kawasaki KLX140L | Owners Manual - Page 114
MAINTENANCE RECORD 113 Date Odometer Reading Maintenance Performed Dealer Name Dealer Address - 2014 Kawasaki KLX140L | Owners Manual - Page 115
-
 1
1 -
 2
2 -
 3
3 -
 4
4 -
 5
5 -
 6
6 -
 7
7 -
8
-
9
-
10
-
11
-
12
-
13
-
14
-
15
-
16
-
17
-
18
-
19
-
20
-
21
-
22
-
23
-
24
-
25
-
26
-
27
-
28
-
29
-
30
-
31
-
32
-
33
-
34
-
35
-
36
-
37
-
38
-
39
-
40
-
41
-
42
-
43
-
44
-
45
-
46
-
47
-
48
-
49
-
50
-
51
-
52
-
53
-
54
-
55
-
56
-
57
-
58
-
59
-
60
-
61
-
62
-
63
-
64
-
65
-
66
-
67
-
68
-
69
-
70
-
71
-
72
-
73
-
74
-
75
-
76
-
77
-
78
-
79
-
80
-
81
-
82
-
83
-
84
-
85
-
86
-
87
-
88
-
89
-
90
-
91
-
92
-
93
-
94
-
95
-
96
-
97
-
98
-
99
-
100
-
101
-
102
-
103
-
104
-
105
-
106
-
107
-
108
-
109
-
110
-
111
-
112
-
113
-
114
-
115
 |
 |
