TASCAM DP-03SD Owners Manual - Page 40
Location marks, To set a location mark
 |
View all TASCAM DP-03SD manuals
Add to My Manuals
Save this manual to your list of manuals |
Page 40 highlights
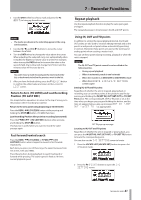
7 - Recorder Functions 2 Turn the DATA wheel to change the value above the cursor. When adjusting, the value will carry over automatically when it reaches the highest or lowest value in a field. For example, when turning the DATA wheel to increase the value in the seconds field, the number will change from 59 to 0 and the minutes value will increase by one. The time display blinks when using the DATA wheel. The blinking stops when the recorder moves to the displayed position. 3 Press the HOME button to move to a different time division and turn the DATA wheel to change the value. 4 After setting the desired time value, press the PLAY (Á) button to start playback from that position. Location marks The unit can store up to 999 location marks per song! Use these to mark the start of verses, vocal entry points, etc. To set a location mark While stopped, recording or playing, press and hold the LOCATE LIST [LOCATE SET] button at the point where you want the new mark. The mark number is shown next to the icon on the Home Screen. The mark number you see is the one at or immediately before the current position. In the example below, 001 indicates thefirst mark in the selected song. NOTE Marks are numbered in the order you enter them, not according to their position in the song. Mark 005 can therefore appear in a song before mark 001. To move to a location mark Press the LOCATE LIST [LOCATE SET] to show the location mark list: NOTE • Press the F1 (EXIT), LOCATE LIST [LOCATE SET] or HOME button to return to the Home Screen. • If the current song does not have any location marks, the location mark list will not open. A No Locate Mark pop-up appears briefly and then the I/O SETTING screen opens. To delete a location mark You can erase a location mark when the recorder is stopped. 1 Press the LOCATE LIST [LOCATE SET] button to show the location mark list. 2 Use the DATA wheel to select a mark and press the F2 (EDIT) to bring up the edit screen. 3 Press the F2 (DEL) button to erase that mark and return to the LOCATE LIST screen. 4 Press the F1 (EXIT), LOCATE LIST [LOCATE SET] or HOME button to return to the Home Screen. NOTE • The marks are shown in the order they appear in the song, not by number. • This operation cannot be undone. Be certain before executing it. To edit a location mark If you made a mistake when you entered a location mark, you can change the time of the mark. TIP This is sometimes called "trimming". 1 Press the LOCATE LIST [LOCATE SET] button to show the location mark list. Use the DATA wheel to choose a mark (they're listed in the order they appear in the song) and press F4 (JUMP) to jump to that mark. 40 TASCAM DP-03SD
-
 1
1 -
2
-
3
-
4
-
5
-
6
-
7
-
8
-
9
-
10
-
11
-
12
-
13
-
14
-
15
-
16
-
17
-
18
-
19
-
20
-
21
-
22
-
23
-
24
-
25
-
26
-
27
-
28
-
29
-
30
-
31
-
32
-
33
-
34
-
 35
35 -
 36
36 -
 37
37 -
 38
38 -
 39
39 -
 40
40 -
 41
41 -
 42
42 -
 43
43 -
 44
44 -
 45
45 -
46
-
47
-
48
-
49
-
50
-
51
-
52
-
53
-
54
-
55
-
56
-
57
-
58
-
59
-
60
-
61
-
62
-
63
-
64
-
65
-
66
-
67
-
68
-
69
-
70
-
71
-
72
-
73
-
74
-
75
-
76
 |
 |
