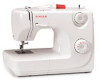
Singer Prelude 8280 User Manual
Singer Prelude 8280 Manual
 |
View all Singer Prelude 8280 manuals
Add to My Manuals
Save this manual to your list of manuals |
Singer Prelude 8280 manual content summary:
- Singer Prelude 8280 | User Manual - Page 1
Instruction Manual 8280 Manual de Instrucciones Manuel d'Instruction - Singer Prelude 8280 | User Manual - Page 2
area, such as threading needle, changing needle, threading bobbin, or changing presser foot, and the like. 10. Always unplug sewing machine from the electrical outlet when removing covers, lubricating, or when making any other user servicing adjustments mentioned in the instruction manual. 11. Never - Singer Prelude 8280 | User Manual - Page 3
de coser de la toma de corriente cuando se retiren tapas, se engrase o cuando se haga cualquier otro ajuste por el usuario mencionado en el manual de instrucciones. 11. Nunca dejar caer ni insertar ningún objeto a través de ninguna abertura. 12. No utilizar la máquina en exteriores. 13. No hacer - Singer Prelude 8280 | User Manual - Page 4
machine au revendeur agréé ou au centre de service le plus proche pour tout examen, réparation, réglage électrique ou mécanique. 4. N'utilisez jamais la machine la machine avant d'enlever des couvercles, de lubrifier la machine ou de faire tout réglage spécifié dans le manuel d'instructions. 11 - Singer Prelude 8280 | User Manual - Page 5
instruction book, step by step, seated at your machine. To ensure that you are always provided with the most modern sewing capabilities, the manufacturer reserves the right to change the appearance, design or accessories of this sewing machine when considered necessary. SINGER este manual de - Singer Prelude 8280 | User Manual - Page 6
in sewing table 8 Connecting machine to power source 10 Changing the bulb 12 Two-step presser foot lifter 14 Adjusting presser foot pressure 14 Attaching the presser foot holder 16 Winding the bobbin 18 Inserting the bobbin 20 Inserting and changing needles 22 Threading the upper thread 24 - Singer Prelude 8280 | User Manual - Page 7
E Indice Detalles de la máquina 3/5 Accessories 7 Instalación de la mesa de coser convertible 9 Conexión de la máquina a la fuente de alimentación eléctrica ....11 Cambio de la bombilla 13 Elevador del prensatelas de dos tiempos 15 Ajuste de la presión del prensatelas 15 Montaje del - Singer Prelude 8280 | User Manual - Page 8
de la machine à une source d'alimentation........11 Chagement de l'ampoule 13 Levier de levage du pied presseur à deux niveaux 15 Réglage de la pression du pied-presseur 15 Fixation du support de Nervure traditionnele 67 Froncer 69 Soutache 71 Entretien de la machine 73 Guide de dépannage 76 - Singer Prelude 8280 | User Manual - Page 9
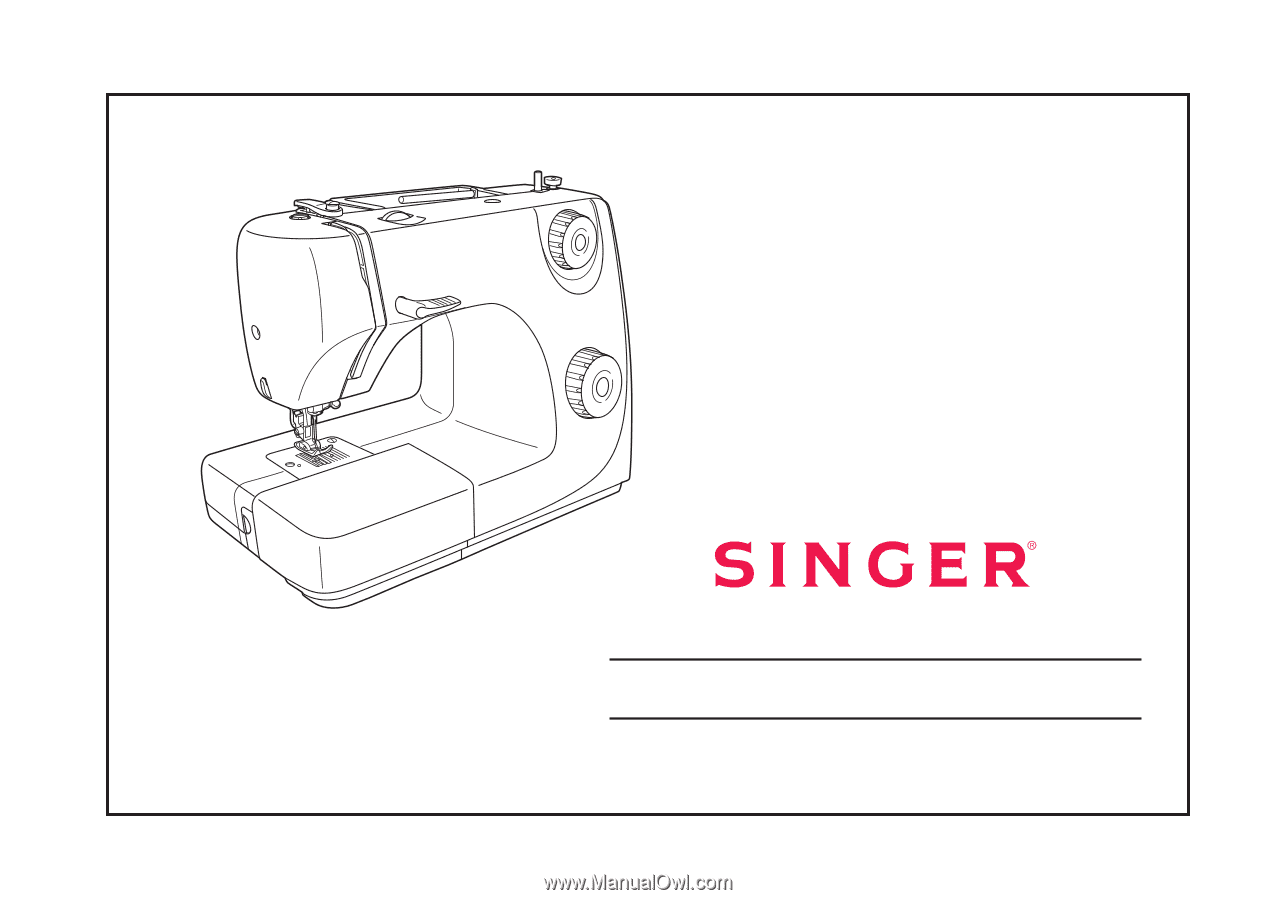
7 12 GB Principal parts of the machine 8 1. Thread tension dial 9 2. Presser foot pressure adjustment 3. Thread take-up lever 10 4. Thread cutter 5. Presser foot 6. Needle plate 7. Removable sewing table/ accessory storage 11 8. Reverse sewing lever 9. Bobbin stopper 10. Stitch length - Singer Prelude 8280 | User Manual - Page 10
9. Tapón de bobina 10. Disco de largo de puntada 11. Disco selector de dibugo 12. Enhebrador automático (optativo) F Composants principaux de la machine à coudre 1. Molette de commande de tension 2. Commande de réglage de pression du pied-presseur 3. Manette de relevage du fil 4. Coupe-fil 5. Pied - Singer Prelude 8280 | User Manual - Page 11
GB Principal parts of the machine 13 18 13. Horizontal spool pin 14 19 14. Bobbin winder 15. Handwheel 20 16. Power and light switch 15 21 17. Main plug socket 18. Bobbin thread guide 22 19. Upper thread guide 20. Face plate 21. Handle 22. Presser foot lever 16 23. Foot speed - Singer Prelude 8280 | User Manual - Page 12
la velocidad de arrastre 24.Cable de alimentación F Composants principaux de la machine à coudre 13. Axe horizontal et porte-bobine 14. Bobineur 15. Prise de branchement du fil d'alimentation 18. Butée du bobineur 19.Guide-fil supérieur 20.Plaque de front 21.Poignée 22.Levier de levage du presse- - Singer Prelude 8280 | User Manual - Page 13
foot b. Zipper foot c. Buttonhole foot d. Button sewing foot e. L-screwdriver f. Seam ripper/ brush g. Pack of needles h. Bobbin (3x) i. Seam guide j. Darning plate k. Spool holder Optional accessories (2) (These 6 accessories are not supplied with this machine; they are however available as special - Singer Prelude 8280 | User Manual - Page 14
coudre g. Étui à aiguilles h. Canette (3x) i. Guide de couture j. Plaquette de reprisage k. Support de bobine Accessoires optionnels (2) (Ces 6 accessoires ne sont pas fournis avec la machine. cependant, ils sont disponibles chez votre dépositaire Singer) l. Pied pour courtepointe m.Pied pour surfil - Singer Prelude 8280 | User Manual - Page 15
GB Installing the snap-in sewing table Keep the snap-in sewing table horizontal, and push it in the direction of the arrow. (1) 1 The inside of the snap-in sewing table can be utilized as an accessory box. To open, lift up at the point of the arrow. (2) 2 8 - Singer Prelude 8280 | User Manual - Page 16
E Instalación de la mesa de coser convertible Mantenga horizontal la mesa de coser convertible y empújela en la dirección de la flecha. (1) F Installation de la tablette de couture amovible Maintenir la tablette en position horizontale et la pousser dans la direction de la flèche. (1) El interior - Singer Prelude 8280 | User Manual - Page 17
is not in use. Foot control The foot control pedal regulates the sewing speed. (3) Attention: Consult a qualified electrician if in doubt as to connect machine to power source. Unplug power cord when machine is not in use. The foot control must be used with the appliance by KD-1902 (110-120V area - Singer Prelude 8280 | User Manual - Page 18
La pédale de commande contrôle la vitesse de fonctionnement de la machine. (3) Attention: Consulter un électricien qualifié en cas de doute pour brancher la machine. Débrancher la machine quand celle-ci n'est pas en service. Le pied de contrôle doit être obligatoirement utilisé avec les apareils - Singer Prelude 8280 | User Manual - Page 19
B A 1 C 2 GB Changing the bulb Disconnect the machine from the power supply by removing the plug from the main socket! Replace bulb with same type the bulb and install a new one (C). (2) - Replace the face plate and tighten screw. Should there be any problem, ask your local dealer for advice. 12 - Singer Prelude 8280 | User Manual - Page 20
- Volver a colocar la placa frontal y apretar el tornillo. Si surge algún problema, consulte con su distribuidor local. F Changement de l'ampoule Débrancher la machine de l'alimentation électrique en enlevant la prise! Remplacer cette dernière avec une ampoule de 10 watts (110120V area) ou 15 watts - Singer Prelude 8280 | User Manual - Page 21
GB Two-step presser foot lifter When sewing several layers or thick fabrics, the presser foot can be raised to a high rise position for easy positioning of the work. (A) A Adjusting presser foot pressure The presser foot pressure of the machine has been pre-set and requires no particular - Singer Prelude 8280 | User Manual - Page 22
E Elevador del prensatelas de dos tiempos Cuando se cose varias capas de tela gruesa, el prensatelas puede elevarse a una posición alta para facilitar la colocación de la labor (A). F Levier de levage du pied presseur à deux niveaux Lorsque vous cousez plusieurs épaisseurs de tissus épais, le pied- - Singer Prelude 8280 | User Manual - Page 23
Raise the presser foot. (3) Raise the lever (e) and the foot disengages. Attaching the seam guide Attach the seam guide (g) in the slot as illustrated. Adjust according to need for hems, pleats, etc. (4) Attention: Turn power switch to off ("O") when carrying out any of the above operations! 4 16 - Singer Prelude 8280 | User Manual - Page 24
de dobladillos, pliegues, etc. (4) F Fixation du support de pied presseur Soulever la tige du pied-presseur (a) avec le dispositif de gager le pied-presseur (3). Lever le pied-presseur. Fixation du guide de couture Placer le guide de couture dans l'encoche (g) tel qu'illustré. Régler - Singer Prelude 8280 | User Manual - Page 25
(6). - Step on foot control pedal (7). 1 - Cut thread (8). - Press bobbin to left (9) and remove. 2 Please Note: When the bobbin winder spindle is in "bobbin winding" position, the machine will not sew and the hand wheel will not turn. To start sewing, push the bobbin winder spindle to the left - Singer Prelude 8280 | User Manual - Page 26
dévidoir vers la gauche (9) et retirez la canette. Veuillez noter: Si l'axe du dévidoir se trouve en position de remplissage de la canette (=à droite), la machine ne coud pas et le volant ne tourne pas. Pour reprendre la couture, repoussez l'axe du dévidoir vers la gauche (position de couture). 19 - Singer Prelude 8280 | User Manual - Page 27
GB Inserting the bobbin a When inserting or removing the bobbin, the needle must be fully raised. - Open the hinged cover (1) - Pull the bobbin case tab (a) and remove the bobbin case. (2) 1 2 - Hold the bobbin case with one hand. Insert the bobbin so that the thread runs in a clockwise - Singer Prelude 8280 | User Manual - Page 28
E Colocación de la canilla La aguja tiene que estar siempre arriba del todo al poner y sacar la canilla. - Abrir la tapa con charnela. (1) - Abrir tapa de la caja de bobina (a) y quitar la caja de bobina. (2) - Sujetar el porta-canilla con una mano. Poner la canilla de manera que el hilo se devane - Singer Prelude 8280 | User Manual - Page 29
especially if it is showing signs of wear and causing problems. For best sewing results always use SINGER Brand Needles. Insert the needle as illustrated as follows: A. Loosen the needle clamp screw and tighten again after inserting the new needle. (1) B. The flat side of the shaft should be towards - Singer Prelude 8280 | User Manual - Page 30
aguja nueva. (1) B. El lado plano de eje debe quedar hacia la parte posterior. C/D. Inserte la aguja lo más arriba posible. Atención: Gire el obtenir les meilleurs résultats, toujours utiliser des aiguilles fabriquées par Singer. Insérer l'aiguille tel qu'illustré ci-dessous: A. Desserrer - Singer Prelude 8280 | User Manual - Page 31
as by not doing so several sewing problems could result. 1 - Start by raising the needle to its highest point (1), and also raise the presser foot to release the tension discs. Note: For safety, it is strongly suggested you turn off the power before threading. - Lift up the spool pin. Place - Singer Prelude 8280 | User Manual - Page 32
la parte superior de ser enhebranda desde la parte frontal hacia trasera. Tire guide-fil supérieur. (3) Guider le fil autour du guide et le guide-fil (3) le fil dans le guide-fil horizontal qui se machine. Coupez le fil à la longueur désirée à l'aide du coupe-fil incorporé. (7) Note: Si votre machine - Singer Prelude 8280 | User Manual - Page 33
your machine has this option use the following instructions: B - Raise the needle to its highest position. A C - Press lever (A) down as far as it will go. B D C D - The threader automatically swings to the threading position (B). - Pass thread around thread guide (C). - Pass the thread in - Singer Prelude 8280 | User Manual - Page 34
desde la parte inferior a machine est équipée de cette option, suivez les instructions ce-dessous: - Relever l'aiguille à la position la plus élevée. - Appuyer sur (A) le plus que possible. - L'enfileur coudra automatiquement à la position d'enfilage (B). - Passer le fil au tour du guide - Singer Prelude 8280 | User Manual - Page 35
dial to lower number. D. Normal thread tension for zig zag and decorative sewing. Correct thread tension is when a small amount of the upper thread appears on the bottom side of fabric. 1 2 Lower thread tension To test the bobbin thread tension, remove the bobbin case and bobbin and hold it by - Singer Prelude 8280 | User Manual - Page 36
E Tensión del hilo Tensión del hilo superior Adjuste de la tensión del hilo básica: "4" Para aumentar la tensión, girar el disco al siguiente número más alto. Para reducir la tensión, girar el disco al siguiente número más bajo. A. Tensión normal del hilo para cosido de puntos rectos. B. Tensión - Singer Prelude 8280 | User Manual - Page 37
Note: If it is difficult to raise the bobbin thread, check to make sure the thread is not trapped by the hinged cover or the Removable Sewing Table. 1 Gently pull on the upper thread to bring the bobbin thread up through the needle plate hole (2). Lay both threads to the back under the presser foot - Singer Prelude 8280 | User Manual - Page 38
hilo uperior para llevar el hilo de la canilla hacia arriba a través del orificio de la placa de la aguja (2). Dejar ambos hilos en la parte posterior bajo el prensatelas (3). Tirer doucement vers le haut sur le fil supérieur de la bobine pour le faire passer au travers de l'orifice - Singer Prelude 8280 | User Manual - Page 39
the machine will sew forwards again. (1) Removing the work Turn the handwheel counterclockwise to bring the thread take up lever to its highest position, raise the presser foot and remove work behind the needle and presser foot. (2) Cutting the thread Pull the threads behind the presser foot. Guide - Singer Prelude 8280 | User Manual - Page 40
la fin d'une couture, mettre en position basse la commande d'inversion de couture. Faire quelques points en sens inverse. Lâcher la commande et la machine reprend la couture vers l'avant (A). (1) Cómo sacar la labor Gire el volante en sentido contrario a las agujas del reloj para llevar la palanca - Singer Prelude 8280 | User Manual - Page 41
IMPORTANT: Match needle size to thread size and weight of fabric. NEEDLE, FABRIC SELECTION NEEDLES EXPLANATION SINGER 2020 Standard sharp needles. Sizes range thin to large. 9 (70) to 18 (110). SINGER 2045 Semi-ball point needle, scarfed. 9 (70) to 18 (110). SINGER 2032 Leather needles. 12 (80 - Singer Prelude 8280 | User Manual - Page 42
majores resultados. Use siempre el mismo hilo en el las partes superior e inferior. 18(110) Tejidos de lana cardada gruesos peso del la tela. SELECCIÓN DE AGUJA Y DE TELA AGUJAS EXPLICACION TIPO DE TEJIDO SINGER 2020 Agujas de afilado normal. Gama de tamaño Telas de tejido normal - lana. - Singer Prelude 8280 | User Manual - Page 43
de correspondance de l'aiguille, du tissu et du fil GUIDE DE SÉLECTION DE L'AIGUILLE, DU TISSU ET DU FIL poids du tissu. SÉLECTION DE L'AIGUILLE ET DU TISSU AIGUILLES EXPLICATIONS TYPE DE TISSU SINGER 2020 Aiguille pointue réglementaire. Tissus naturels tissés-laine, coton, soie, etc. La - Singer Prelude 8280 | User Manual - Page 44
37 - Singer Prelude 8280 | User Manual - Page 45
GB How to choose your pattern To select a stitch, simply turn the pattern selector dial. a b The pattern selector dial may be turned in either direction. The following page shows the recommended range of stitch lengths. Adjust the stitch length with the stitch length dial according to the - Singer Prelude 8280 | User Manual - Page 46
E Cómo seleccionar su dibujo? Para punto recto de aguja central, seleccione el dibujo " " con el disco selector de dibujo. Ajuste el largo de la puntada con el disco correspondiente. Puede elegir la posición izquierda de la aguja, seleccionando el dibujo " ". Para punto en zig-zag, seleccione el - Singer Prelude 8280 | User Manual - Page 47
stitching Turn the stitch selection dial so that the pointer is set to the straight stitch position. Generally speaking, the thicker the fabric, thread and needle, the longer the stitch should be. For a fine stitch set length at "1" or "2". For gathering set stitch length to "4". 4 3 2 1 0.5 321 40 - Singer Prelude 8280 | User Manual - Page 48
Para plizados, seleccione la longitud del punto "4". F Couture au point droit Tournez le sélecteur de point jusqu'à ce que le repère sur la machine coïncide avec la position du point droit. Choisissez votre position d'aiguille : soit la position centrale, soit la position droite. En général, plus - Singer Prelude 8280 | User Manual - Page 49
1 4 3 2 1 0.5 321 2 4 0 GB Zig-zag stitching Turn the pattern selector dial to " ". (1) Function of stitch length dial while zigzaging The density of zigzag stitches increase as the setting of stitch length dial approaches "0". Neat zigzag stitches are usually achieved at "2.5" or below. Dense - Singer Prelude 8280 | User Manual - Page 50
E Punto de zig-zag Gira el botón selector de puntos a " ". (1) Función del disco del largo de la puntada mientras se realiza el zig-zag La densidad de las puntadas en zig-zag aumenta cuando el ajuste del disco de largo de la puntada se aproxima a "0". Las puntadas en zig-zag mejor ejecutadas se - Singer Prelude 8280 | User Manual - Page 51
the fabric with the top edge of the hem extending about 5 mm. (1/5") to the right side of the folded fabric. Start to sew slowly on the fold, making sure the needle touches slightly the folded top to catch one or two fabric threads (2). Unfold the fabric when hemming is completed and press. 44 - Singer Prelude 8280 | User Manual - Page 52
E Dobladillo / Punto de lencería Para dobladillos, cortinas, pantalones, faldas, etc. Haga un dobladillo para telas elásticas, posición en disco selector de dibujo. Hage un dobladillo/ Punto de lencería para telas firmes posición en el disco selector de dibujo. Nota: Se necesita practicar para coser - Singer Prelude 8280 | User Manual - Page 53
the button without hitting the button. Slowly sew on the button with about 10 stitches. Select pattern " " and sew a few securing stitches (2). If a shank is required, place a darning needle on top of the button and sew (3). For buttons with 4 holes, sew through the front two holes first (2), push - Singer Prelude 8280 | User Manual - Page 54
puntada a " " y cosa unas pocas puntadas de fijación. (2) Si se precisa coser un tallo de botón, utilizar una aguja de zurcir en la parte superior del botón y coser (3). Para botones con cuatro agujeros, coser primero a través de los dos agujeros frontales (2), empujar la labor hacia delante y coser - Singer Prelude 8280 | User Manual - Page 55
open from both ends towards the middle. Tips: - Slightly reducing upper thread tension will produce better results. - Use a backing for fine or stretchy fabrics. - It is advisable to use heavy thread or cord for stretch or knit fabrics. - The zig-zag should sew over the heavy thread or cord. (5) 48 - Singer Prelude 8280 | User Manual - Page 56
E Cómo coser ojales en 4 pasos Preparación 1. Quite el pie prensatelas multiuso y meta el pie prensatelas para hacer ojales. 2. Mida el diámetro y el espesor del botón y añada 0.3 cm (1/8") para hilvanes; Señala el tamaño del ojal en la tela. 3. Coloque la tela debajo del pie prensatelas de modo - Singer Prelude 8280 | User Manual - Page 57
of fabric). The zipper foot can be attached right or left, depending on which side of the foot you are going to sew. (1) To sew past the zipper tab, lower the needle into the fabric, raise the presser foot and push the zipper tab behind the presser foot. Lower the foot and continue - Singer Prelude 8280 | User Manual - Page 58
E Cremalleras y ribetes Cambie al prensatelas para cremalleras. Coloque el disco selector de dibujo a " ". Ajuste el control del largo de la puntada entre "1" - "4" (de acuerdo con el grueso de la tela). El prensatelas para cremalleras puede incorporarse a la derecha o a la izquierda (1) dependiendo - Singer Prelude 8280 | User Manual - Page 59
backing fabric to reinforce. The stitch density can be varied by adjusting the stitch length. First sew over the center and then overlap on both sides. Depending on the type of fabric and damage, sew between 3 and 5 rows. (2) Bar tack Set the stitch pattern dial to " " or " ". Set the stitch length - Singer Prelude 8280 | User Manual - Page 60
puntada en: "1" - "1.5" Esta función se usa para asegurar la parte de arriba de los pliegues, así como las aberturas de los bolsillos. Primero, use la puntada recta atravesando la parte de arriba del bolsillo o el pliegue. Esta costura debe ser - Singer Prelude 8280 | User Manual - Page 61
edge of the hole (to secure the threads). (5) First row: Always work from left to right. Turn work by 1/4 and oversew. A darning hoop is recommended for easier sewing and better results. Note: Free motion darning is accomplished without the sewing machine internal feed system. Movement of the fabric - Singer Prelude 8280 | User Manual - Page 62
de rotation à votre travail et recommencer à coudre. (5) Note: Le raccommodage avec mouvement libre se fait sans utiliser le système d'alimentation interne de la machine à coudre. L'opérateur contrôle le mouvement du tissu. Il est nécessaire de coordonner la vitesse d'exécution de la couture et le - Singer Prelude 8280 | User Manual - Page 63
4 321 0 GB Decorative stitches Set the machine as illustrated. Turn the stitch length dial to suit the fabric and application. Shell stitch (A) For decorative edges. Suitable for edges on sheer, fine and - Singer Prelude 8280 | User Manual - Page 64
E Puntadas de utilidad Seleccione el dibujo deseado con el disco selector de dibujo. Gire el disco del largo de la puntada que se ajuste a la tela y a la aplicación. Punto de dobladillo de conche (A) Para orillas decorativas. Punto punto turco (B) Para un sobreorillado delicado a lo largo de la - Singer Prelude 8280 | User Manual - Page 65
need to adjust the position of the guide to bring it closer or further from the edge of the applique, by using the thumbscrew located at the right of the foot. Begin sewing following the edge of your applique. To pivot for curves or corners, leave needle down in fabric on outside edge - Singer Prelude 8280 | User Manual - Page 66
. Aligner l'aiguille et abaisser-la dans le tissu au bord de l'appliqué. Abaisser le pied presseur. Si vous utilisez le pied invisible, placer le guide pour qu'il soit positionné sous le bord de l'appliqué. Il sera peut-être nécessaire d'ajuster (rapprocher ou éloigner) le guidedu bord en utilisant - Singer Prelude 8280 | User Manual - Page 67
4 32 1 0 GB Quilting functions * The Quilting foot is an optional accessory not included with your machine. Stippling is free motion quilting where you hoop the fabric and guide it by hand, allowing you to stitch in any direction. For template quilting transfer a design from a template (plastic - Singer Prelude 8280 | User Manual - Page 68
, así como el pie para zurcir y bordar. F Fonctions de courtepointe Le pied pour courtepointe est un accessoire optionnel qui n'est pas livré avec votre machine. Pour piqûre libre, placez le tissu dans un cerceau et piquez à main levée dans la direction que vous désirez. Pour le matelassage, transf - Singer Prelude 8280 | User Manual - Page 69
43 10 2 GB Mending Machine Preparation: - Pattern: Multi - stitch Zigzag - Stitch width: Largest 4.5mm - Stitch length: Fine (0.5 - 1.0) Sewing Instructions: Position a piece of fabric directly beneath the tear in your fabric. Align the center of the foot with the center of the tear. Stitchacross, - Singer Prelude 8280 | User Manual - Page 70
con el centro de la rotura. Cosa a través, pespunteando al comienzo y al final de la costura. F Raccommodage Préparation de la machine: - Point: Multi Zigzag - Largeur de point: 4.5 - Longueur de point: 0.5 - 1.0 Mode D'emploie: Positionner un morceau de tissu directement sous l'accroc. Aligner le - Singer Prelude 8280 | User Manual - Page 71
4 3 0 GB Stay-stitching 21 Machine Preparation: - Pattern: Straight Stitch - Stitch length: 1.5mm (fine) Sewing Instructions: Stay-stitching is used to reinforce curves such as armholes, seams in stretch fabrics and other areas to prevent stretching. Stay stitch along the edge - Singer Prelude 8280 | User Manual - Page 72
y otras áreas para prevenir que se estiren. Cosa a lo largo del área a 1/4 de pulgada del orillo. F Couture de Soutien Préparation de la Machine: - Point: Droit - Longueur de Point: 1.5 mm (Fin) Mode D'emploie : La couture de soutien sert à renforcer les coutures courbées et les coutures dans - Singer Prelude 8280 | User Manual - Page 73
32 1 0 GB Traditional pintucks Machine Preparation: - Pattern: Straight - Stitch Length: 2 - 3 Sewing Instructions: To mark pintucks in your fabric, either pull a thread to mark the fold or mark with chalk or marking pencil. Fold and press wrong sides together on pulled thread line or marked lines - Singer Prelude 8280 | User Manual - Page 74
la marca. Cosa 1/8 de pulgada del dobléz. Repita, cosiendo en la misma dirección para cada alforza. Planche. F Nervure Traditionnel Préparation de la machine : - Point: Droit - Longueur de Point: 2 - 3 Mode D'emploie : Pour le placement des nervures, tirez un fil de trame ou marquez la ligne avec - Singer Prelude 8280 | User Manual - Page 75
by backstitching and then continue to sew the length required. When seam is complete, raise the needle to it's highest, raise the presser foot and pull the upper and lower threads to the back of the foot. Cut your thread ends leaving a minimum 6 inches of thread. Repeat this procedure once again at - Singer Prelude 8280 | User Manual - Page 76
. Una vez las dos hileras estén terminadas, frunza lo necesario halando con el hilo de la bobina. Asegure los hilos. F Froncer Préparation de la Machine : - Point: Droit - Longueur de Point: Le plus long Mode D'emploie : Utilisez cette technique pour froncer la taille, la tête de manche et cetera - Singer Prelude 8280 | User Manual - Page 77
4 321 0 GB Couching Machine Preparation: - Pattern: Zigzag - Stitch width: Variable (Set according to width of cord) - Stitch length: Variable Sewing Instructions: Couching is simply the technique of zigzagging over a fine cord. Use as a decorative touch on jackets and other sewing projects. With - Singer Prelude 8280 | User Manual - Page 78
debajo de la abertura central de su pie y haga zigzag sobre el cordón para que la aguja caiga directamente a la derecha y la izquierda del adorno. A medida que cose siga las líneas del diseño. F Soutache Préparation de la Machine: - Point: Zigzag - Largeur de Point: Variable (Réglez à la largeur du - Singer Prelude 8280 | User Manual - Page 79
with sewing machine oil. Turn the handwheel until the hook race (7) is in the left position. Replace the hook (5). Replace the 7 5 hook race cover and snap back the two hook retaining arms. Insert the bobbin case and bobbin and replace the needle plate. 4 Important: Fabric lint and threads - Singer Prelude 8280 | User Manual - Page 80
importante: Enlevez régulièrement la poussière et les déchets de fil susceptibles d'encrasser la machine. Pour maintenir votre machine en parfait état de marche, faitesla reviser régulièrement par notre service après-vente. Attention: Débranchez la machine avant toute opération de nettoyage. 73 - Singer Prelude 8280 | User Manual - Page 81
GB Trouble shooting guide Problem Upper thread breaks Lower thread breaks Skipped stitches Needle breaks Loose stitches Seams gather or pucker Uneven stitches, uneven feed The machine is noisy The machine jams Cause 1. The machine is not threaded correctly. 2. The thread tension is too tight. 3. - Singer Prelude 8280 | User Manual - Page 82
E Eliminación de averías Problema El hilo superior se rompe Falta de puntos La aguja se rompe Suelto los puntos La costura se encoge, la tela se frunce Puntadas desguales, arraste no uniforme La máquina hace ruido Máquina obstruida Causa 1. La máquina está mal enhebrada. 2. La tensión del hilo es - Singer Prelude 8280 | User Manual - Page 83
. 3. Ne pas tirer sur le tissu en cousant. Laisser la machine entraîner le tissu. 1. Emporter la machine au détaillant pour l'entretien. 2. Nettoyer le crochet et les griffes d'entraînement comme décrit. 3. Utilisez de l'huile SINGER. 4. Remplacer. 1. Retirer le fil supérieur et la bobine, tourner - Singer Prelude 8280 | User Manual - Page 84
021V880108(D)( ) Sep/11 SINGER 8280(8280A)/A5
-
 1
1 -
 2
2 -
 3
3 -
 4
4 -
 5
5 -
 6
6 -
 7
7 -
8
-
9
-
10
-
11
-
12
-
13
-
14
-
15
-
16
-
17
-
18
-
19
-
20
-
21
-
22
-
23
-
24
-
25
-
26
-
27
-
28
-
29
-
30
-
31
-
32
-
33
-
34
-
35
-
36
-
37
-
38
-
39
-
40
-
41
-
42
-
43
-
44
-
45
-
46
-
47
-
48
-
49
-
50
-
51
-
52
-
53
-
54
-
55
-
56
-
57
-
58
-
59
-
60
-
61
-
62
-
63
-
64
-
65
-
66
-
67
-
68
-
69
-
70
-
71
-
72
-
73
-
74
-
75
-
76
-
77
-
78
-
79
-
80
-
81
-
82
-
83
-
84
 |
 |
8280
Manual de Instrucciones
Manuel d'Instruction
Instruction Manual