Nady 8W-1KU Manual
Nady 8W-1KU Manual
 |
View all Nady 8W-1KU manuals
Add to My Manuals
Save this manual to your list of manuals |
Nady 8W-1KU manual content summary:
- Nady 8W-1KU | Manual - Page 1
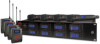
Owner's Manual 8W-1KU 1000-Channel UHF Dual Receiver Wireless System - Nady 8W-1KU | Manual - Page 2
this Manual...2 System Features...3 Quick User Controls Guide...4 System Operation...8 8W-1KU Receiver...8 HT-1KU Handheld Microphone Transmitter 12 BT-1KU Bodypack Transmitter 14 Specifications...17 Cautions and Troubleshooting 19 Miscellaneous Tips...20 Frequency...22 Accessories...22 Service - Nady 8W-1KU | Manual - Page 3
sight • 1000 user-selectable UHF frequencies per band 8W-1KU Octo Receiver • Unsurpassed state-of-the-art PLL UHF performance with 120dB dynamic range and operation up to 500 ft. line-of sight • Eight complete, independent wireless receivers with 1000 user-selectable UHF frequencies • Works with any - Nady 8W-1KU | Manual - Page 4
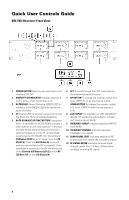
Guide 8W-1KU Receiver: Front View 1. POWER BUTTON Press for two seconds to turn receivers ON-OFF 2. DIVERSITY A/B INDICATOR Indicates receiver ) to make IR link and download the receiver's selected frequency to the TX. To download, positioning the HT-1KU/BT-1KU transmitters' IR Window (34/43) by - Nady 8W-1KU | Manual - Page 5
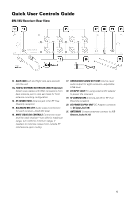
Quick User Controls Guide 8W-1KU Receiver: Rear View 13. RACK EARS Left and Right rack ears are AUDIO OUT SUM Volume Level audio output for eight receivers-adjustable LINE level 18. DC INPUT JACK For using external DC adapter to power the receivers 19. RF CONNECTORS Antenna jack B for RF True - Nady 8W-1KU | Manual - Page 6
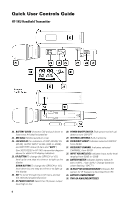
Quick User Controls Guide HT-1KU Handheld Transmitter 22. BATTERY COVER Unscrew CW and pull INPUT LEVEL (0dB to -30dB), and BATTERY status (5 bars and "BATT.") See 30/31/32/33 in HT-1KU transmitter diagram above for detail LCD display indicators. 25. UP BUTTON To change the GRP/CH or VOL level - Nady 8W-1KU | Manual - Page 7
Quick User Controls Guide BT-1KU Bodypack Transmitter (LT, LT/HM or GT) 37. INPUT JACK 3.5mm INPUT LEVEL (0dB to -30dB), and BATTERY status (5 bars and "BATT.") See 30/31/32/33 in HT-1KU transmitter diagram above for detail LCD display indicators. 41. UP BUTTON To change the GRP/CH or VOL level - Nady 8W-1KU | Manual - Page 8
BNC cables to an RF Connector (14/19) on the back of the unit. Then connect the two antennas to the front of the receiver. Rack-mounting the Receiver The Nady 8W-1KU receiver wireless system has built-In Rack Ears (13). Simply attach the rackears with supplied screws on both sides and install the - Nady 8W-1KU | Manual - Page 9
. Then start AUTO-SCAN on the second receiver. This avoids duplicate selection Selecting the 8W-1KU Receiver Volume Level / Group / Channel This section will also aid in finding desired channel(s) of operation when setting up your system(s). Press the Set Button (6) 3 times to check the current - Nady 8W-1KU | Manual - Page 10
in Programming sections of HT-1KU and BT-1KU transmitter sections. Adjusting the Squelch In normal operation, each 8W-1KU receiver's Mute Control (16) system. Decrease the audio level input to the transmitter or overload distortion sound may result. Connecting the Audio Outputs 8W-1KU receiver has - Nady 8W-1KU | Manual - Page 11
to the following instructions for the HT-1KU Handheld or BT1KU Instrument transmitter. Note: Only one transmitter can be used with one receiver. It is not possible to use two transmitters on the same frequency and mix the output of these transmitters into one wireless receiver. However, as this - Nady 8W-1KU | Manual - Page 12
Microphone Transmitter Setting up the Transmitter The HT-1KU requires two AA size batteries to operate. HT-1KU to the Selected Channel The transmitter can be programmed to the same frequency as selected for the receiver, either via automatic synchronization using the IR Sync function or manually - Nady 8W-1KU | Manual - Page 13
During manual Receiver 2), 03 (Receiver 3) and 04 (Receiver 4), Group 05 (Receiver 5) and 06 (Receiver 6), 07 (Receiver 7) and 08 (Receiver 8) for all receivers. After programming is finished, slide the battery cover back then turn the Mic Ball (23) counterclockwise to secure the housing. The HT-1KU - Nady 8W-1KU | Manual - Page 14
Channel as selected (if not using IR Sync from receiver). They can also be used to select the desired used to turn on the LCD display. During manual programming, the selected function will flash for five BT-1KU Bodypack Transmitter (LT, LT/HM or GT) Setting up the Transmitter The BT-1KU bodypack - Nady 8W-1KU | Manual - Page 15
. Programming the BT-1KU to the Selected Channel The transmitter can be programmed to the same frequency as selected for the receiver, either via automatic synchronization using the IR Sync function or manually on the transmitter itself. IR Sync Programming: Use the wireless IR LED Receptor Sensor - Nady 8W-1KU | Manual - Page 16
is Group 01 (Receiver 1) and 02 (Receiver 2), 03 (Receiver 3) and 04 (Receiver 4), Group 05 (Receiver 5) and 06 (Receiver 6), 07 (Receiver 7) and 08 (Receiver 8) for all receivers. After programming is finished, close the battery compartment door, ensuring that it latches. The BT-1KU is now ready - Nady 8W-1KU | Manual - Page 17
3dB 120dB - Nady 8W-1KU | Manual - Page 18
a low power level (not in excess of 50mW); and it has no protection from interference received from any other device. Purchasers should also be aware that the FCC is currently evaluating use of wireless microphone systems, and these rules are subject to change. For more information, call the FCC at - Nady 8W-1KU | Manual - Page 19
). If operating multiple 8W-1KU Series systems simultaneously, repeat this procedure with every new channel being selected, with previously tuned systems all on, both transmitters and receivers. Please note that wireless frequencies are shared with other radio services. According to FCC regulations - Nady 8W-1KU | Manual - Page 20
range (not too high and not too low). This provides the optimum signal-to-noise for the • A receiver cannot receive signals from two or more transmitters simultaneously. entire system. • Turn the transmitter off when it is • Before inserting the batteries, ensure that they are inserted with - Nady 8W-1KU | Manual - Page 21
is used with a wireless system. Therefore, the supplied capacitor provides first-order filtering of the RF signal from the cord into the guitar and eliminates virtually all scratchy noises. Should your equipment still produce scratchy noise, we suggest these steps to eliminate problems: 1) Make sure - Nady 8W-1KU | Manual - Page 22
mounting cables kit for 8W-1KU receiver Service Information In the U.S. If you are experiencing operational problems with your system, please refer to the Support page at www.nady.com for assistance. Should your wireless system require service, please contact the Nady Service Department at (510 - Nady 8W-1KU | Manual - Page 23
a brief description of the unit's problem(s) or Nady cannot be responsible for repair or replacement. Nady Systems, Inc. will not repair, nor be package. 3) Per the above, Nady will perform all warranty service and return the unit to you at no charge. Nady Systems will inform the buyer if product - Nady 8W-1KU | Manual - Page 24
6701 Shellmound Street | Emeryville, CA USA 94608 T 510.652.2411 | F 510.652.5075 | www.nady.com 07/11
-
 1
1 -
 2
2 -
 3
3 -
 4
4 -
 5
5 -
 6
6 -
 7
7 -
8
-
9
-
10
-
11
-
12
-
13
-
14
-
15
-
16
-
17
-
18
-
19
-
20
-
21
-
22
-
23
-
24
 |
 |
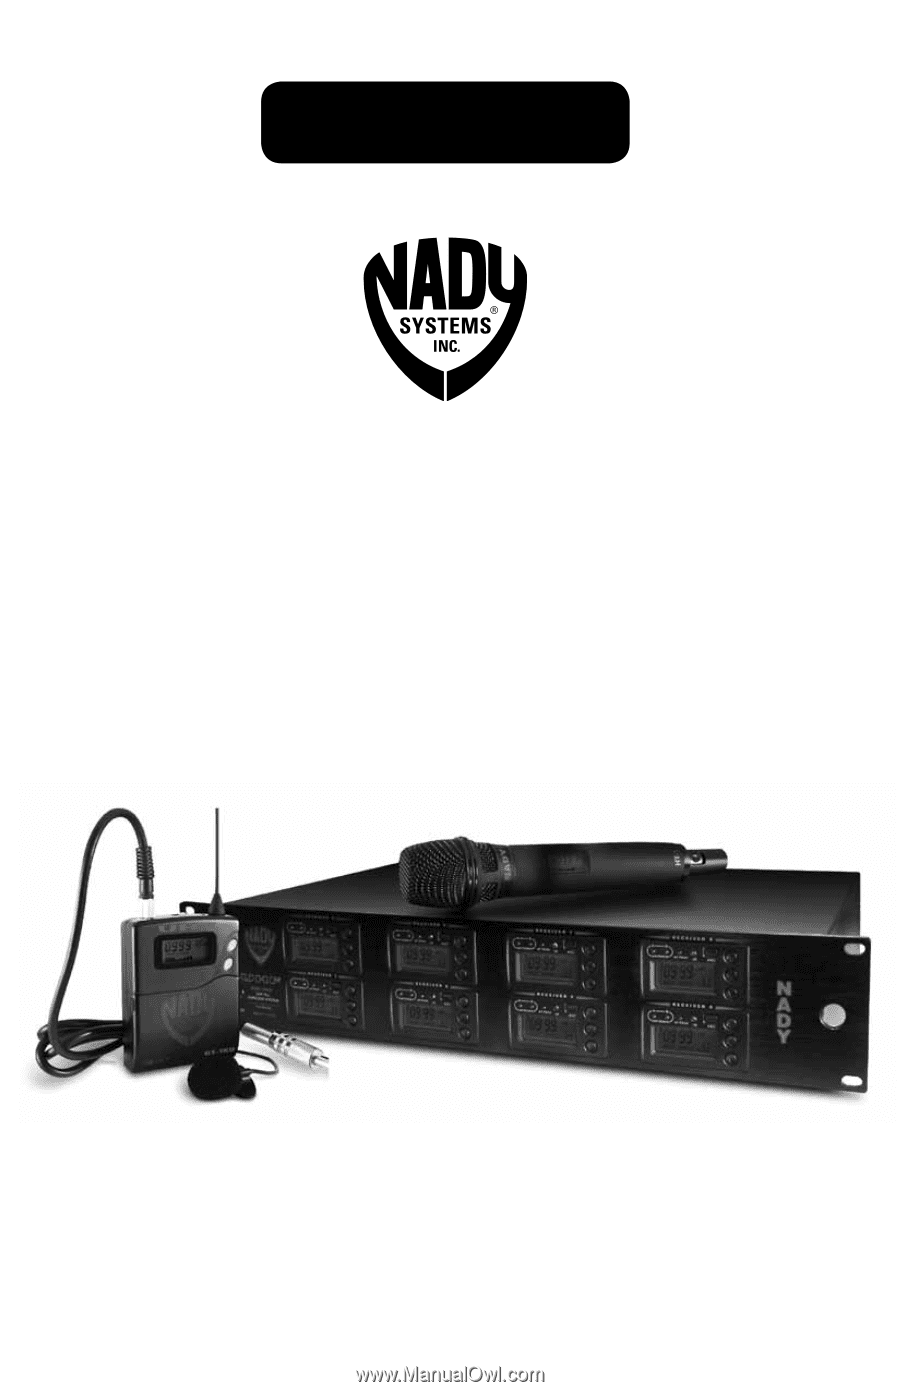
8W-1KU
1000-Channel UHF Dual Receiver
Wireless System
OWNER’S MANUAL