Hitachi CP-X4021N Operating Guide - Page 19
Volume, Volume, Video, S-video, Component, Computer In1, Computer In2, Input, Usb Type B
 |
View all Hitachi CP-X4021N manuals
Add to My Manuals
Save this manual to your list of manuals |
Page 19 highlights
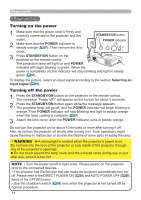
Operating Operating VOLUME +/- button Adjusting the volume MY SOURCE/ VIDEO COMPUTER DOC.CAMERA 1. Use the VOLUME +/VOLUME - buttons to adjust the volume. A dialog will appear on the screen to aid you in adjusting the ASPECT AUTO SEARCH BLANK MAGNIFY FREEZE PAGE VOLUME UP ON 㧗 volume. If you do not do anything, the dialog will automatically DOWN disappear after a few seconds. OFF KEYSTONE MY BUTTON MUTE 1 2 ● When is selected for current picture input port, the volume adjustment is disabled. Please see AUDIO SOURCE item of AUDIO menu ( 46). ● Even if the projector is in the standby mode, the volume is adjustable when both of the following conditions are true: - An option other than is selected for STANDBY in the AUDIO SOURCE item of the AUDIO menu ( 46). - NORMAL is selected in the STANDBY MODE item of the SETUP menu ( 45). ● In the standby mode, the volume of the microphone is adjustable with the VOLUME +/- buttons on the remote control, in synchronization with the volume of the projector ( 19). The volume of the microphone is adjusted regardless of the mode (standby or normal). Temporarily muting the sound MUTE button 1. Press MUTE button on the remote control. A dialog will appear on the screen indicating that you have muted the sound. To restore the sound, press the MUTE, VOLUME + or VOLUME - button. Even if you do not do anything, the dialog will automatically disappear after a few seconds. MY SOURCE/ VIDEO COMPUTER DOC.CAMERA ASPECT AUTO SEARCH BLANK MAGNIFY FREEZE PAGE VOLUME UP ON 㧗 DOWN OFF KEYSTONE MY BUTTON MUTE 1 2 ● When is selected for current picture input port, the sound is always muted. Please see AUDIO SOURCE item of AUDIO menu ( 46). ● C.C. (Closed Caption) is automatically activated when sound is muted and an input signal containing C.C. is received. This function is available only when the signal is NTSC for VIDEO or S-VIDEO, or 480i@60 for COMPONENT, COMPUTER IN1 or COMPUTER IN2, and when AUTO is selected for DISPLAY in the C.C. menu under the SCREEN menu ( 53). Selecting an input signal 1. Press INPUT button on the projector. Each time you press the button, the projector switches its input port from the current port as below. INPUT button COMPUTER IN1 COMPUTER IN2 LAN VIDEO USB TYPE A S-VIDEO USB TYPE B COMPONENT (Y, Cb/Pb, Cr/Pr) HDMI ● While ON is selected for AUTO SEARCH item in OPTION menu ( 54), the projector will keep checking the ports in above order repeatedly till an input signal is detected. ● It may take several seconds to project the images from the USB TYPE B port. (continued on next page) 19
-
 1
1 -
2
-
3
-
4
-
5
-
6
-
7
-
8
-
9
-
10
-
11
-
12
-
13
-
 14
14 -
 15
15 -
 16
16 -
 17
17 -
 18
18 -
 19
19 -
 20
20 -
 21
21 -
 22
22 -
 23
23 -
 24
24 -
25
-
26
-
27
-
28
-
29
-
30
-
31
-
32
-
33
-
34
-
35
-
36
-
37
-
38
-
39
-
40
-
41
-
42
-
43
-
44
-
45
-
46
-
47
-
48
-
49
-
50
-
51
-
52
-
53
-
54
-
55
-
56
-
57
-
58
-
59
-
60
-
61
-
62
-
63
-
64
-
65
-
66
-
67
-
68
-
69
-
70
-
71
-
72
-
73
-
74
-
75
-
76
-
77
-
78
-
79
-
80
-
81
-
82
-
83
-
84
-
85
-
86
-
87
-
88
-
89
-
90
-
91
-
92
-
93
-
94
-
95
-
96
-
97
-
98
-
99
-
100
-
101
-
102
-
103
 |
 |
