Epson SureColor T2170 Users Guide - Page 64
Creating Custom Paper Configurations
 |
View all Epson SureColor T2170 manuals
Add to My Manuals
Save this manual to your list of manuals |
Page 64 highlights
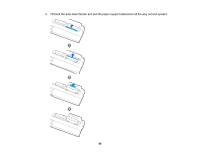
3. Close the cut sheet cover. 4. Remove the output tray. Note: Remove the output tray when printing on roll paper or cut sheets so the paper can eject smoothly. Parent topic: Cut Sheet Handling Creating Custom Paper Configurations You can create and store up to 10 custom paper configurations for use if printing on non-Epson paper or paper that is not supported by the Epson printer driver. 1. Load the type of paper that you want to configure in the printer. 2. Press the home button, if necessary. 3. Select Settings > General Settings > Printer Settings > Custom Paper Setting. 4. Select a number for the custom paper configuration. 5. Select Change Name and enter a name. 6. Select OK when you are done. 7. Select Change Reference Paper. 8. Select a paper type that is similar to the paper that you want to use. 9. Select Advanced Media Setting. 10. Select any additional settings as necessary. 11. When you finish changing the custom paper configuration settings, press the left arrow button to return to exit the menu. Selecting Custom Paper Configurations Parent topic: Media Handling Selecting Custom Paper Configurations Once you have created a custom paper configuration, you can select the configuration whenever you print on the associated media. 1. Press the home button, if necessary. 2. Select Paper Setting. 64
-
 1
1 -
2
-
3
-
4
-
5
-
6
-
7
-
8
-
9
-
10
-
11
-
12
-
13
-
14
-
15
-
16
-
17
-
18
-
19
-
20
-
21
-
22
-
23
-
24
-
25
-
26
-
27
-
28
-
29
-
30
-
31
-
32
-
33
-
34
-
35
-
36
-
37
-
38
-
39
-
40
-
41
-
42
-
43
-
44
-
45
-
46
-
47
-
48
-
49
-
50
-
51
-
52
-
53
-
54
-
55
-
56
-
57
-
58
-
 59
59 -
 60
60 -
 61
61 -
 62
62 -
 63
63 -
 64
64 -
 65
65 -
 66
66 -
 67
67 -
 68
68 -
 69
69 -
70
-
71
-
72
-
73
-
74
-
75
-
76
-
77
-
78
-
79
-
80
-
81
-
82
-
83
-
84
-
85
-
86
-
87
-
88
-
89
-
90
-
91
-
92
-
93
-
94
-
95
-
96
-
97
-
98
-
99
-
100
-
101
-
102
-
103
-
104
-
105
-
106
-
107
-
108
-
109
-
110
-
111
-
112
-
113
-
114
-
115
-
116
-
117
-
118
-
119
-
120
-
121
-
122
-
123
-
124
-
125
-
126
-
127
-
128
-
129
-
130
-
131
-
132
-
133
-
134
-
135
-
136
-
137
-
138
-
139
-
140
-
141
-
142
-
143
-
144
-
145
-
146
-
147
-
148
-
149
-
150
-
151
-
152
-
153
-
154
-
155
-
156
-
157
-
158
-
159
-
160
-
161
-
162
-
163
-
164
-
165
-
166
-
167
-
168
-
169
-
170
-
171
-
172
-
173
-
174
-
175
-
176
-
177
-
178
-
179
-
180
-
181
-
182
-
183
-
184
-
185
-
186
-
187
-
188
-
189
-
190
-
191
-
192
-
193
-
194
-
195
-
196
-
197
-
198
-
199
-
200
-
201
-
202
-
203
-
204
-
205
-
206
-
207
-
208
 |
 |
