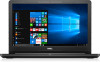
Dell Vostro 15 3568 Vostro 15-3568 Owners Manual
Dell Vostro 15 3568 Manual
 |
View all Dell Vostro 15 3568 manuals
Add to My Manuals
Save this manual to your list of manuals |
Dell Vostro 15 3568 manual content summary:
- Dell Vostro 15 3568 | Vostro 15-3568 Owners Manual - Page 1
Dell Vostro 15-3568 Owner's Manual Regulatory Model: P63F Regulatory Type: P63F002 August 2020 Rev. A04 - Dell Vostro 15 3568 | Vostro 15-3568 Owners Manual - Page 2
data and tells you how to avoid the problem. WARNING: A WARNING indicates a potential for property damage, personal injury, or death. © 2018-2020 Dell Inc. or its subsidiaries. All rights reserved. Dell, EMC, and other trademarks are trademarks of Dell Inc. or its subsidiaries. Other trademarks may - Dell Vostro 15 3568 | Vostro 15-3568 Owners Manual - Page 3
7 Safety instructions...7 Before battery...14 Optical drive...15 Removing the optical drive ...15 Removing the optical drive bracket...15 Installing the optical drive bracket...16 Installing the optical drive...16 Keyboard lattice and Keyboard...16 Removing the keyboard...16 Installing the keyboard - Dell Vostro 15 3568 | Vostro 15-3568 Owners Manual - Page 4
Power button board...27 Removing the power button board...27 Installing the power button board...27 Heat sink ...28 Removing the heat sink ...28 Installing the heat sink ...28 System fan...29 Removing the system fan...29 Installing the system fan...30 Speaker...30 Removing the speakers...30 - Dell Vostro 15 3568 | Vostro 15-3568 Owners Manual - Page 5
...64 Verifying system memory ...64 Verifying system memory in setup...64 Testing memory using ePSA...64 Audio drivers...65 Chapter 4: System setup...66 Boot Sequence...66 Navigation keys...66 Keyboards Hot Key Definitions...67 System setup options...67 Updating the BIOS in Windows ...74 System and - Dell Vostro 15 3568 | Vostro 15-3568 Owners Manual - Page 6
Running the ePSA Diagnostics...76 Chapter 6: Technical specifications 77 Chapter 7: Contacting Dell...81 6 Contents - Dell Vostro 15 3568 | Vostro 15-3568 Owners Manual - Page 7
only perform troubleshooting and simple repairs as authorized in your product documentation, or as directed by the online or telephone service and support team. Damage due to servicing that is not authorized by Dell is not covered by your warranty. Read and follow the safety instructions that came - Dell Vostro 15 3568 | Vostro 15-3568 Owners Manual - Page 8
turn the computer upside-down on a flat work surface. NOTE: To avoid damaging the system board, you must remove the main battery before you service the computer. 8. Remove the main battery. 9. Turn the computer top-side up. 10. Open the display. 11. Press the power button to ground the system board - Dell Vostro 15 3568 | Vostro 15-3568 Owners Manual - Page 9
CAUTION: To avoid damage to the computer, use only the battery designed for this particular Dell computer. Do not use batteries designed for other Dell computers. 1. Connect any external devices, such as a port replicator or media base, and replace any cards, such as an ExpressCard. 2. Connect any - Dell Vostro 15 3568 | Vostro 15-3568 Owners Manual - Page 10
Chassis view • Battery • Optical drive • Keyboard lattice and Keyboard • Base cover • Hard drive • WLAN card • Memory modules • Coin-cell battery • Power button #1 screwdriver ● Small plastic scribe Screw size list Table 1. Vostro 15-3562 screw size list Component M2L3 M2L2(Bi M2L2(Bi M2. - Dell Vostro 15 3568 | Vostro 15-3568 Owners Manual - Page 11
Table 1. Vostro 15-3562 screw size list (continued) Component M2L3 M2L2(Bi M2L2(Bi M2.5L8 g g head07) head05) Hard drive bracket WLAN card System fan System board 2 I/O board 1 - Dell Vostro 15 3568 | Vostro 15-3568 Owners Manual - Page 12
1. Camera 3. Microphone 5. Power and battery-status light/ Hard-drive activity light 2. Camera-status light 4. LCD panel Left view 1. Power connector 3. VGA connector 5. USB 3.1 Gen 1 connector 2. Network connector (No LED indicator) 4. - Dell Vostro 15 3568 | Vostro 15-3568 Owners Manual - Page 13
Palm rest view 1. Power button 3. Palm rest Right view 2. Keyboard 4. Touchpad 1. SD card reader 2. Universal audio port Disassembly and reassembly 13 - Dell Vostro 15 3568 | Vostro 15-3568 Owners Manual - Page 14
Follow the procedure in Before working inside your computer. 2. To remove the battery: a. Slide the release latch to release the battery [1]. b. Remove the battery from the computer [2]. Installing the battery 1. Insert the battery into the slot and press until it clicks into place. 2. Follow the - Dell Vostro 15 3568 | Vostro 15-3568 Owners Manual - Page 15
Follow the procedure in Before working inside your computer. 2. Remove the battery. 3. To remove the optical drive: a. Remove the two M2L3 screws the procedure in Before working inside your computer. 2. Remove the: a. battery b. optical drive 3. To remove the optical drive from the bracket: a. - Dell Vostro 15 3568 | Vostro 15-3568 Owners Manual - Page 16
place. 2. Tighten the two M2L3 screws to secure the optical drive to the computer. 3. Install the battery. 4. Follow the procedure in After working inside your computer. Keyboard lattice and Keyboard Removing the keyboard 1. Follow the procedure in Before working inside your computer. 2. Remove the - Dell Vostro 15 3568 | Vostro 15-3568 Owners Manual - Page 17
4. To remove the keyboard cable: a. Disconnect the keyboard cable from the system board. b. Remove the keyboard from the computer. Disassembly and reassembly 17 - Dell Vostro 15 3568 | Vostro 15-3568 Owners Manual - Page 18
inside your computer. Base cover Removing the base cover 1. Follow the procedure in Before working inside your computer. 2. Remove the: a. battery b. optical drive c. keyboard 3. To remove the base cover: a. Disconnect the optical drive connector and lift it to remove it from the system board - Dell Vostro 15 3568 | Vostro 15-3568 Owners Manual - Page 19
4. Flip the computer and remove the screws (3 screws - M2L2; 2 screws- M2L2; 8 screws - M2.5L8) that secure the base cover to the computer. Disassembly and reassembly 19 - Dell Vostro 15 3568 | Vostro 15-3568 Owners Manual - Page 20
5. To remove the base cover: a. Use a scribe to pry the edges of the base cover [1]. b. Lift the base cover and remove it from the computer [2]. 20 Disassembly and reassembly - Dell Vostro 15 3568 | Vostro 15-3568 Owners Manual - Page 21
to the system board. 6. Tighten the five M2L5 screws to secure the base cover to the palm rest. 7. Install the: a. keyboard b. optical drive c. battery 8. Follow the procedure in After working inside your computer. Hard drive Removing the hard drive assembly 1. Follow the procedure in Before working - Dell Vostro 15 3568 | Vostro 15-3568 Owners Manual - Page 22
[3]. Removing the hard drive from the hard drive bracket 1. Follow the procedure in Before working inside your computer. 2. Remove the: a. battery b. optical drive c. keyboard d. base cover e. hard drive assembly 3. To remove the hard drive from the hard drive assembly: a. Pull the hard drive cable - Dell Vostro 15 3568 | Vostro 15-3568 Owners Manual - Page 23
assembly to the computer. 3. Connect the hard drive cable to the connector on the system board. 4. Install the: a. base cover b. keyboard c. optical drive d. battery 5. Follow the procedures in After working inside your computer. WLAN card Removing the WLAN card 1. Follow the procedure in Before - Dell Vostro 15 3568 | Vostro 15-3568 Owners Manual - Page 24
Place the securing tab on the WLAN card and tighten the M2L3 screw on the computer. 4. Install the: a. base cover b. keyboard c. optical drive d. battery 5. Follow the procedure in After working inside your computer. Memory modules Removing the memory module 1. Follow the procedure in Before working - Dell Vostro 15 3568 | Vostro 15-3568 Owners Manual - Page 25
memory module 1. Insert the memory module into the memory socket. 2. Press the memory module until the clips secure the memory module. 3. Install the: a. base cover b. keyboard c. optical drive d. battery 4. Follow the procedures in After working inside your computer. Disassembly and reassembly 25 - Dell Vostro 15 3568 | Vostro 15-3568 Owners Manual - Page 26
out of the slot [1,2]. Installing the coin cell battery 1. Insert the coin cell battery into the battery slot. 2. Press the battery until it clicks into place. 3. Install the: a. battery b. keyboard c. optical drive d. battery 4. Follow the procedures in After working inside your computer. 26 - Dell Vostro 15 3568 | Vostro 15-3568 Owners Manual - Page 27
Power button board Removing the power button board 1. Follow the procedure in Before working inside your computer. 2. Remove the: a. battery b. optical drive c. keyboard d. base cover 3. To remove the power button board: a. Disconnect the system board cable from the computer [1]. b. Remove the two - Dell Vostro 15 3568 | Vostro 15-3568 Owners Manual - Page 28
6. Tighten the two (M2.5L8) screws to secure the display hinge to the power button board. 7. Install the: a. base cover b. keyboard c. optical drive d. battery 8. Follow the procedures in After working inside your computer. Heat sink Removing the heat sink 1. Follow the procedure in Before working - Dell Vostro 15 3568 | Vostro 15-3568 Owners Manual - Page 29
it to the system board. NOTE: Secure the screws in the order of the callout numbers [1, 2, 3, 4]. 3. Install the: a. base cover b. keyboard c. optical drive d. battery 4. Follow the procedures in After working inside your computer. System fan Removing the system fan 1. Follow the procedure in Before - Dell Vostro 15 3568 | Vostro 15-3568 Owners Manual - Page 30
the two M2L5 screws. 3. Connect the system fan connector cable to the system board connector. 4. Install the: a. base cover b. keyboard c. optical drive d. battery 5. Follow the procedures in After working inside your computer. Speaker Removing the speakers 1. Follow the procedure in Before working - Dell Vostro 15 3568 | Vostro 15-3568 Owners Manual - Page 31
the speakers into the slots on the computer. 2. Connect the speaker cable to the system board. 3. Install the: a. base cover b. keyboard c. optical drive d. battery 4. Follow the procedure in After working inside your computer System board Removing the system board 1. Follow the procedure in Before - Dell Vostro 15 3568 | Vostro 15-3568 Owners Manual - Page 32
f. memory module g. heat sink h. system fan 3. Remove the screw and lift the display hinge from the computer [1, 2]. 4. Lift the locking tab to disconnect the following cables a. hard drive connector [1] b. power connector [2] c. remove the adhesive tape [3] d. lift the locking tab and disconnect - Dell Vostro 15 3568 | Vostro 15-3568 Owners Manual - Page 33
5. Remove the two M2L3 screws that secure the system board to the computer [1] and lift the system board [2]. Disassembly and reassembly 33 - Dell Vostro 15 3568 | Vostro 15-3568 Owners Manual - Page 34
6. Flip the system board. 7. To remove the system board: a. Peel the adhesive tape [1]. b. Unlock the tab and disconnect the power cable [2]. c. Remove the system board from the computer. 34 Disassembly and reassembly - Dell Vostro 15 3568 | Vostro 15-3568 Owners Manual - Page 35
c. speaker connector d. I/O connector e. eDP connector f. power connector 8. Install the: a. system fan b. heat sink c. memory module d. WLAN Card e. base cover f. keyboard g. optical drive h. battery 9. Follow the procedure in After working inside your computer. Disassembly and reassembly 35 - Dell Vostro 15 3568 | Vostro 15-3568 Owners Manual - Page 36
-Output board Removing the Input-Output board 1. Follow the procedure in Before working inside your computer. 2. Remove the: a. battery b. optical drive c. keyboard d. base cover e. hard drive assembly 3. To remove the Input/Output board (I/O board): a. Disconnect the I/O board cable [1]. b. Remove - Dell Vostro 15 3568 | Vostro 15-3568 Owners Manual - Page 37
. Power connector port Removing the power connector 1. Follow the procedure in Before working inside your computer. 2. Remove the: a. battery b. optical drive c. keyboard d. base cover e. hard drive assembly f. WLAN card g. memory module h. heat sink i. system fan j. system board 3. To remove the - Dell Vostro 15 3568 | Vostro 15-3568 Owners Manual - Page 38
Install the: a. system board b. system fan c. WLAN Card d. memory module e. heat sink f. hard drive assembly g. base cover h. keyboard i. optical drive j. battery 5. Follow the procedure in After working inside your computer. Display assembly Removing the display assembly 1. Follow the procedure in - Dell Vostro 15 3568 | Vostro 15-3568 Owners Manual - Page 39
4. Flip the computer. 5. To remove the display assembly: NOTE: Place the chassis on the edge of a table with the display facing down. a. Remove the three M2.5L8 screws that secure the display hinge to the computer [1]. Disassembly and reassembly 39 - Dell Vostro 15 3568 | Vostro 15-3568 Owners Manual - Page 40
CAUTION: Practice caution when handling the LCD HUD by supporting it with one hand, while working on the hinges. the display assembly. 6. Install the: a. WLAN Card b. base cover c. keyboard d. optical drive e. battery 7. Follow the procedure in After working inside your computer. 40 Disassembly and - Dell Vostro 15 3568 | Vostro 15-3568 Owners Manual - Page 41
Display bezel Removing the display bezel 1. Follow the procedure in Before working inside your computer. 2. Remove the: a. battery b. optical drive c. keyboard d. base cover e. WLAN card f. display assembly 3. To disconnect the display bezel: a. Use a plastic scribe to release the tabs on the edges - Dell Vostro 15 3568 | Vostro 15-3568 Owners Manual - Page 42
Camera Removing the camera 1. Follow the procedure in Before working inside your computer. 2. Remove the: a. battery b. optical drive c. keyboard d. base cover e. WLAN card f. display assembly g. display bezel 3. To remove the camera: a. Disconnect the camera cable from the camera [1]. b. Remove the - Dell Vostro 15 3568 | Vostro 15-3568 Owners Manual - Page 43
your computer. Display panel Removing the display panel 1. Follow the procedure in Before working inside your computer. 2. Remove the: a. battery b. optical drive c. keyboard d. base cover e. WLAN card f. display assembly g. display bezel 3. To remove the display panel: a. Remove the M2.5L8 screws - Dell Vostro 15 3568 | Vostro 15-3568 Owners Manual - Page 44
secure the display panel to the display assembly. 5. Install the: a. display bezel b. display assembly c. WLAN Card d. base cover e. keyboard f. optical drive g. battery 6. Follow the procedure in After working inside your computer. Display hinges Removing the display hinges 1. Follow the procedure - Dell Vostro 15 3568 | Vostro 15-3568 Owners Manual - Page 45
hinges to the display assembly. 2. Install the: a. display panel b. display bezel c. display assembly d. WLAN Card e. base cover f. keyboard g. optical drive h. battery 3. Follow the procedure in After working inside your computer. Touchpad Removing the touchpad 1. Follow the procedure in Before - Dell Vostro 15 3568 | Vostro 15-3568 Owners Manual - Page 46
b. optical drive c. keyboard d. base cover e. hard drive assembly f. WLAN card g. memory module h. speaker i. heat sink j. system fan k. system board 3. To remove the screw support bracket: a. Remove the M2L3 screw that secures the screw support bracket to the computer [1]. b. Remove the bracket - Dell Vostro 15 3568 | Vostro 15-3568 Owners Manual - Page 47
5. To remove the touchpad board: a. Remove the four M2L2 screws that secure the touchpad board to the computer [1]. b. Lift and remove the touchpad board [2]. Disassembly and reassembly 47 - Dell Vostro 15 3568 | Vostro 15-3568 Owners Manual - Page 48
Replace the M2L3 screw to secure the screw support bracket to the computer. 6. Install the: a. system board b. system fan c. heat sink d. speaker e. memory module f. WLAN Card g. hard drive assembly h. base cover i. keyboard j. optical drive k. battery 7. Follow the procedure in After working inside - Dell Vostro 15 3568 | Vostro 15-3568 Owners Manual - Page 49
c. power connector port d. I/O board e. speaker f. system fan g. heat sink h. power button board i. memory module j. WLAN Card k. hard drive assembly l. base cover m. keyboard n. optical drive o. battery 3. Follow the procedure in After working inside your computer. Disassembly and reassembly 49 - Dell Vostro 15 3568 | Vostro 15-3568 Owners Manual - Page 50
Display options • Hard drive options • USB features • HDMI 1.4 • USB Powershare • Camera features • Memory features • Audio drivers Processors This laptop is shipped with Intel 6th generation processor: ● Intel Core i7 series ● Intel Celeron NOTE: The clock speed and performance varies depending on - Dell Vostro 15 3568 | Vostro 15-3568 Owners Manual - Page 51
The basic information of the processor is displayed. Identifying processors in Windows 7 1. Click Start > Control Panel > Device Manager. 2. Select Processor. The basic information of the processor is displayed. Verifying the processor usage in Task Manager 1. Press and hold the taskbar. 2. Select - Dell Vostro 15 3568 | Vostro 15-3568 Owners Manual - Page 52
The Windows Task Manager window is displayed. 3. Click the Performance tab in the Windows Task Manager window. The processor performance details are displayed. Verifying the processor usage in Resource Monitor 1. Press and hold the taskbar. 2. Select Start Task Manager. The Windows Task Manager - Dell Vostro 15 3568 | Vostro 15-3568 Owners Manual - Page 53
Turn on the laptop. 2. Go to Dell.com/support. 3. Click Product Support, enter the Service Tag of your laptop, and then click Submit. NOTE: If you do not have the Service Tag, use the autodetect feature or manually browse for your laptop model. 4. Click Drivers and Downloads. 5. Select the operating - Dell Vostro 15 3568 | Vostro 15-3568 Owners Manual - Page 54
Intel chipset drivers Verify if the Intel chipset drivers are already installed in the laptop. Table 2. Intel chipset drivers Before installation After installation Intel HD Graphics This laptop is shipped with the Intel HD Graphics graphics chipset. 54 Technology and components - Dell Vostro 15 3568 | Vostro 15-3568 Owners Manual - Page 55
are already installed in the laptop. Table 3. Intel HD Graphics drivers Before installation After installation Display options This laptop has a 15- inch HD with 1366 x 768 pixels resolution (maximum). Identifying the display adapter 1. Start the Search Charm and select Settings. 2. Type Device - Dell Vostro 15 3568 | Vostro 15-3568 Owners Manual - Page 56
arrow key (Rotate 270 degrees) Downloading drivers 1. Turn on the laptop. 2. Go to Dell.com/support. 3. Click Product Support, enter the Service Tag of your laptop, and then click Submit. NOTE: If you do not have the Service Tag, use the auto detect feature or manually browse for your laptop model - Dell Vostro 15 3568 | Vostro 15-3568 Owners Manual - Page 57
adjustment. NOTE: You can also use the Brightness level slider to adjust the brightness manually. Cleaning the display 1. Check for any smudges or areas that has to be cleaned with your display device. Hard drive options This laptop supports SATA drives and SSDs. Technology and components 57 - Dell Vostro 15 3568 | Vostro 15-3568 Owners Manual - Page 58
drives. 2. Expand Disk drives. Entering BIOS setup 1. Turn on or restart your laptop. 2. When the Dell logo appears, perform one of the following actions to enter the BIOS setup program: ● With keyboard - Tap F2 until the Entering BIOS setup message appears. To enter the Boot selection menu, tap F12 - Dell Vostro 15 3568 | Vostro 15-3568 Owners Manual - Page 59
the connection between host computers and peripheral devices like mice, keyboards, external drivers, and printers. Table 4. USB evolution Type Data Transfer Rate New power management features ● Full-duplex data transfers and support for new transfer types ● Backward USB 2.0 compatibility ● - Dell Vostro 15 3568 | Vostro 15-3568 Owners Manual - Page 60
● USB 2.0 previously had four wires (power, ground, and a pair for differential data); USB 3.0/USB 3.1 Gen 1 adds four more for two pairs of differential signals (receive and transmit) for a combined total of eight connections in the connectors and cabling. ● USB 3.0/USB 3.1 Gen 1 utilizes the - Dell Vostro 15 3568 | Vostro 15-3568 Owners Manual - Page 61
and computer graphics ● 4K Support - Enables video resolutions far beyond 1080p, supporting next-generation displays that will rival the Digital setup under the On Board Devices heading. You can select how much of the battery's charge can be used as well (pictured below). If you set the USB - Dell Vostro 15 3568 | Vostro 15-3568 Owners Manual - Page 62
reaches 25% of full capacity (e.g. 75% of the portable's battery charge is used up). Camera features This laptop comes with front-facing camera with the image resolution of 1280 x 720 (maximum). Identifying the camera in - Dell Vostro 15 3568 | Vostro 15-3568 Owners Manual - Page 63
Starting the camera To start the camera, open an application that uses the camera. For instance, if you tap the Dell webcam central software or the Skype software that is shipped with the laptop, the camera turns on. Similarly, if you are chatting on the internet - Dell Vostro 15 3568 | Vostro 15-3568 Owners Manual - Page 64
Memory features This Laptop supports 4 GB to 16 GB, 1600MHz DDR3L SoDIMM (2 slot). Verifying system one of the following actions after the Dell logo is displayed: ● With keyboard - Press F2. ● Without keyboard - Press and hold the Volume Up button when the Dell logo is displayed on the screen. When - Dell Vostro 15 3568 | Vostro 15-3568 Owners Manual - Page 65
Audio drivers Verify if the Realtek audio drivers are already installed in the laptop. Table 5. Realtek HD audio drivers Before installation After installation Technology and components 65 - Dell Vostro 15 3568 | Vostro 15-3568 Owners Manual - Page 66
boot device order and boot directly to a specific device (for example: optical drive or hard drive). During the Power-on Self-Test (POST), when the Dell logo appears, you can: ● Access System Setup by pressing F2 key ● Bring up the one-time boot menu by pressing F12 key. The one-time - Dell Vostro 15 3568 | Vostro 15-3568 Owners Manual - Page 67
Sleep Toggle between power and battery-status light/hard-drive activity light Turn offf/on Wireless Page up Page down Home End Mute audio Decrease volume Increase volume Previous track Play/Pause Next track Extended display Search Toggle Keyboard Backlight Brightness (optional) Decrease brightness - Dell Vostro 15 3568 | Vostro 15-3568 Owners Manual - Page 68
Service Tag, Asset Tag, Ownership Tag, Ownership Date, Manufacture Date, and the Express Service -Fi Device, Bluetooth Device. Battery Information Displays the battery status and the type of field configures the integrated USB controller. If Boot Support is enabled, the system is allowed to boot - Dell Vostro 15 3568 | Vostro 15-3568 Owners Manual - Page 69
to this port. ● Enable Boot Support ● Enable External USB Port ● Enable USB3.0 Controller NOTE: USB keyboard and mouse always work in the BIOS Allows you to set the display brightness depending up on the power source (On Battery and On AC). NOTE: The Video setting will only be visible when a - Dell Vostro 15 3568 | Vostro 15-3568 Owners Manual - Page 70
SHA-256 (enabled by default) ● Disabled ● Enabled NOTE: To upgrade or downgrade TPM1.2/2.0, download the TPM wrapper tool (software). Computrace Allows setting: Deactivate CPU XD Support Allows you to enable the Execute Disable mode of the processor. Enable CPU XD Support (default) Admin Setup - Dell Vostro 15 3568 | Vostro 15-3568 Owners Manual - Page 71
This option sets SGX Enclave Reserve Memory Size. The options are: ● 32 MB ● 64 MB ● 128 MB Table 13. Performance Option Multi Core Support Intel SpeedStep C States Control Description This field specifies whether the process will have one or all cores enabled. The performance of some applications - Dell Vostro 15 3568 | Vostro 15-3568 Owners Manual - Page 72
. If the AC power adapter is removed during Standby, the system setup will remove power from all of the USB ports to conserve battery power. ● Enable USB Wake Support Default Setting: The option is disabled. Wake on LAN Allows you to enable or disable the feature that powers on the computer from - Dell Vostro 15 3568 | Vostro 15-3568 Owners Manual - Page 73
15. ● 5 seconds ● 10 seconds Table 16. Virtualization Support Option Description Virtualization Allows you to enable or disable the options are enabled by default. Table 18. Maintenance Option Service Tag Asset Tag Description Displays the Service Tag of your computer. Allows you to create a - Dell Vostro 15 3568 | Vostro 15-3568 Owners Manual - Page 74
2. Go to Dell.com/support. ● Enter the Service Tag or Express Service Code and click Submit. ● Click Detect Product and follow the instructions on screen. and the Product Support page of your computer appears. 6. Click Get drivers and click Drivers and Downloads. The Drivers and Downloads section - Dell Vostro 15 3568 | Vostro 15-3568 Owners Manual - Page 75
System and setup password Table 21. System and setup password Password type System password Setup password Description Password that you must enter to log on to your system. Password that you must enter to access and make changes to the BIOS settings of your computer. You can create a system - Dell Vostro 15 3568 | Vostro 15-3568 Owners Manual - Page 76
are completed successfully ● View error messages that inform you of problems encountered during testing NOTE: Some tests for specific devices require on the computer. 2. As the computer boots, press the F12 key when the Dell logo is displayed. 3. In the boot menu screen, use Up/Down arrow key to - Dell Vostro 15 3568 | Vostro 15-3568 Owners Manual - Page 77
Intel Kaby Lake 64 bits 16 MB Table 23. Processor specifications Feature Processor type L2 cache Specification ● 7th Generation Intel Core i7, i5, i3 ● 6th Generation Intel Core i3 ● Intel Pentium Processor 4405U ● Intel Celeron Processor 3855U 2 MB Table 24. Memory specifications Feature Memory - Dell Vostro 15 3568 | Vostro 15-3568 Owners Manual - Page 78
controls Program menu and keyboard media-control keys Table DDR3) 64 bits External display support VGA Table 28. Camera specifications Mbps Ethernet LAN on Motherboard (LOM) ● Wi- port NOTE: The powered USB 3.0 connector also supports Microsoft Kernel Debugging. The ports are identified in - Dell Vostro 15 3568 | Vostro 15-3568 Owners Manual - Page 79
(14.17 inches) Diagonal 396.24 mm (15.60 inches) Width 224.3 mm (8.83 inches) -30 degrees Pixel pitch 0.252 mm Table 32. Keyboard specifications Feature Number of keys: Pitch Travel distance Specification mm (3.14 inches) Table 34. Battery specifications Feature Type Dimensions: Height Width - Dell Vostro 15 3568 | Vostro 15-3568 Owners Manual - Page 80
) 2.29 kg (5.04 lb) Specification 0°C-35 °C (32°F-95 °F) -40°C-65 °C (-40°F-149 °F) 10% to 90% (non-condensing) 0% to 95% (non-condensing) -15.2 m to 30482000 m (-50 to 10,0006560 ft) 0° to 35°C -15.2 m to 10,668 m (-50 ft to 35,000 ft) G1 as defined by ISA-S71.04-1985 80 Technical specifications - Dell Vostro 15 3568 | Vostro 15-3568 Owners Manual - Page 81
options. Availability varies by country and product, and some services may not be available in your area. To contact Dell for sales, technical support, or customer service issues: 1. Go to Dell.com/support. 2. Select your support category. 3. Verify your country or region in the Choose a Country
-
 1
1 -
 2
2 -
 3
3 -
 4
4 -
 5
5 -
 6
6 -
 7
7 -
8
-
9
-
10
-
11
-
12
-
13
-
14
-
15
-
16
-
17
-
18
-
19
-
20
-
21
-
22
-
23
-
24
-
25
-
26
-
27
-
28
-
29
-
30
-
31
-
32
-
33
-
34
-
35
-
36
-
37
-
38
-
39
-
40
-
41
-
42
-
43
-
44
-
45
-
46
-
47
-
48
-
49
-
50
-
51
-
52
-
53
-
54
-
55
-
56
-
57
-
58
-
59
-
60
-
61
-
62
-
63
-
64
-
65
-
66
-
67
-
68
-
69
-
70
-
71
-
72
-
73
-
74
-
75
-
76
-
77
-
78
-
79
-
80
-
81
 |
 |

Dell Vostro 15–3568
Owner's Manual
Regulatory Model: P63F
Regulatory Type: P63F002
August 2020
Rev. A04