Dell SE2416H Dell Users Guide
Dell SE2416H Manual
 |
View all Dell SE2416H manuals
Add to My Manuals
Save this manual to your list of manuals |
Dell SE2416H manual content summary:
- Dell SE2416H | Dell Users Guide - Page 1
User's Guide Dell SE2416H Model No.: SE2416H Regulatory model: SE2416Hc - Dell SE2416H | Dell Users Guide - Page 2
CAUTION indicates potential damage to hardware or loss of data if instructions are not followed. WARNING: A WARNING indicates a potential for property of the U.S. Environmental Protection Agency. As an ENERGY STAR partner, Dell Inc. has determined that this product meets the ENERGY STAR guidelines - Dell SE2416H | Dell Users Guide - Page 3
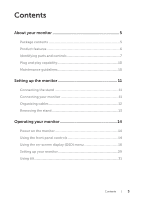
7 Plug and play capability 10 Maintenance guidelines 10 .Setting up the monitor 11 Connecting the stand 11 Connecting your monitor 11 Organizing cables 12 Removing the stand 13 .Operating your monitor 14 Power on the monitor 14 Using the front panel controls 14 Using the on-screen display - Dell SE2416H | Dell Users Guide - Page 4
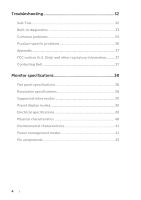
.Troubleshooting 32 Self-Test 32 Built-in diagnostics 33 Common problems 34 Product-specific problems 36 Appendix 37 FCC notices (U.S. Only) and other regulatory information...........37 Contacting Dell 37 .Monitor specifications 38 Flat panel specifications 38 Resolution specifications 38 - Dell SE2416H | Dell Users Guide - Page 5
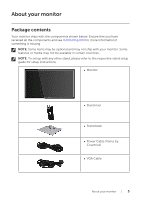
Dell for more information if something is missing. NOTE: Some items may be optional and may not ship with your monitor. Some features or media may not be available in certain countries. NOTE: To set up with any other stand, please refer to the respective stand setup guide for setup instructions - Dell SE2416H | Dell Users Guide - Page 6
DellTM SE2416H Monitor ∞∞ Drivers and Documentation Media ∞∞ Quick Setup Guide ∞∞ Safety and Regulatory Information Product features The Dell SE2416H flat panel display has an active matrix, Thin-Film Transistor (TFT), Liquid Crystal Display (LCD), anti-static, and LED backlight. The monitor - Dell SE2416H | Dell Users Guide - Page 7
Identifying parts and controls Front view 1 2 Front panel controls Label Description 1 Function buttons (For more information, see Operating your monitor) 2 Power On/Off button NOTE: For displays with glossy bezels the user should consider the placement of the display as the bezel may cause - Dell SE2416H | Dell Users Guide - Page 8
View with monitor stand Label Description 1 Security-lock slot 2 Barcode serial number and Service Tag label 3 Cable management slot Use Secures monitor with security lock (security lock not included). Refer to this label if you need to contact Dell for technical support. The Dell service tag - Dell SE2416H | Dell Users Guide - Page 9
-outlet. L'appareil doit être branché sur une prise de courant munie d'une mise à la terre. XXXXXX-XX 1 4 2 3 Bottom view without monitor stand Label Description 1 Power port 2 HDMI port 3 VGA port 4 Regulatory label Use Connect the power cable. Connect your computer with HDMI cable - Dell SE2416H | Dell Users Guide - Page 10
on Dell Monitor Quality and Pixel Policy, see Dell Support site at www.dell.com/support/monitors. Maintenance guidelines Cleaning your monitor WARNING: Before cleaning the monitor, unplug the monitor power cable from the electrical outlet. CAUTION: Read and follow the Safety Instructions before - Dell SE2416H | Dell Users Guide - Page 11
the tabs on the upper part of the stand in to the grooves on the back of the monitor. 3. Press down the stand till it snaps into place. 2 3 Connecting your monitor WARNING: Before you begin any of the procedures in this section, follow the Safety Instructions. NOTE: Do not connect all cables to the - Dell SE2416H | Dell Users Guide - Page 12
Connecting the VGA cable Connecting the HDMI cable (sold separately) Organizing cables 12 | Setting up the monitor - Dell SE2416H | Dell Users Guide - Page 13
NOTE: To prevent scratches on the LCD screen while removing the stand, ensure that the monitor is placed on a soft and clean surface. To remove the stand: 1. Place the monitor on a soft cloth or cushion. 2. Use a long and thin screwdriver to push the release latch. 3. Once the latch is released - Dell SE2416H | Dell Users Guide - Page 14
. Using the front panel controls Use the control buttons on the front of the monitor to adjust the image being displayed. 1 2 3 4 5 The following table describes the front panel buttons: Front OSD) and select the OSD Menu. See Accessing the Menu OSD menu. 14 | Operating your monitor - Dell SE2416H | Dell Users Guide - Page 15
is On and fully functional. Blinking white light indicates the power save mode. OSD controls Use the buttons on the front of the monitor to adjust the image settings. 1 2 34 Front Panel Button Description 1 Use the Up button to increase values or move up in a menu. Up 2 Use the - Dell SE2416H | Dell Users Guide - Page 16
display the OSD main menu. Main Menu for analog (VGA) input Dell SE2416H Brightness / Contrast Auto Adjust Input Source Color Display Audio Energy Menu Maximum: 1920x1080, 60Hz Main Menu for digital (HDMI) input Dell SE2416H Brightness / Contrast Auto Adjust Input Source Color Display Audio - Dell SE2416H | Dell Users Guide - Page 17
a complete list of all the options available for the monitor. 3. Press the button once to activate the highlighted option activate Brightness/Contrast adjustment. Dell SE2416H Brightness / Contrast Auto (min. 0 / max. 100). NOTE: Manual adjustment of Brightness is disabled when Dynamic Contrast - Dell SE2416H | Dell Users Guide - Page 18
Use this key to activate automatic setup and adjust menu. Dell SE2416H Energy Use Brightness / Contrast Auto Adjust Press to adjust the incoming video signal. After using Auto Adjustment, you can further tune your monitor by using the Pixel Clock (Coarse) and Phase (Fine) controls under Display - Dell SE2416H | Dell Users Guide - Page 19
Input Source Use the Input Source menu to select between the different video signals that may be connected to your monitor. Dell SE2416H Brightness / Contrast Auto Adjust Input Source Color Display Audio Energy Menu Personalize Others Resolution: 1024x768, 60Hz Energy Use Auto Select VGA HDMI - Dell SE2416H | Dell Users Guide - Page 20
the VGA cable or HDMI cable. YPbPr: Select this option if your monitor is connected to a DVD player by YPbPr using the VGA cable or HDMI cable, or if the DVD color output setting is not RGB. Dell SE2416H Brightness / Contrast Auto Adjust Input Source Color Display Audio Energy Menu Personalize - Dell SE2416H | Dell Users Guide - Page 21
Color Temp.or Custom Color from the list. ∞∞ Standard: Loads the monitor's default color settings. This is the default preset mode. ∞∞ Multimedia: manually adjust the color settings. Press the and buttons to adjust the three colors (R, G, B) values and create your own preset color mode. Dell SE2416H - Dell SE2416H | Dell Users Guide - Page 22
: Saturation adjustment is available only when you select Movie or Game preset mode. Resets your monitor color settings to the factory settings. Change image settings. Dell SE2416H Brightness / Contrast Auto Adjust Input Source Color Display Audio Energy Menu Personalize Others Resolution: 1024x768 - Dell SE2416H | Dell Users Guide - Page 23
languages of the OSD, the amount of time the menu remains on screen and so on. Dell SE2416H Brightness / Contrast Auto Adjust Input Source Color Display Audio Energy Menu Personalize Others Resolution: 1024x768, the slider in 1 second increments, from 5 to 60 seconds. Operating your monitor | 23 - Dell SE2416H | Dell Users Guide - Page 24
, Auto adjust, Input Source or Aspect Ratio and set it as a shortcut key. Dell SE2416H Brightness / Contrast Auto Adjust Input Source Color Display Audio Energy Menu Personalize Others Resolution: Key 2. Allows you to restore shortcut key to the default setting. 24 | Operating your monitor - Dell SE2416H | Dell Users Guide - Page 25
. You can disable this feature by selecting Disable. Enable this feature for best user experience and optimum performance of your monitor. Dell SE2416H Brightness / Contrast Auto Adjust Input Source Color Display Audio Energy Menu Personalize Others Resolution: 1024x768, 60Hz Energy Use DDC/CI - Dell SE2416H | Dell Users Guide - Page 26
some time to run. To start LCD conditioning, select Enable. Dell SE2416H Brightness / Contrast Auto Adjust Input Source Color Display Audio Energy Menu all settings to the factory preset values. NOTE: Your monitor has a built-in feature to automatically calibrate the brightness to compensate for - Dell SE2416H | Dell Users Guide - Page 27
, the following message is displayed: Dell SE2416H The current input timing is not supported by the monitor display. Please change your input timing to 1920x1080@60Hz or any other monitor listed timing as per the monitor specifications. This means that the monitor cannot synchronize with the signal - Dell SE2416H | Dell Users Guide - Page 28
as shown below appears. Dell SE2416H No HDMI Cable The display will go into Power Save Mode in 5 minutes. www. dell.com/support/monitors or Dell SE2416H No VGA Cable The display will go into Power Save Mode in 5 minutes. www.d ell.com/support/monitors See Troubleshooting for more information. 28 - Dell SE2416H | Dell Users Guide - Page 29
set the maximum resolution for the monitor: In Windows 7, Windows 8, drivers. If you have a Dell desktop or a Dell portable computer with internet access 1. Go to www.dell.com/support, enter your service tag, and download the latest driver for your graphics card. 2. After installing the drivers - Dell SE2416H | Dell Users Guide - Page 30
drivers for your graphics adapter, attempt to set the resolution to 1920 x 1080 again. NOTE: If you are unable to set the recommended resolution, contact the manufacturer of your computer or consider purchasing a graphics adapter that will support the video resolution. 30 | Operating your monitor - Dell SE2416H | Dell Users Guide - Page 31
Using tilt NOTE: This is applicable for a monitor with a stand. When any other stand is bought, please refer to the respective stand setup guide for set up instructions. Tilt NOTE: The stand is detached when the monitor is shipped from the factory. 5° 21° Operating your monitor | 31 - Dell SE2416H | Dell Users Guide - Page 32
one of the following message appears. While in self-test mode, the power LED remains white. Dell SE2416H No HDMI Cable The display will go into Power Save Mode in 5 minutes. www. dell.com/support/monitors Dell SE2416H No VGA Cable The display will go into Power Save Mode in 5 minutes. www.d ell.com - Dell SE2416H | Dell Users Guide - Page 33
an inherent problem with your monitor, or with your computer and video card. NOTE: You can run the built-in diagnostics only when the video cable is unplugged and the monitor is in -in diagnostic tool, the monitor is functioning properly. Check the video card and computer. Troubleshooting | 33 - Dell SE2416H | Dell Users Guide - Page 34
defect that can occur in LCD technology. ∞∞ For more information on Dell Monitor Quality and Pixel Policy, see Dell Support site at: www.dell.com/support/monitors. ∞∞ Reset the monitor to Factory Settings (Factory Reset). ∞∞ Adjust brightness & contrast controls via OSD. 34 | Troubleshooting - Dell SE2416H | Dell Users Guide - Page 35
cable connector. ∞∞ Restart the computer in the safe mode. Safety Related Issues ∞∞ Do not perform any troubleshooting steps. ∞∞ Contact Dell immediately. Intermittent Problems ∞∞ Ensure that the video cable connecting the monitor to the computer is connected properly and is secure. ∞∞ Reset the - Dell SE2416H | Dell Users Guide - Page 36
necessary. ∞∞ Reset the computer or video player. The picture does not fill the entire screen ∞∞ Due to different video formats (aspect ratio) of DVDs, the monitor may display in full screen. ∞∞ Run the built-in diagnostics. 36 | Troubleshooting - Dell SE2416H | Dell Users Guide - Page 37
or mechanical hazards. For information on safety instructions, see the Product Information Guide. FCC notices (U.S. Only) and other Monitor support content: 1. Visit www.dell.com/support/monitors. To contact Dell for sales, technical support, or customer service issues: 1. Visit www.dell.com/support - Dell SE2416H | Dell Users Guide - Page 38
, Active Area Area Pixel pitch Viewing angle Luminance output Contrast ratio Faceplate coating Backlight Response time Color depth Color gamut SE2416H Active matrix-TFT LCD In-Plane Switching 604.70 mm (23.81 in) 527.04 mm (20.75 in) 296.46 mm (11.67 in) 1562.46 cm2 (242.15 in2 - Dell SE2416H | Dell Users Guide - Page 39
Supported video modes Model SE2416H Video display capabilities (HDMI ) 480p, 480i, 576p, 720p, 1080p, 576i, 1080i Preset display modes Display Mode VESA, 720 x 400 VESA, 640 x 480 VESA, 640 x 480 VESA, 800 x 600 VESA, 800 x 600 VESA, 1024 x 768 VESA, 1024 x 768 VESA, 1152 x 864 VESA, 1280 x - Dell SE2416H | Dell Users Guide - Page 40
Depth Weight Weight with packaging Weight with stand assembly and cables Weight without stand assembly (no cables) Weight of stand assembly Front-frame gloss (minimum) SE2416H ∞∞ Digital: detachable, HDMI, 19 pins 05 lb) 0.66 kg (1.45 lb) Black frame - 85 gloss units 40 | Monitor specifications - Dell SE2416H | Dell Users Guide - Page 41
) Non-operating (maximum) (maximum) Thermal dissipation (typical) SE2416H 0°C to 40°C (32°F to 104°F) ∞∞ Storage ∞∞ BTU/hour Power management modes If you have VESA's DPM compliance display card or software installed in your PC, the monitor can automatically reduce its power consumption when not - Dell SE2416H | Dell Users Guide - Page 42
VESA Modes Active-off mode, one of the following messages will be displayed: Dell SE2416H There is no signal coming from your computer. Press any key on press the monitor button now to select the correct input source on the On-Screen-Display menu. Activate the computer and the monitor to gain access - Dell SE2416H | Dell Users Guide - Page 43
Pin assignments D-SUB connector Pin Number 1 2 3 4 5 6 7 8 9 10 11 12 13 14 15 15-pin Side of the Connected Signal Cable Video-Red Video-Green Video-Blue GND Self-test GND-R GND-G GND-B Computer 5V/3.3V GND-sync GND DDC data H-sync V-sync DDC clock Monitor specifications | 43 - Dell SE2416H | Dell Users Guide - Page 44
0TMDS CLOCK+ TMDS CLOCK SHIELD TMDS CLOCKCEC Reserved (N.C. on device) DDC CLOCK (SCL) DDC DATA (SDA) DDC/CEC Ground +5V POWER HOT PLUG DETECT 44 | Monitor specifications
-
 1
1 -
 2
2 -
 3
3 -
 4
4 -
 5
5 -
 6
6 -
 7
7 -
8
-
9
-
10
-
11
-
12
-
13
-
14
-
15
-
16
-
17
-
18
-
19
-
20
-
21
-
22
-
23
-
24
-
25
-
26
-
27
-
28
-
29
-
30
-
31
-
32
-
33
-
34
-
35
-
36
-
37
-
38
-
39
-
40
-
41
-
42
-
43
-
44
 |
 |

Model No.: SE2416H
Regulatory model: SE2416Hc
User’s Guide
Dell SE2416H