Dell Latitude 5280 Deploying Windows 10 IoT and Windows Embedded Standard Secu - Page 7
Deploy a package, Install the MSU or EXE package using Wyse Management Suite
 |
View all Dell Latitude 5280 manuals
Add to My Manuals
Save this manual to your list of manuals |
Page 7 highlights
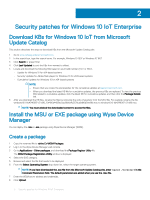
9 After the upload is complete, close the WDM Package Registration Utility window. 10 Launch Wyse Device Manager again, and login using valid credentials. 11 Go to Applications > Other packages, and verify the registered KB in the list. Deploy a package 1 Log in to the Wyse Device Manager web console. 2 Go to Devices, and select the devices to which the KB must be updated. 3 Click Update. 4 Click Save to schedule the deployment of KBs. 5 After the package push is complete, go to Updates and click the scheduled job to check the deployment status. 6 On the client side, click Update Now after the job is successfully scheduled from the Wyse Device Manager server. NOTE: If the Update Now window is not displayed, restart the HAgent service from the administrator mode. The directory C:\Temp is not deleted. To delete the directory, edit the RSP script manually with the delete command. For example, DT C: \Temp. NOTE: The lock screen is disabled when you deploy the package using WDM. Install the MSU or EXE package using Wyse Management Suite You can install the add-on using Wyse Management Suite. 1 Copy the downloaded file (raw installer) to the Wyse Management Suite server repository. For example, copy the downloaded file to \Share\repository\thinClientApps. 2 Log in to Wyse Management Suite. 3 Click Portal Administration, and then click File Repository under Console Settings. 4 Select the Local Repository check box. 5 Click Sync Files. Wait for the synchronization process to complete. The synchronization process copies the package from the repository to Apps and Data. 6 Click Apps and Data. The Apps and Data page is displayed. 7 Verify the copied package in the applications list. 8 To create a group in the Wyse Management Suite server, click Groups & Configs. The Groups & Configs page is displayed. 9 Click the Plus sign (+) button and enter the required details to register your client in the same group. 10 Click Apps and Data. The Apps and Data page is displayed. 11 Click Thin Clients under App Policies. 12 Click Add Policy to add the policy to the required group. NOTE: If you use the .exe file downloaded from the Microsoft Update Catalog site, the silent parameter is /quiet/ norestart. The default silent parameters are considered when you use the .msu file. 13 Update the required fields, and click Save. 14 Click Yes to deploy the policy immediately. 15 In the App Policy job, update the description. 16 Click Run > Immediately. Security patches for Windows 10 IoT Enterprise 7
-
 1
1 -
 2
2 -
 3
3 -
 4
4 -
 5
5 -
 6
6 -
 7
7 -
 8
8 -
 9
9 -
 10
10 -
 11
11 -
 12
12 -
13
 |
 |
