Dell Latitude 5280 Managing Windows-based Wyse Thin Clients using System Cente
Dell Latitude 5280 Manual
 |
View all Dell Latitude 5280 manuals
Add to My Manuals
Save this manual to your list of manuals |
Dell Latitude 5280 manual content summary:
- Dell Latitude 5280 | Managing Windows-based Wyse Thin Clients using System Cente - Page 1
Managing Windows-based Dell Wyse Thin Clients using System Center Configuration Manager Administrator's Guide - Dell Latitude 5280 | Managing Windows-based Wyse Thin Clients using System Cente - Page 2
data and tells you how to avoid the problem. WARNING: A WARNING indicates a potential for property damage, personal injury, or death. © 2018 -2019 Dell Inc. or its subsidiaries. All rights reserved. Dell, EMC, and other trademarks are trademarks of Dell Inc. or its subsidiaries. Other trademarks may - Dell Latitude 5280 | Managing Windows-based Wyse Thin Clients using System Cente - Page 3
Contents 1 Introduction...4 About this guide...4 SCCM system requirements...4 SCCM features...4 SCCM prerequisites...4 2 Imaging Dell Wyse thin clients with System Center Configuration Manager (SCCM 6 Creating driver packages for imaging...6 Preparing the operating system image for capturing...13 - Dell Latitude 5280 | Managing Windows-based Wyse Thin Clients using System Cente - Page 4
engineers who work on SCCM. This guide contains the following information: • Features supported on the Dell Wyse Enhanced Windows Embedded builds • Managing software on Dell Wyse thin clients • Imaging and deploying operating systems on Dell Wyse thin clients For more information about SCCM and - Dell Latitude 5280 | Managing Windows-based Wyse Thin Clients using System Cente - Page 5
Application Management in Configuration Manager at https:// technet.microsoft.com. NOTE: For reference, SCCM 2016 and Windows 10 IoT Enterprise screenshots are used in this guide. However this guide can also be used for SCCM 2012 R2 or SCCM 2019. Introduction 5 - Dell Latitude 5280 | Managing Windows-based Wyse Thin Clients using System Cente - Page 6
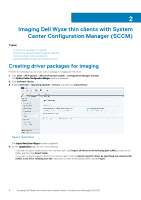
2 Imaging Dell Wyse thin clients with System Center Configuration Manager (SCCM) Topics: • Creating driver packages for imaging • Preparing the .oem file radio button, browse to the specific driver, and click Open. 6 Imaging Dell Wyse thin clients with System Center Configuration Manager (SCCM) - Dell Latitude 5280 | Managing Windows-based Wyse Thin Clients using System Cente - Page 7
the Specify the option for duplicate drivers drop-down list. 6. Click Next. 7. On the Driver Details page, select the drivers you want to import. Imaging Dell Wyse thin clients with System Center Configuration Manager (SCCM) 7 - Dell Latitude 5280 | Managing Windows-based Wyse Thin Clients using System Cente - Page 8
name, and browse to the network UNC path where you want the Configuration Manager to store the drivers added to the package. Click Ok. 8 Imaging Dell Wyse thin clients with System Center Configuration Manager (SCCM) - Dell Latitude 5280 | Managing Windows-based Wyse Thin Clients using System Cente - Page 9
want to add the driver and click Next. Figure 5. Select the packages 13. On the Add Driver to Boot Images page retain the default options and click Next. 14. On the Summary page, verify the details, and click Next. Imaging Dell Wyse thin clients with System Center Configuration Manager (SCCM) 9 - Dell Latitude 5280 | Managing Windows-based Wyse Thin Clients using System Cente - Page 10
Next. Figure 7. Review selected content 20. On the Content Destination page, click Add, and then select Distribution Point from the drop-down list. 10 Imaging Dell Wyse thin clients with System Center Configuration Manager (SCCM) - Dell Latitude 5280 | Managing Windows-based Wyse Thin Clients using System Cente - Page 11
Points window is displayed. 21. Select the available distribution points, and click Ok. On the Content Destination page, click Next. Figure 9. Add distribution points Imaging Dell Wyse thin clients with System Center Configuration Manager (SCCM) 11 - Dell Latitude 5280 | Managing Windows-based Wyse Thin Clients using System Cente - Page 12
Distribution Points. 31. In the Update Distribution Points page, click Next and then click Close. 32. Refresh the Boot Images window, and ensure that the Success message is displayed on the Content Status page. 12 Imaging Dell Wyse thin clients with System Center Configuration Manager (SCCM) - Dell Latitude 5280 | Managing Windows-based Wyse Thin Clients using System Cente - Page 13
image to capture, import, and deploy to the supported Wyse thin clients running Windows 10 IoT Enterprise operating system in a the default user name is Admin, and the default password is DellCCCvdi. • For WES7P/WES7E image, the default user name is Administrator, and the default password is - Dell Latitude 5280 | Managing Windows-based Wyse Thin Clients using System Cente - Page 14
image deployment, select the Removable USB drive radio button, and from the drop-down list, select the drive. • To use a CD/DVD set for the image deployment, select the CD/DVD set radio button, and browse to the media file. 14 Imaging Dell Wyse thin clients with System Center Configuration Manager - Dell Latitude 5280 | Managing Windows-based Wyse Thin Clients using System Cente - Page 15
Figure 14. Create task sequence media wizard 7. Click Next. 8. On the Boot Image page, browse to the appropriate boot image and distribution point. Imaging Dell Wyse thin clients with System Center Configuration Manager (SCCM) 15 - Dell Latitude 5280 | Managing Windows-based Wyse Thin Clients using System Cente - Page 16
to the reference thin client. 2. Open the USB pen drive or CD/DVD drive, and go to D:\SMS\Bin\i386. 3. Run the D:\SMS\Bin\i386\TSMBAutoRun.exe file. The Image Capture Wizard is displayed. 4. On the Welcome to the Image Capture Wizard page, click Next. 16 Imaging Dell Wyse thin clients with System - Dell Latitude 5280 | Managing Windows-based Wyse Thin Clients using System Cente - Page 17
local USB drive boots into the Windows Preinstallation Environment. In the Windows Preinstallation Environment session, the image is captured. After the image capture, the .wim file is generated and stored to the location specified in the Capture Wizard page. NOTE: Imaging Dell Wyse thin clients - Dell Latitude 5280 | Managing Windows-based Wyse Thin Clients using System Cente - Page 18
CreateMedia.exe /K:full /p:"SCCM2016.cloud.com" /D:"SCCM2016.cloud.com" /S:"IND" / L:"FullMediaLabel" /A:"IND0004A" /K:"False" /T:"CD" /M:"44482" /F:"C:\deployment.iso" / X:"OSDComputerName=" /X:"OSTType=Enterprise" 18 Imaging Dell Wyse thin clients with System Center Configuration Manager (SCCM) - Dell Latitude 5280 | Managing Windows-based Wyse Thin Clients using System Cente - Page 19
Manager provides two default boot images. Capture an image of the operating system that you want to deploy by using a task sequence. Distribute the boot image, operating system image, and any related content to a distribution point. Topics: • Associating target thin clients with Configuration - Dell Latitude 5280 | Managing Windows-based Wyse Thin Clients using System Cente - Page 20
Figure 18. Configuration Manager Properties The thin client is added to the Configuration Manager server. 5. On the Configuration Manager server side, go to Asset and Compliance > Device Collections. 6. Right-click Device Collection and - Dell Latitude 5280 | Managing Windows-based Wyse Thin Clients using System Cente - Page 21
, and from the Limiting collection drop-down list, select All Systems. Figure 20. General 8. Click Next. NOTE: Add a rule when multiple clients are available. For more information about rules, see how to create collections in configuration manager in https://technet.microsoft.com. Deploying - Dell Latitude 5280 | Managing Windows-based Wyse Thin Clients using System Cente - Page 22
Figure 21. Membership Rules 9. On the Summary page, click Next. The selected settings are applied. Figure 22. Summary page 22 Deploying operating system image by using Operating Systems Deployment (OSD) - Dell Latitude 5280 | Managing Windows-based Wyse Thin Clients using System Cente - Page 23
10. Click Close. 11. In the Devices list, right-click a device, and click Add Selected Items > Add Selected Items to Existing Device collection. Figure 23. Devices 12. In the Device Collections window, select the device to add to the collection, and click OK. Figure 24. Select device collections - Dell Latitude 5280 | Managing Windows-based Wyse Thin Clients using System Cente - Page 24
In the Asset and Compliance section, click Device Collections and verify whether the device is added. The Member count is displayed as 1. Importing a captured Windows reference image into Configuration Manager To import a captured Windows reference image into Configuration Manager, do the following: - Dell Latitude 5280 | Managing Windows-based Wyse Thin Clients using System Cente - Page 25
Figure 27. Data source 4. Enter the necessary information, and click Next. 5. Verify the information that you have provided and click Next. The settings are applied. 6. Click Close. 7. Expand Software Library > Overview > Operating Systems, and select an operating system image. 8. Right-click - Dell Latitude 5280 | Managing Windows-based Wyse Thin Clients using System Cente - Page 26
Figure 28. Create task sequence 3. In the New Task Sequence wizard, select Install an existing image package, and click Next. 4. Enter the Task sequence name, select the appropriate boot image, and then click Next. 26 Deploying operating system image by using Operating Systems Deployment (OSD) - Dell Latitude 5280 | Managing Windows-based Wyse Thin Clients using System Cente - Page 27
Figure 29. Task sequence information 5. Enter the package name and image index and click Next. The Index number may vary depending on the configuration of your thin client. Deploying operating system image by using Operating Systems Deployment (OSD) 27 - Dell Latitude 5280 | Managing Windows-based Wyse Thin Clients using System Cente - Page 28
Figure 30. Install Windows 6. On the Configure the network page, specify your preferred configuration, and click Next. 28 Deploying operating system image by using Operating Systems Deployment (OSD) - Dell Latitude 5280 | Managing Windows-based Wyse Thin Clients using System Cente - Page 29
Figure 31. Configure network 7. On the Install the Configuration Manager Client page, click Browse, and select Configuration Manager Client Package and then click Next. Deploying operating system image by using Operating Systems Deployment (OSD) 29 - Dell Latitude 5280 | Managing Windows-based Wyse Thin Clients using System Cente - Page 30
Figure 32. Install configuration manager 8. Clear the following check boxes and click Next: • Capture user settings and files • Capture network settings • Capture Microsoft Windows settings 30 Deploying operating system image by using Operating Systems Deployment (OSD) - Dell Latitude 5280 | Managing Windows-based Wyse Thin Clients using System Cente - Page 31
Figure 33. State migration 9. On the Include Software Updates page, select Do not install any software updates check box, and click Next. 10. On the Install applications page click Next. Deploying operating system image by using Operating Systems Deployment (OSD) 31 - Dell Latitude 5280 | Managing Windows-based Wyse Thin Clients using System Cente - Page 32
Figure 34. Install applications 11. On the Summary page, verify the information that you have provided, and click Next. 32 Deploying operating system image by using Operating Systems Deployment (OSD) - Dell Latitude 5280 | Managing Windows-based Wyse Thin Clients using System Cente - Page 33
Figure 35. Summary page The selected settings are applied. 12. Click Close. Deploying operating system image by using Operating Systems Deployment (OSD) 33 - Dell Latitude 5280 | Managing Windows-based Wyse Thin Clients using System Cente - Page 34
13. Right-click the deployment task sequence, and click Edit. 34 Deploying operating system image by using Operating Systems Deployment (OSD) - Dell Latitude 5280 | Managing Windows-based Wyse Thin Clients using System Cente - Page 35
: 17. Click the Properties tab, and add the following command line for mapping the network drive: net use \\IPAddress\share\PrepareOS_WIE10 password /user: domainname\User name NOTE: Copy the PrepareOSPartition.wss file available in the C:\windows\setup folder to the Configuration Manager server - Dell Latitude 5280 | Managing Windows-based Wyse Thin Clients using System Cente - Page 36
Figure 37. Mapping DEW 20. Enter the command line to map the network drive of the SCCM Server share where the DEW files are copied. 21. Create cmd scripts execute-DEW-script.cmd and Task-sequence-dew-script.ps1, and copy to the DEW folder in share path. For more information, see Pre-requisites to - Dell Latitude 5280 | Managing Windows-based Wyse Thin Clients using System Cente - Page 37
Figure 38. DEW_Directory 25. Enter cmd.exe /c md C:\DEW\Temp in the Command line field. 26. Click Apply and then click OK. 27. Click Install Operating System, and click Add. 28. In the Properties tab, enter CopyFiles_DEW in the Name field. Deploying operating system image by using Operating Systems - Dell Latitude 5280 | Managing Windows-based Wyse Thin Clients using System Cente - Page 38
Figure 39. Copyfiles_DEW 29. Enter xcopy L:\ C:\DEW_Temp /c /d /e /h /i /k /q /r /s /x /y in the Command line field. 30. Click Apply and then click OK. 31. Click Install Operating System, and click Add. 32. In the Properties tab, enter Invoke_DEW_Script in the Name field. 38 Deploying operating - Dell Latitude 5280 | Managing Windows-based Wyse Thin Clients using System Cente - Page 39
Figure 40. Invoke_DEW_Script 33. Enter cmd.exe /c "C:\DEW_Temp\execute-DEW-script.cmd" in the Command line field. 34. Type C:\DEW_Temp in the Start field. 35. Click Apply and then click OK. 36. Click Install Operating System, and click Add. 37. In the Properties tab, enter Restart in Windows PE in - Dell Latitude 5280 | Managing Windows-based Wyse Thin Clients using System Cente - Page 40
Figure 41. Restart in Windows PE 38. Click Apply and then click OK. 39. Click Install Operating System, and click Add. 40. In the Properties tab, enter Mapping in the Name field. 40 Deploying operating system image by using Operating Systems Deployment (OSD) - Dell Latitude 5280 | Managing Windows-based Wyse Thin Clients using System Cente - Page 41
Figure 42. Mapping 41. Enter the command line to map the network drive of the SCCM Server share where the DEW files are copied. 42. Click Apply and then click OK. 43. Click Install Operating System, and click Add. 44. In the Properties tab, enter Format in the Name field. Deploying operating system - Dell Latitude 5280 | Managing Windows-based Wyse Thin Clients using System Cente - Page 42
Figure 43. Format 45. Enter Diskpart.exe /s PrepareOSPartition.wss in the Command line field. 46. Enter K:\ in the Start in field. 47. Click Apply and then click OK. 48. Click Install Operating System, and click Add. 49. Click the Properties tab, and do the following: a) Click the Apply an operating - Dell Latitude 5280 | Managing Windows-based Wyse Thin Clients using System Cente - Page 43
-down list, select a value of the image. Ensure that the value is the highest of 1-1, 2-2, 3-3. NOTE: If only a single image exists, then by default the value is displayed as 1-1. d) Select the Use an Unattended or Sysprep answer file for a custom installation check box. e) Browse to the location - Dell Latitude 5280 | Managing Windows-based Wyse Thin Clients using System Cente - Page 44
Figure 45. Apply Network Settings 52. Select the Join a workgroup radio button and specify the workgroup name. 53. Click Apply and then click OK. 54. Click Setup Operating System, and click Add. 55. In the Properties tab, enter Setup Windows and Configuration Manager in the Name field. 44 - Dell Latitude 5280 | Managing Windows-based Wyse Thin Clients using System Cente - Page 45
Figure 46. Setup Windows and Configuration Manager 56. In the Client Package field, browse and select Configuration Manager Client Package. 57. Click Apply and then click OK. Deploying Windows reference image To deploy the Windows reference image, do the following: 1. Right-click the created - Dell Latitude 5280 | Managing Windows-based Wyse Thin Clients using System Cente - Page 46
page, select Required from the Purpose drop-down list. 4. To make this task sequence available for software deployment, select Configuration Manager Clients, media and PXE from the drop-down list and click Next. 46 Deploying operating system image by using Operating Systems Deployment (OSD - Dell Latitude 5280 | Managing Windows-based Wyse Thin Clients using System Cente - Page 47
Figure 48. Deployment settings 5. On the Specify the schedule for this deployment page, click New. Deploying operating system image by using Operating Systems Deployment (OSD) 47 - Dell Latitude 5280 | Managing Windows-based Wyse Thin Clients using System Cente - Page 48
after you complete the configuration. 7. In Assignment Schedule click OK. 8. On the User Experience page, retain the default options and click Next. 9. On the Alert page, retain the default options and click Next. 48 Deploying operating system image by using Operating Systems Deployment (OSD) - Dell Latitude 5280 | Managing Windows-based Wyse Thin Clients using System Cente - Page 49
Next, and then click Close. After the task sequence is complete, the thin client restarts in the Windows pre-installation environment. NOTE: Time for the advertisement to appear at the client side depends on the thin client and the user policy refresh interval time. It also depends on the server - Dell Latitude 5280 | Managing Windows-based Wyse Thin Clients using System Cente - Page 50
reference image. After successful deployment, the thin client automatically logs in using the local user account, and the Dell Wyse scripts run on the destination thin client. The scripts enable the Unified Write Filter, and restarts the thin client. 50 Deploying operating system image by using - Dell Latitude 5280 | Managing Windows-based Wyse Thin Clients using System Cente - Page 51
more information on managing Windows Embedded devices that are write-filer enabled, see blogs.technet.microsoft.com and Planning for client deployment to Windows Embedded devices in System Center Configuration Manager at https://docs.microsoft.com/. Pre-requisites to deploy software applications - Dell Latitude 5280 | Managing Windows-based Wyse Thin Clients using System Cente - Page 52
folder. • When you deploy an operating system image to the client by using a task sequence, the size of the wim file Set-ExecutionPolicy ExecutionPolicy Unrestricted #Get GUID $id = Get-WmiObject -Class NTFS -Force -Full $service = "DEWSERVICE" Set-Service -Name $service -StartupType Disabled New- - Dell Latitude 5280 | Managing Windows-based Wyse Thin Clients using System Cente - Page 53
the C:\windows\setup\sysprep.xml file (for legacy scripts) and C:\windows\setup\tools \sysprep.xml file (for PowerShell ported scripts) with supported images to the \SCCMserver\share-folder location on the Configuration Manager server. The .xml file must be accessible by the Configuration Manager - Dell Latitude 5280 | Managing Windows-based Wyse Thin Clients using System Cente - Page 54
Figure 53. Information about package 4. Browse to the source folder where you have copied the sysprep files. 5. Click Next. 6. Select Program for device radio button, and then click Next. NOTE: Based on your requirement, you can select any one of the options available on the Program type page. 54 - Dell Latitude 5280 | Managing Windows-based Wyse Thin Clients using System Cente - Page 55
Figure 54. Program type 7. Enter the package device information, and click Next. 8. Enter the estimated disk space, and click Next. Creating software package for unattended installation 55 - Dell Latitude 5280 | Managing Windows-based Wyse Thin Clients using System Cente - Page 56
Figure 55. Estimated disk space 9. Verify the information that you have provided and click Next. 56 Creating software package for unattended installation - Dell Latitude 5280 | Managing Windows-based Wyse Thin Clients using System Cente - Page 57
Figure 56. Summary page The settings are applied. 10. Click Close. 11. In the Distribute Content wizard, right-click the software package which you have created, and click Distribute content. Creating software package for unattended installation 57 - Dell Latitude 5280 | Managing Windows-based Wyse Thin Clients using System Cente - Page 58
Figure 57. Content destination 12. From the Add drop-down list, select Distribution Point. 58 Creating software package for unattended installation - Dell Latitude 5280 | Managing Windows-based Wyse Thin Clients using System Cente - Page 59
Figure 58. Add distribution points 13. In Available distribution points, select the check boxes applicable to the distribution points that host your content, and click OK. 14. Click Next. Figure 59. Content status The content status is displayed in green. It may take a few minutes to complete the
-
 1
1 -
 2
2 -
 3
3 -
 4
4 -
 5
5 -
 6
6 -
 7
7 -
8
-
9
-
10
-
11
-
12
-
13
-
14
-
15
-
16
-
17
-
18
-
19
-
20
-
21
-
22
-
23
-
24
-
25
-
26
-
27
-
28
-
29
-
30
-
31
-
32
-
33
-
34
-
35
-
36
-
37
-
38
-
39
-
40
-
41
-
42
-
43
-
44
-
45
-
46
-
47
-
48
-
49
-
50
-
51
-
52
-
53
-
54
-
55
-
56
-
57
-
58
-
59
 |
 |

Managing Windows-based Dell Wyse Thin
Clients using System Center Configuration
Manager
Administrator’s Guide