Dell DL1000 Appliance Users Guide - Page 71
Restore Machine Wizard, Disk Mapping Preview
 |
View all Dell DL1000 manuals
Add to My Manuals
Save this manual to your list of manuals |
Page 71 highlights
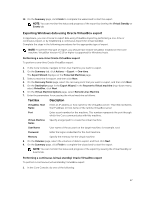
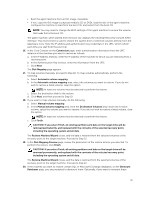
• Boot the agent machine from an ISO image, if possible. • If not, copy the ISO image to physical media (a CD or DVD), load the disc in the agent machine, configure the machine to load from the boot CD, and restart from the boot CD. NOTE: You may need to change the BIOS settings of the agent machine to ensure the volume that loads first is the boot CD. The agent machine, when started from the boot CD, displays the Universal Recovery Console (URC) interface. This environment is used to restore the system drive or selected volumes directly from the AppAssure Core. Note the IP address and authentication key credentials in the URC, which refresh each time you start from the boot CD. 16. In the Core Console on the Connection page, enter authentication information from the URC instance of the machine you want to restore as follows: a. In the IP Address text box, enter the IP address of the machine to which you are restoring from a recovery point. b. In the Authentication Key text box, enter the information from the URC. c. Click Next. The Disk Mapping page appears. 17. To map volumes manually, proceed to Step 18. To map volumes automatically, perform the following: a. Select Automatic volume mapping. b. In the Automatic volume mapping area, select the volumes you want to restore. If you do not wish to restore a listed volume, clear the option. NOTE: At least one volume must be selected to perform the restore. c. Select the destination disk for the restore. d. Click Next, and then proceed to Step 19. 18. If you want to map volumes manually, do the following: a. Select Manual volume mapping. b. In the Manual volume mapping area, from the Destination Volumes drop-down list for each volume, select the volume you want to restore. If you do not wish to restore a listed volume, clear the option. NOTE: At least one volume must be selected to perform the restore. c. Click Finish. CAUTION: If you select Finish, all existing partitions and data on the target drive will be removed permanently, and replaced with the contents of the selected recovery point, including the operating system and all data. The Restore Machine Wizard closes, and the data is restored from the selected volumes of the recovery point to the target machine. Proceed to Step 22. 19. In the Disk Mapping Preview page, review the parameters of the restore actions you selected. To perform the restore, click Finish. CAUTION: If you select Finish, all existing partitions and data on the target drive will be removed permanently, and replaced with the contents of the selected recovery point, including the operating system and all data. The Restore Machine Wizard closes, and the data is restored from the selected volumes of the recovery point to the target machine. Proceed to Step 22. 20. If the volumes you want to restore contain SQL or Microsoft Exchange databases, on the Dismount Databases page, you are prompted to dismount them. Optionally, if you want to remount these 71
-
 1
1 -
2
-
3
-
4
-
5
-
6
-
7
-
8
-
9
-
10
-
11
-
12
-
13
-
14
-
15
-
16
-
17
-
18
-
19
-
20
-
21
-
22
-
23
-
24
-
25
-
26
-
27
-
28
-
29
-
30
-
31
-
32
-
33
-
34
-
35
-
36
-
37
-
38
-
39
-
40
-
41
-
42
-
43
-
44
-
45
-
46
-
47
-
48
-
49
-
50
-
51
-
52
-
53
-
54
-
55
-
56
-
57
-
58
-
59
-
60
-
61
-
62
-
63
-
64
-
65
-
 66
66 -
 67
67 -
 68
68 -
 69
69 -
 70
70 -
 71
71 -
 72
72 -
 73
73 -
 74
74 -
 75
75 -
 76
76 -
77
-
78
-
79
-
80
-
81
-
82
-
83
-
84
-
85
-
86
-
87
-
88
-
89
-
90
-
91
-
92
-
93
-
94
-
95
-
96
-
97
-
98
 |
 |
