2011 Yamaha Motorsports V Star 650 Custom Owners Manual - Page 51
2011 Yamaha Motorsports V Star 650 Custom Manual

Page 51 highlights
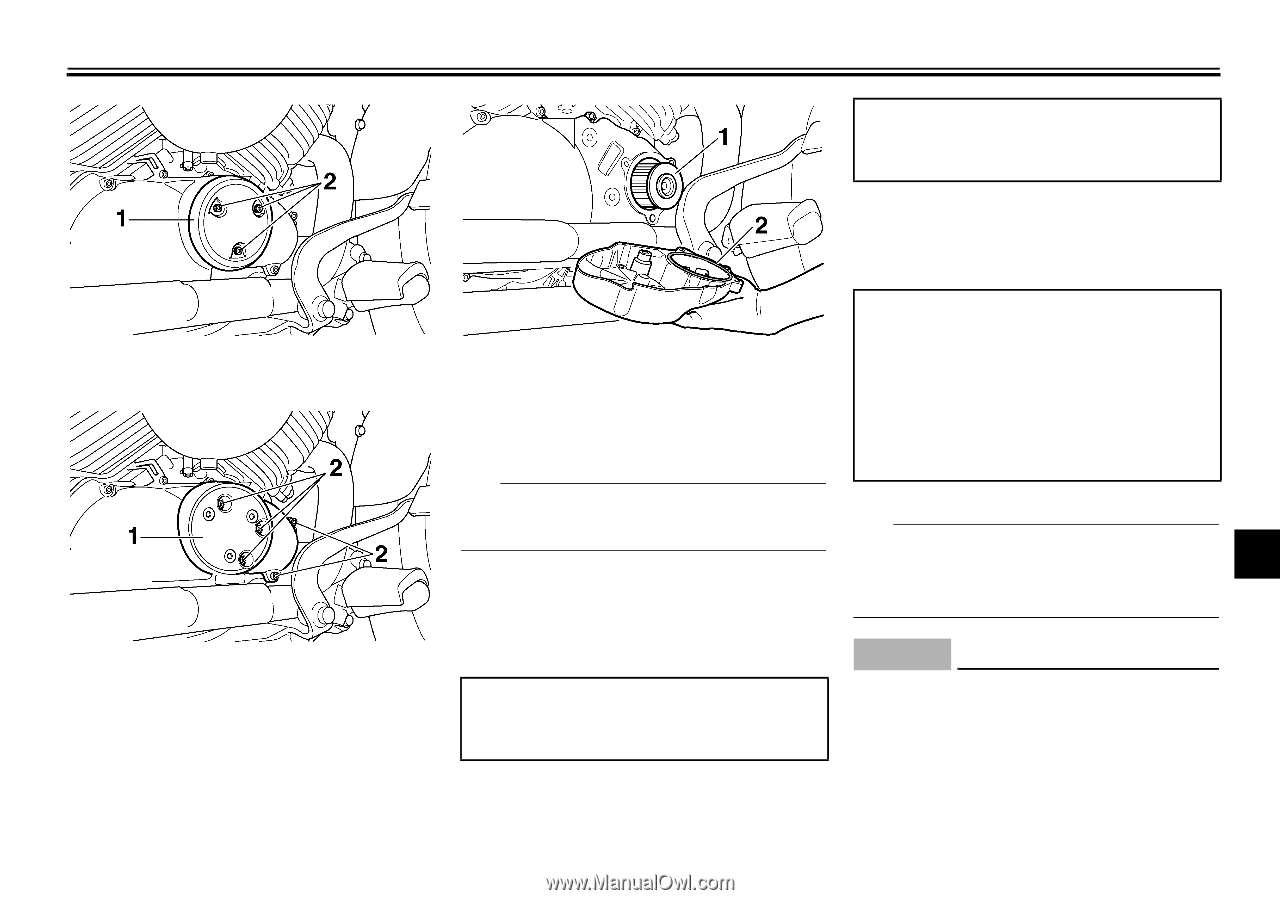
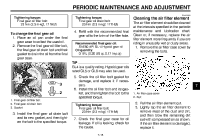
PERIODIC MAINTENANCE AND ADJUSTMENT Tightening torque: Engine oil drain bolt: 43 Nm (4.3 m·kgf, 31 ft·lbf) 9. Refill with the specified amount of the recommended oil, and then install and tighten the oil filler cap. Recommended engine oil: See page 9-1. Oil quantity: Without oil filter element replacement: 2.60 L (2.75 US qt, 2.29 Imp.qt) With oil filter element replacement: 2.80 L (2.96 US qt, 2.46 Imp.qt) 1. Outer oil filter element cover 2. Bolt 1. Oil filter element 2. O-ring 6. Install a new oil filter element and the O-ring. TIP Make sure that the O-ring is properly seated. 7. Install the oil filter element covers by installing the bolts, and then tighten them to the specified torque. Tightening torque: Oil filter element cover bolt: 10 Nm (1.0 m·kgf, 7.2 ft·lbf) TIP Be sure to wipe off spilled oil on any parts after the engine and exhaust system have cooled down. ECA11620 7 1. Inner oil filter element cover 2. Bolt NOTICE G 5. Remove the oil filter element and O-ring. 8. Install the engine oil drain bolt and its new gasket, and then tighten the bolt to the specified torque. 7-13 In order to prevent clutch slippage (since the engine oil also lubricates the clutch), do not mix any chemical additives. Do not use oils with a diesel specification of "CD" or oils of a high-
-
 1
1 -
2
-
3
-
4
-
5
-
6
-
7
-
8
-
9
-
10
-
11
-
12
-
13
-
14
-
15
-
16
-
17
-
18
-
19
-
20
-
21
-
22
-
23
-
24
-
25
-
26
-
27
-
28
-
29
-
30
-
31
-
32
-
33
-
34
-
35
-
36
-
37
-
38
-
39
-
40
-
41
-
42
-
43
-
44
-
45
-
 46
46 -
 47
47 -
 48
48 -
 49
49 -
 50
50 -
 51
51 -
 52
52 -
 53
53 -
 54
54 -
 55
55 -
 56
56 -
57
-
58
-
59
-
60
-
61
-
62
-
63
-
64
-
65
-
66
-
67
-
68
-
69
-
70
-
71
-
72
-
73
-
74
-
75
-
76
-
77
-
78
-
79
-
80
-
81
-
82
-
83
-
84
-
85
-
86
-
87
-
88
-
89
-
90
-
91
-
92
-
93
-
94
-
95
-
96
-
97
-
98
 |
 |