URC MX-600 Owners Manual
URC MX-600 Manual
 |
View all URC MX-600 manuals
Add to My Manuals
Save this manual to your list of manuals |
URC MX-600 manual content summary:
- URC MX-600 | Owners Manual - Page 1
- URC MX-600 | Owners Manual - Page 2
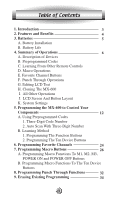
3. Batteries 5 A. Battery Installation B. Battery Life 4. Summary of Operations 6 A. Description of Devices B. Preprogrammed Codes C. Learning From Other Remote Controls D. Macro Operations E. Favorite Channel Buttons F. Punch Through Operations G. Editing LCD Text H. Cloning The MX-600 - URC MX-600 | Owners Manual - Page 3
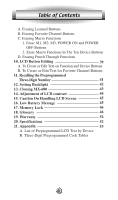
Buttons 11. Recalling the Preprogrammed Three-Digit Number 41 12. Setting Backlight 42 13. Cloning MX-600 43 14. Adjustment of LCD contrast 44 15. Caution On Handling LCD Screen 45 16. Low Battery Message 45 17. Memory Lock 46 18. Glossary 46 19. Warranty 52 20. Specifications - URC MX-600 | Owners Manual - Page 4
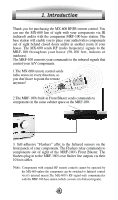
flasher line outputs via their 10 foot cables. Note: Components with original RF remote controls cannot be operated by the MX-600 unless the component can be switched to Infrared control via it's internal menus.The MX-600's RF signal only communicates with the MRF-100 base station (which converts it - URC MX-600 | Owners Manual - Page 5
home and the amount of interference generated by computers, microprocessors and other devices within and nearby your home. Replaces Ten Remote Controls Your MX-600 can operate up to ten home entertainment and home automation infrared controlled components by using the preprogrammed code library in - URC MX-600 | Owners Manual - Page 6
unit and install the four AAA batteries inside the battery compartment as shown. Make sure the batteries line up with the (+) and (-) markings. Improper installation could damage the remote control. When you're done, slide the battery cover back on. The remote control starts up automatically and the - URC MX-600 | Owners Manual - Page 7
all of your components with the MX-600 by simply entering a three-digit code number assigned to your brand of component. The code numbers for the various brands of components are listed in the back of this instruction manual. Please refer to the programming instructions shown on page 13 for details - URC MX-600 | Owners Manual - Page 8
From Other Remote Controls The MX-600 can learn codes from your original remote controls. There are 26 LCD screens in the MX-600. Each screen You can teach up to 530 new functions into the remote control. Please refer to page 19 in this instruction manual for details. D. Macro Operations A "macro" is - URC MX-600 | Owners Manual - Page 9
channel numbers into these buttons. Each of these buttons can send out up to 10 commands. Please refer to page 24 of the manual for Favorite Channel Programming. F. Punch Through Operations The MX-600 can be set up to operate your audio component volume control buttons (VOLUME UP and DOWN and 8 - URC MX-600 | Owners Manual - Page 10
buttons in the remote control are controlling other components. Please refer to page 32 in the manual for details. G. Editing LCD Text You can write your own text on each of the twenty-six LCD screens. Please refer to page 39 in the manual for details. H. Cloning The MX-600 The MX-600 is capable of - URC MX-600 | Owners Manual - Page 11
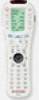
4. Summary of Operations J. LCD Screen And Button Layout Displays the name of the device selected. POWER ON Displays page number. Displays the device and function names. LIGHT button. MACRO buttons. MAIN DEVICE menu button. LCD Page change button. POWER OFF MUTE VOLUME CHANNEL Previous channel - URC MX-600 | Owners Manual - Page 12
4. Summary of Operations K. System Settings All programming is done by first entering the SETUP mode in the remote control. Press both the MAIN and ENTER buttons simultaneously for three seconds to enter the SETUP mode. SETUP will be shown at the top of - URC MX-600 | Owners Manual - Page 13
preprogrammed method for those devices. For the rest, you can program the MX-600 to make it compatible with your components by following the preprogrammed method instructions, by using your original remote controls to teach the MX-600, or both methods. Next, it is a good idea to decide whether you - URC MX-600 | Owners Manual - Page 14
a combination of both to fully customize your MX-600 will give you a remote totally customized to your needs. So, let's start with learning how to Preprogram the MX-600. A. Using Preprogrammed Codes 1. Three-Digit Code Number You can program the MX-600 to make it compatible with your components by - URC MX-600 | Owners Manual - Page 15
MX-600 to Control Your Components 1. Manually turn on the device you wish to operate. 2. Go to the SETUP mode by pressing both the MAIN and ENTER buttons simultaneously for three seconds until SETUP appears at the top of the LCD screen. 3. Press the P-PRO button next to the LCD screen. 4. The remote - URC MX-600 | Owners Manual - Page 16
5. Programming the MX-600 to Control Your Components first three-digit code functions to operate your equipment. If there are any functions missing, you will learn them from your original remote in the "Learning Method" section on page 19. 10. Continue to program other components by repeating from - URC MX-600 | Owners Manual - Page 17
5. Programming the MX-600 to Control Your Components 12. When you are finished programming your remote, exit from the preprogramming mode by codes for your device and make note of each one that turns your device OFF. 1. Manually turn on the device you plan to operate. 2. Go to the SETUP mode by - URC MX-600 | Owners Manual - Page 18
MX-600 to Control Your Components 4. The remote will be flashing "SELECT BUTTON". Press the device you wish to program. (For example, to program TV, press the TV button.) 5. The remote labels as shown in the illustration on page 11 of this manual. For example, if you have relabeled AUX as LIGHTS, you - URC MX-600 | Owners Manual - Page 19
5. Programming the MX-600 to Control Your Components 7. Confirm that it is the right code by pressing the Power button. After you have confirmed that the right code is - URC MX-600 | Owners Manual - Page 20
guide, exit, info, 0-9, and the joystick. Points to Remember If the remote control fails to learn a function after the first try: G Keep the remotes is not at an angle. G Make sure both remotes' batteries aren't low. G Avoid programming the MX-600 under bright lighting. It can interfere with the - URC MX-600 | Owners Manual - Page 21
the function button you wish to program. 4. Press the PAGE button to go to page 2 of the device if you need to. 5. Place your original remote control head to head with the MX-600 about 2 inches apart on a flat surface as illustrated below. 20 - URC MX-600 | Owners Manual - Page 22
button on your original remote control that you wish to program onto the MX-600. Once the MX-600 has received the signal, the MX-600 will flash "Good" Tip: Learning to VOL, CH and Transport buttons: If you are having problems learning to the Volume, Channel and Transport buttons, it may be that you - URC MX-600 | Owners Manual - Page 23
of the ten device buttons you wish to program on the MX-600. Press the button on your original remote control you wish to program into the Device button you have chosen on the MX-600. Once the MX-600 has received the signal, the MX-600 will flash "Good" on the LCD screen, indicating it learned the - URC MX-600 | Owners Manual - Page 24
5. Programming the MX-600 to Control Your Components 7. Once you complete the programming and wish to exit the Learning mode, press the MAIN button. Exit from the SETUP mode by pressing the MAIN button once again. Tip: Only follow these instructions if you actually want a code sent when changing - URC MX-600 | Owners Manual - Page 25
6. Programming Favorite Channels You can create and program up to 50 Favorite Channel buttons. Each favorite channel button can send out up to 10 commands with one button press. 1. Go to the SETUP mode by pressing both the MAIN and ENT buttons simultaneously for three seconds. 2. Press the FAV - URC MX-600 | Owners Manual - Page 26
) To make even more powerful FAV macros, you can learn codes from your original remote(s) to the 0-9, ENTER, DISPLAY, POWER ON, POWER OFF, and INFO/PAUSE buttons could LEARN the proper code to the ENTER button from your original television remote, and use that in your FAV macro. If you are creative, - URC MX-600 | Owners Manual - Page 27
one button. There are two types of macro functions you can program with the MX-600: The M1, M2, M3, POWER ON and POWER OFF buttons are designed button is pressed for more than 1 second while on the MAIN page of the remote control. Important: If you program the POWER ON and POWER OFF buttons with a - URC MX-600 | Owners Manual - Page 28
7. Programming Macro Buttons 3. Press one of the macro buttons, M1-M3, POWER ON or POWER OFF you wish to store your macro on. 4. Press the functional buttons you wish to store in the device macro button you selected, in the order you want them stored. You can store up to 20 commands. Important: Do - URC MX-600 | Owners Manual - Page 29
7. Programming Macro Buttons B. Programming Macro Functions To The Ten Device Buttons 1. Go to the SETUP mode by pressing the MAIN and ENTER buttons simultaneously for three seconds. 2. Press the MACRO button next to the LCD screen. 3. Important: Press the PAGE button. 4. Press one of the ten device - URC MX-600 | Owners Manual - Page 30
. It will not show when a series of PAUSE commands are being executed. Wait until the icon finishes flashing before using other functions or putting the remote down. Sample Macro: The following is a sample macro, to give you a quick idea of what a macro can do, in an easy stepby-step form. Please - URC MX-600 | Owners Manual - Page 31
7. Programming Macro Buttons In this case we are going to use the M1 button to turn on the TV, the receiver, the Cable box, choose the appropriate inputs, and tune in the channel where we normally watch the morning news. 1. Press MAIN and ENTER simultaneously for three seconds. 2. Press MACRO. 3. - URC MX-600 | Owners Manual - Page 32
7. Programming Macro Buttons 15. Press MAIN. 16. Press CABLE. (Back to the this device to enter the appropriate channel.) 17. Press 1, then 3, then 5. (Then press the ENT button if your cable device requires it.) 18. Press CH UP to save the macro. 19. Press MAIN twice. Press M1 to test your macro. - URC MX-600 | Owners Manual - Page 33
8. Programming Punch Through Functions You can use the audio receiver volume control in a different mode (for example, Audio receiver Volume Up and Volume Down and Mute in Satellite mode) using the volume punch through feature. You can also have channel punch through (Channel Up, Channel Down) as - URC MX-600 | Owners Manual - Page 34
8. Programming Punch Through Functions For example, for VOL you are punching through the controls of the Audio receiver's VOL to the TV or Cable box, enabling you to control the Audio receiver's VOL when in the TV or Cable box screen. 6. Punch Through is saved when the second device is pressed. 7. - URC MX-600 | Owners Manual - Page 35
seconds. 2. Press the ERASE button next to the LCD screen. 3. Press the LEARN button. 4. If you wish to erase all the learned functions in the MX-600TM, press the ALL button and then press the SURE? button at the next LCD screen. 5. If you wish to erase all the buttons in - URC MX-600 | Owners Manual - Page 36
. 2. Press the ERASE button next to the LCD screen. 3. Press the FAV button. 4. If you wish to erase all the favorite channel buttons in the MX-600, press the ALL button and then press the SURE? button at the next LCD screen. 5. If you wish to erase one button, press the KEY - URC MX-600 | Owners Manual - Page 37
. 2. Press the ERASE button next to the LCD screen. 3. Press the MACRO button. 4. If you wish to erase all of the macro buttons in the MX-600, press the ALL button and then press the SURE? button at the next LCD screen. 5. If you wish to erase just one of the macros - URC MX-600 | Owners Manual - Page 38
9. Erasing Existing Programming 2. Erase Macro Functions In The Ten Device Buttons 1. Go to the SETUP mode by pressing the MAIN and ENTER buttons simultaneously for three seconds. 2. Press the ERASE button next to the LCD screen. 3. Press the MACRO button. 4. Press the KEY button. 5. Press one of - URC MX-600 | Owners Manual - Page 39
9. Erasing Existing Programming 3. Press the VOL button on the LCD for Volume Punch Through, the PLAY for Transport Punch Through or the CH for Channel Punch Through depending upon which Punch Through you want to erase. 4. Press the DEVICE button from which you wish to erase punch through. 5. Press - URC MX-600 | Owners Manual - Page 40
before selecting the Device button. 6. The character to be changed will blink and you can change the character using the number pad buttons on the remote control. The characters assigned to each number pad button are shown below. It will be rotated to a different character each time the same number - URC MX-600 | Owners Manual - Page 41
. 4. The character to be changed on the button you selected will blink and you can change the character using the number pad buttons on the remote control. The characters assigned to each number pad button are shown on the next page. It will be rotated to different character each time the - URC MX-600 | Owners Manual - Page 42
to the device for 10 seconds and then exit to the SETUP mode. 4. Before the 10 seconds are up, pressing the MAIN button on the remote will stop the flashing and exit to the SETUP mode. 5. Exit from SETUP mode by pressing the MAIN button once again. 41 - URC MX-600 | Owners Manual - Page 43
The Backlight can be toggled On and Off just by pushing the LIGHT button on the top right side of the remote. It can also be set to go off at a predetermined time, as shown below. 1. Go to the SETUP will go off at the predetermined interval AFTER you have pushed the last button on the remote. 42 - URC MX-600 | Owners Manual - Page 44
three seconds. 2. Press the CLONE button next to the LCD screen. 3. Press either the SEND or RECV button depending upon the role of the remote control. If the MX-600 is to be copied from, press the SEND button. If it is to be copied to, press the RECV button. 4. If you wish - URC MX-600 | Owners Manual - Page 45
13. Cloning MX-600 7. Press the START button on both units to begin cloning. It will take about 40 seconds to complete the cloning and it will flash " GOOD" - URC MX-600 | Owners Manual - Page 46
water. G Don't expose the MX-600 to extreme temperatures. Keep it away from any heat sources. G Avoid dropping the remote control. G Clean the LCD screen with a soft cloth. Never use abrasives or cleaning solutions on the soft cloth. 16. Low Battery Message If the batteries are running low, the LCD - URC MX-600 | Owners Manual - Page 47
for use in low light or dark conditions. Battery type: The MX-600 uses 4 standard disposable alkaline AAA batteries, or the new rechargeable alkaline batteries. Codes: Can refer to either the numeric codes needed to program a preprogrammed remote control, or the actual infrared signals transmitted - URC MX-600 | Owners Manual - Page 48
and off and changing device inputs. Some of the preprogrammed codes in the MX-600 contain discrete codes. If your original remote contains discrete codes, these can be taught to the MX-600 as well. Device: The MX-600 remote control is capable of controlling a certain number of devices, or pieces of - URC MX-600 | Owners Manual - Page 49
for any limits on the range of frequencies that can be controlled. Emitters are always placed at the "top" of a remote control and are typically shielded by a red plastic window. The MX-600 has 2 very strong IR emitters. Infrared receiver: The portion of a device that receives infrared commands from - URC MX-600 | Owners Manual - Page 50
referred to as a Thumbpad. Keypad: Generally refers to all hard buttons on a remote control, or more specifically the numeric keypad (0 through 9). LCD screen: The display device built into the MX-600. The MX-600 LCD screen displays mode and programming information, along with macro commands and - URC MX-600 | Owners Manual - Page 51
displayed on the LCD panel. Pause: See Delay. Power off: A feature used by many LCD remote controls to save battery power, it represents entering a "standby" mode after a certain length of inactivity. The MX-600 uses very little power with the LCD screen on, so the screen remains on at all times - URC MX-600 | Owners Manual - Page 52
way components. RF: Radio Frequency signals. Note that the MX-600's RF signal only communicates with the MRF-100 base station (which converts it to Infrared signals). Components with original RF remote controls cannot be operated by the MX600 unless the component can be switched to Infrared control - URC MX-600 | Owners Manual - Page 53
19. Warranty The MX-600 is covered against any manufacturers defects or workmanship for a period of MRF-100 Power Supply: 9V 300mA IR Flasher Line Outputs: 2.5mm Mono Mini Jack RF Frequency: 418MHz MX-600 IR Range: 30 to 50 feet (line of sight), depending on your components RF Range: 50 to 100 - URC MX-600 | Owners Manual - Page 54
UP CH DN MUTE PRE-CH UP DN LEFT RIGHT SELECT PLAY STOP REW FF II, GUIDE O, EXIT II, INFO 1 2 3 4 5 6 7 8 9 0 DISPLAY ENTER Functions POWER UP CH DN MUTE PRE-CH UP DN LEFT RIGHT SELECT PLAY STOP REW FF II, GUIDE O, EXIT II, INFO 1 2 3 4 5 6 7 8 9 0 DISPLAY ENTER Functions - URC MX-600 | Owners Manual - Page 55
CH DN MUTE PRE-CH UP DN LEFT RIGHT SELECT PLAY STOP REW FF II, GUIDE O, EXIT II, INFO 1 2 3 4 5 6 7 8 9 0 DISPLAY ENTER ON POWER OFF VOL UP VOL DN CH UP CH DN MUTE PREV CH UP DN LEFT RIGHT SELECT MENU GUIDE CANCEL INFO 1 2 3 4 5 6 7 8 9 0 DISPLAY ENTER VCR Button Name ON OFF VOL UP - URC MX-600 | Owners Manual - Page 56
DN CH UP CH DN MUTE PRE-CH UP DN LEFT RIGHT SELECT PLAY STOP REW FF II, GUIDE O, EXIT II, INFO 1 2 3 4 5 6 7 8 9 0 DISPLAY ENTER Functions POWER ON DN CH UP CH DN MUTE PREV CH UP DN LEFT RIGHT SELECT PLAY STOP REW FF MENU GUIDE EXIT INFO 1 2 3 4 5 6 7 8 9 0 DISPLAY ENTER DVD/LD Button - URC MX-600 | Owners Manual - Page 57
Name ON OFF VOL UP VOL DN CH UP CH DN MUTE PRE-CH UP DN LEFT RIGHT SELECT PLAY STOP REW FF II, GUIDE O, EXIT II, INFO 1 2 3 4 5 6 7 8 9 0 DISPLAY ENTER Functions POWER ON POWER OFF TRACK+ TRACK - RANDOM SKIP SKIP + PLAY STOP REW FF I>I EJECT PAUSE 1 2 3 4 5 6 7 8 9 0 DISC TAPE - URC MX-600 | Owners Manual - Page 58
UP CH DN MUTE PRE-CH UP DN LEFT RIGHT SELECT PLAY STOP REW FF II, GUIDE O, EXIT II, INFO 1 2 3 4 5 6 7 8 9 0 DISPLAY ENTER Functions POWER UP CH DN MUTE PRE-CH UP DN LEFT RIGHT SELECT PLAY STOP REW FF II, GUIDE O, EXIT II, INFO 1 2 3 4 5 6 7 8 9 0 DISPLAY ENTER Functions POWER - URC MX-600 | Owners Manual - Page 59
Set-Up Code Table B. Three-Digit Preprogrammed Code Table AUDIO Manufacturer/Brand ADC ADCOM AIWA AKAI AMC AMEND AMX ANGSTROM ARCAM ATLANTIC TECHNOLOGY AUDIO ACCESS AUDIO ALCHEMY AUDIO DESIGN AUDIO EASE AUDIO FILE AUDIO MATRIX AUDIO SOURCE AUDIO TECHNICA B & K BOSE BRYSTON CARVER CASIO CHIRO - URC MX-600 | Owners Manual - Page 60
Set-Up Code Table Manufacturer/Brand MCS MERIDIAN MITSUBISHI MONDIAL MYRYAD NAD NAKAMICHI NEC NIRO ONKYO OPTIMUS OUTLAW PANASONIC PARASOUND PHAST PHILIPS PIONEER POLKAUDIO PROCEED RCA REALISTIC REVOX ROTEL SAMSUNG SANSUI SANYO SCOTT SEARS SHARP SHERWOOD SONY SOUNDESIGN SOUNDSTREAM SSI SUMO SUNFIRE - URC MX-600 | Owners Manual - Page 61
Set-Up Code Table Manufacturer/Brand Set-Up Code Number CABLEVISION / VOOM 148 ECHOSTAR /DISH 122 EXPRESSVU 122 GENERAL ELECTRIC 151 106 150 GENERAL INSTRUMENT 148 GOI 122 HITACHI 139 140 HTS 122 HUGHES 068 154 161 162 165 166 JVC 122 MAGNAVOX 136 MEMOREX 136 MITSUBISHI 068 - URC MX-600 | Owners Manual - Page 62
Set-Up Code Table Manufacturer/Brand ADMIRAL ADVENT AKAI A MARK AMPRO AMSTRAD ANAM AOC APEX DIGITAL AUDIOVOX BLAUPUNKT CAIRN CANDLE CAPEHART CETRONIC CITIZEN CLASSIC CONCERTO CONTEC CORONADO CRAIG CROWN CURTIS MATHES CXC DAEWOO DAYTRON DWIN DYNASTY DYNATECH EIKI ELECTROHOME EMERSON FISHER FUJITSU - URC MX-600 | Owners Manual - Page 63
SHARP SIEMENS SIGNATURE SONY SOUNDESIGN SPECTRICON SSS SUPRE MACY SYLVANIA TANDY TATUNG TECHNICS TECHWOOD TEKNIKA TELEFUNKEN TELERENT TERA TMK TOSHIBA TOTEVISION UNIVERSAL VIDEO CONCEPTS VIDIKRON VIDTECH WARDS WESTING HOUSE YAMAHA YORK YUPITERU ZENITH ZONDA Set-Up Code Number 007 072 004 088 197 - URC MX-600 | Owners Manual - Page 64
Set-Up Code Table Manufacturer/Brand AIWA AKAI AMPRO ANAM AUDIO DYNAMICS BROOKSONIC CANON CAPEHART CRAIG CURTIS MATHES DAEWOO DAYTRON DBX DYNATECH ELECTROHOME EMERSON FISHER FUNAI GE GO VIDEO GOLDSTAR HARMAN KARDON HITACHI INSTANTREPLAY JCL JCPENNY JENSEN JVC KENWOOD LLOYD LXI MAGIN MAGNAVOX - URC MX-600 | Owners Manual - Page 65
Set-Up Code Table Manufacturer/Brand RUNCO SALORA SAMSUNG SANSUI SANYO SCOTT SEARS SHARP SHINTOM SIGNATURE SONY SOUNDESIGN STS SYLVANIA SYMPHONIC TANDY TATUNG TEAC TECHNICS TEKNIKA THOMAS TMK TOSHIBA TOTEVISION UNITECH VECTOR RESEARCH VICTOR VIDEO CONCEPTS VIDEOSONIC WARDS YAMAHA ZENITH Set-Up - URC MX-600 | Owners Manual - Page 66
Set-Up Code Table Manufacturer/Brand Set-Up Code Number ABC 004 103 003 039 042 046 053 ADELPHIA 043 074 ADVANCED NEWHOUSE 043 ALTRIO 043 AMERICAST 099 ARCHER 005 007 014 ARMSTONG 074 AT&T BROADBAND 074 ATLANTIC BROADBAND 043 074 BELL SOUTH 099 BLUE RIDGE 043 074 BRESNAN 074 - URC MX-600 | Owners Manual - Page 67
Set-Up Code Table Manufacturer/Brand SEREN SERVICE ELECTRIC SHAW SIGECOM SONY SPRUCER STARCOM STARGATE SUSQUEHANNA TIME WARNER TOCOM TOSHIBA UNITED CABLE UNIVERSAL VIDEOTRON VIEWSTAR Wide Open West ZENITH Set-Up Code Number 043 074 074 043 096 108 047 078 002 004 008 009 008 030 097 - URC MX-600 | Owners Manual - Page 68
Set-Up Code Table Manufacturer/Brand ALPINE APEX DIGITAL DENON GE GO VIDEO HARMAN KARDON HITACHI INTEGRA JVC KLH LG/GOLDSTAR MAGNAVOX MARANTZ MEMOREX MINTEK MITSUBISHI MYRYAD NAD NAKAMICHI ONKYO PANASONIC PHILIPS PIONEER PROCEED PROSCAN RCA SAMSUNG SHARP SONY TATUNG THOMPSON TOSHIBA YAMAHA ZENITH - URC MX-600 | Owners Manual - Page 69
Set-Up Code Table Manufacturer/Brand ADCOM AIWA AKAI AMC AMEND ARCAM AUDIO ACCESS AUDIO EASE AUDIO TECHNICA BSR CALIFORNIA AUDIO CAPETRONIC CARRERA CARVER CASIO CLARINETTE CREEK CROWN DENON EMERSON FISHER FRABA GENEXXA GOLDSTAR HAITAI HARMAN KARDON HITACHI INKEL JC PENNY JENSEN JVC KENWOOD KOSS - URC MX-600 | Owners Manual - Page 70
Set-Up Code Table CD Manufacturer/Brand RADIO SHACK RCA REALISTIC ROTEL SAE SANSUI SANYO SCOTT SHARP SHERWOOD SIGNATURE SONY SOUNDESIGN SUMO SYLVANIA SYMPHONIC TAEKWANG TANDY TEAC TECHNICS TECHWOOD THETA DIGITAL TOSHIBA VECTOR RESEARCH VICTOR WARDS YAMAHA YORX Set-Up Code Number 182 017 042 150 - URC MX-600 | Owners Manual - Page 71
Set-Up Code Table LD Manufacturer/Brand DENON MAGNAVOX MARANTZ MITSUBISHI NAD PANASONIC PHILIPS PIONEER RCA RUNCO SONY TECHNICS THETA DIGITAL TOSHIBA YAMAHA Set-Up Code Number 206 207 032 121 211 121 121 113 032 106 107 108 121 002 127 053 110 113 032 106 129 GNote : These codes are stored in - URC MX-600 | Owners Manual - Page 72
Set-Up Code Table Manufacturer/Brand CARVER DENON HARMAN KARDON JVC KENWOOD LUXMAN MAGNAVOX MARANTZ MITSUBISHI NAKAMICHI ONKYO PHILIPS PIONEER SANSUI SHERWOOD SONY TEAC YAMAHA Set-Up Code Number 008 027 024 036 105 227 233 239 240 013 023 145 035 027 027 242 243 244 245 012 018 019 027 003 039 050 - URC MX-600 | Owners Manual - Page 73
Set-Up Code Table Manufacturer/Brand HUGHES PHILIPS RCA REPLAY NETWORKS SONY TIVO Set-Up Code Number 117 090 117 109 075 104 105 090 117 DVR 72 - URC MX-600 | Owners Manual - Page 74
Set-Up Code Table G AUX - Light, Switch, etc. Manufacturer/Brand 3M AIWA ARCHER AUTON DMX DRAPER SCREEN DREAMVISION DWIN EVERQUEST EXTRON FAROUDJA FUJI JERROLD JVC HUNTER DOUGLAS KENWOOD LITE-TOUCH LUTRON MAKITA MINDPATH NILES NSM PIANO DISC PLUS POLKAUDIO RUSSOUND SCIENTIFIC ATLANTA SIMA SOLO - URC MX-600 | Owners Manual - Page 75
Notes 74 - URC MX-600 | Owners Manual - Page 76
Notes 75 - URC MX-600 | Owners Manual - Page 77
Notes 76 - URC MX-600 | Owners Manual - Page 78
Notes 77 - URC MX-600 | Owners Manual - Page 79
- URC MX-600 | Owners Manual - Page 80
OCE-0016A Rev.06
-
 1
1 -
 2
2 -
 3
3 -
 4
4 -
 5
5 -
 6
6 -
 7
7 -
8
-
9
-
10
-
11
-
12
-
13
-
14
-
15
-
16
-
17
-
18
-
19
-
20
-
21
-
22
-
23
-
24
-
25
-
26
-
27
-
28
-
29
-
30
-
31
-
32
-
33
-
34
-
35
-
36
-
37
-
38
-
39
-
40
-
41
-
42
-
43
-
44
-
45
-
46
-
47
-
48
-
49
-
50
-
51
-
52
-
53
-
54
-
55
-
56
-
57
-
58
-
59
-
60
-
61
-
62
-
63
-
64
-
65
-
66
-
67
-
68
-
69
-
70
-
71
-
72
-
73
-
74
-
75
-
76
-
77
-
78
-
79
-
80
 |
 |
