Stihl FC 75 Instruction Manual - Page 23
Operating Instructions, see Adjusting the Throttle Cable.
 |
View all Stihl FC 75 manuals
Add to My Manuals
Save this manual to your list of manuals |
Page 23 highlights
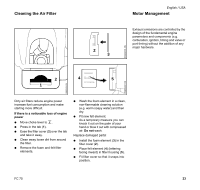
English / USA Operating Instructions 10 : Start the engine by pulling the starter rope briskly - 10 to 20 pulls may be necessary. If the engine still does not start : Push the slide control in the direction of the arrow (h ) to STOP-O. : Pull off the spark plug boot (10). : Unscrew and dry off the spark plug. 393BA019 KN : Open the throttle wide. : Crank the engine several times with the starter to clear the combustion chamber. : Refit the spark plug. : Connect the spark plug boot (press it down firmly). : Move the slide control to START. : Set the choke lever to e - even if engine is cold. : Now start the engine. Throttle cable adjustment : Check adjustment of throttle cable - see "Adjusting the Throttle Cable". Fuel tank run until dry : After refueling, press the fuel pump bulb at least five times - even if bulb is filled with fuel. : Set the choke lever to suit the engine temperature. : Now start the engine. During break-in period A factory new machine should not be run at high revs (full throttle off load) for the first three tank fillings. This avoids unnecessary high loads during the break-in period. As all moving parts have to bed in during the break-in period, the frictional resistances in the engine are greater during this period. The engine develops its maximum power after about 5 to 15 tank fillings. During operation After a long period of full-throttle operation, allow engine to run for a while at idle speed so that the heat in the engine can be dissipated by flow of cooling air. This protects enginemounted components (ignition, carburetor) from thermal overload. After finishing work Wait for engine to cool down. Drain the fuel tank. Store the machine in a dry place. Check tightness of nuts and screws (not adjusting screws) at regular intervals and retighten as necessary. 22 FC 75
-
 1
1 -
2
-
3
-
4
-
5
-
6
-
7
-
8
-
9
-
10
-
11
-
12
-
13
-
14
-
15
-
16
-
17
-
 18
18 -
 19
19 -
 20
20 -
 21
21 -
 22
22 -
 23
23 -
 24
24 -
 25
25 -
 26
26 -
 27
27 -
 28
28 -
29
-
30
-
31
-
32
-
33
-
34
-
35
-
36
-
37
-
38
-
39
-
40
-
41
-
42
-
43
-
44
-
45
-
46
-
47
-
48
-
49
-
50
-
51
-
52
-
53
-
54
-
55
-
56
-
57
-
58
-
59
-
60
-
61
-
62
-
63
-
64
-
65
-
66
-
67
-
68
-
69
-
70
-
71
-
72
-
73
-
74
-
75
-
76
-
77
-
78
-
79
-
80
-
81
-
82
 |
 |
