Sharp XG-NV7XUL XG-NV7XU Operation Manual - Page 45
Using the Presentation Tools, Using
 |
View all Sharp XG-NV7XUL manuals
Add to My Manuals
Save this manual to your list of manuals |
Page 45 highlights
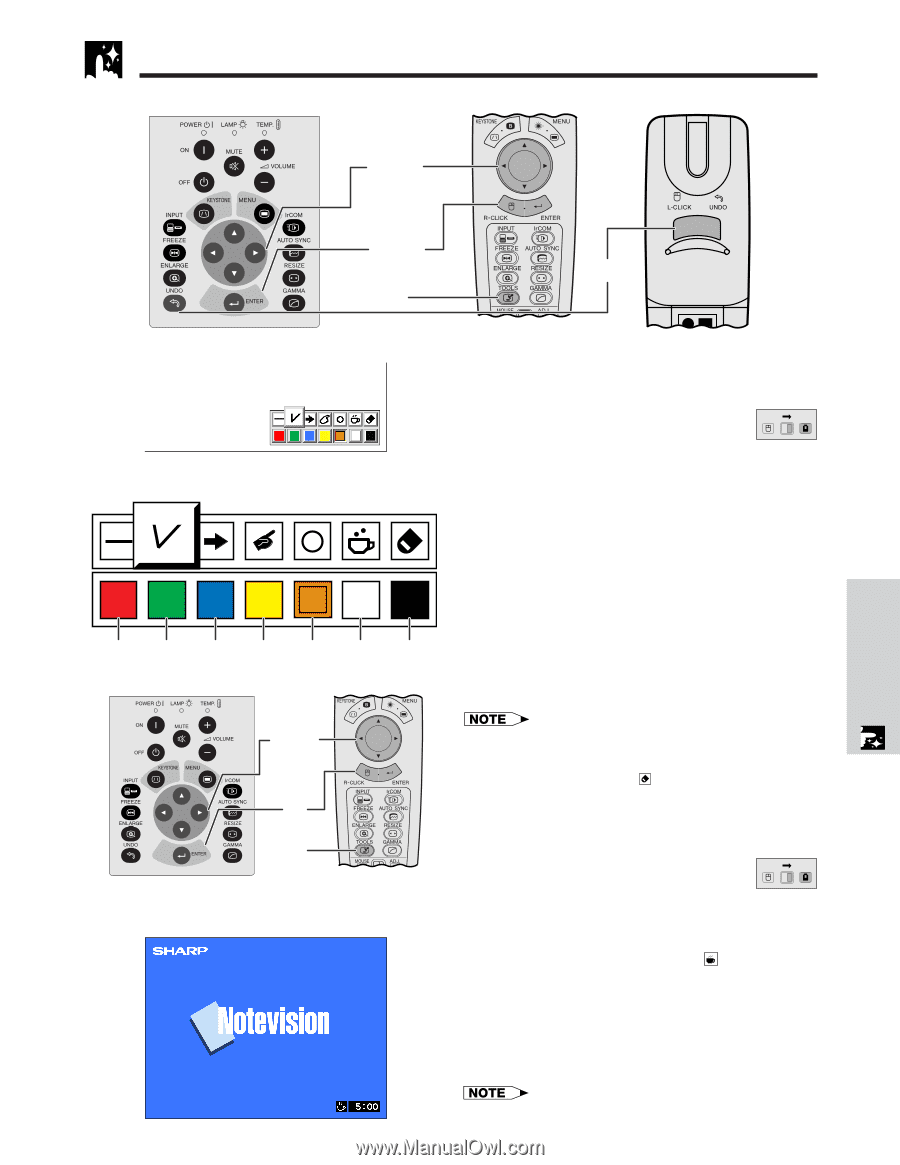
Using the Presentation Tools Projector Remote control 2, 4 Useful Features 3, 5 6 1 On-screen Display Menu Window Red Green Blue Yellow Orange White Black Projector Remote control This projector is equipped with presentation tools. These will help you emphasize keypoints within your presentation. (Slide the MOUSE/ADJUSTMENT switch MOUSE ADJ. on the remote control to the ADJ. position.) 1 Press TOOLS to display the presentation tools menu window on the screen. 2 Press to select the desired tool and color. 3 Press ENTER to select it. 4 Once the tool is displayed on the screen, press to move it around the screen. 5 Press ENTER to stamp the tool on the screen. 6 Use UNDO to individually delete tools stamped on the screen. 2, 4 3 1 When selecting Sharp default image • You can stamp each tool as many times as you want on the screen. • To clear all the stamped presentation tools on the screen, press to select " " and ENTER. Displaying the break time (Slide the MOUSE/ADJUSTMENT switch MOUSE ADJ. on the remote control to the ADJ. position.) 1 Press TOOLS to display the presentation tools menu window on the screen. 2 Press to select " " in the menu window. 3 Press ENTER to start counting down the break time. 4 Press ∂ to increase or ƒ to decrease the break time. • The break time is displayed against the background image selected in "Selecting a Startup Image". (See page 42.) E-44
-
 1
1 -
2
-
3
-
4
-
5
-
6
-
7
-
8
-
9
-
10
-
11
-
12
-
13
-
14
-
15
-
16
-
17
-
18
-
19
-
20
-
21
-
22
-
23
-
24
-
25
-
26
-
27
-
28
-
29
-
30
-
31
-
32
-
33
-
34
-
35
-
36
-
37
-
38
-
39
-
 40
40 -
 41
41 -
 42
42 -
 43
43 -
 44
44 -
 45
45 -
 46
46 -
 47
47 -
 48
48 -
 49
49 -
 50
50 -
51
-
52
-
53
-
54
-
55
-
56
-
57
-
58
-
59
-
60
-
61
-
62
-
63
-
64
-
65
-
66
 |
 |