Sharp PN-HM851 PN-HB Series PN-HM Series Operation Manual - Page 33
Enlarge, Menu Items, Set ENLARGE to ON.
 |
View all Sharp PN-HM851 manuals
Add to My Manuals
Save this manual to your list of manuals |
Page 33 highlights
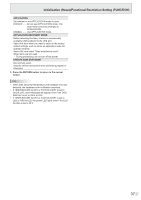
Menu Items TIPS • You might infringe on a copyright of the author which is protected by copyright law when you display the images of the computer screen and television/VCR simultaneously for profit-making or to show the image to the public. • When quad-screen display is selected, screen size cannot be changed. The screen size for quad-screen display is the same as the screen size for single-screen display. The Dot by Dot screen is displayed in NORMAL size. • When quad-screen display is selected, the CONNECT AUTO INPUT SELECT function and NO SIGNAL AUTO INPUT SEL. function are disabled. • When quad-screen display is selected, SCREEN menu and AUDIO menu cannot be set. • When quad-screen display is selected, the DISPLAY COLOR PATTERN cannot be set. • When quad-screen display is selected, the monitor will not enter the input signal waiting mode even if POWER MANAGEMENT is set to ON. • When quad-screen display is selected, HDMI CEC LINK does not operate. • When quad-screen display is selected, the FREEZE, DP (DisplayPort), HDMI, and OPTION buttons cannot be used. • When quad-screen display is selected, the position 1 screen is output from the DisplayPort output terminal. • Positions 2 to 4 do not support HDR signals. nEnlarge • You can align several monitors and integrate them into a single large screen to display. • Up to 5 monitors can be aligned in both the horizontal and vertical directions. • Each monitor displays enlarged views of separated images. (Example) Horizontal direction: 2 monitors Vertical direction: 2 monitors Horizontal direction: 3 monitors Vertical direction: 2 monitors Setting procedure Set using MULTI in the MULTI/PIP menu. 1. Set ENLARGE to ON. 2. Select ADVANCED (ENLARGE). 3. Set the number of monitors aligned in the horizontal direction in ENLARGE H. 4. Set the number of monitors aligned in the vertical direction in ENLARGE V. 5. Set the section of the separated image to be displayed on each monitor in ENLARGE-POS. 1) Press the ENTER button. 2) Press the , , or button to select position, then press MENU button. TIPS • When Enlarge is used, the CONNECT AUTO INPUT SELECT function and NO SIGNAL AUTO INPUT SEL. function are disabled. 33 E
-
 1
1 -
2
-
3
-
4
-
5
-
6
-
7
-
8
-
9
-
10
-
11
-
12
-
13
-
14
-
15
-
16
-
17
-
18
-
19
-
20
-
21
-
22
-
23
-
24
-
25
-
26
-
27
-
 28
28 -
 29
29 -
 30
30 -
 31
31 -
 32
32 -
 33
33 -
 34
34 -
 35
35 -
 36
36 -
 37
37 -
 38
38 -
39
-
40
-
41
-
42
-
43
-
44
-
45
-
46
-
47
-
48
-
49
-
50
-
51
-
52
-
53
-
54
-
55
-
56
-
57
 |
 |
