Oreck HALO Owners Guide - Page 10
Assembly - attachments
 |
View all Oreck HALO manuals
Add to My Manuals
Save this manual to your list of manuals |
Page 10 highlights
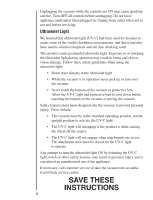
Assembly The only assembly necessary before using the vacuum is to attach the handle. Follow these steps: Handle assembly 1. Stand the vacuum up-right. 2. Snap the wire connectors together. 3. Gently lift the handle and place the aluminum tube over the main shaft of the vacuum. 4. Slide aluminum tube down onto the main shaft while pressing in the handle attachment screw. 5. Use provided hex wrench (hanging from handle) turn clockwise to tighten. Aluminum tube Hex wrench Wire connectors Main shaft Handle attachment screw 10
-
 1
1 -
2
-
3
-
4
-
 5
5 -
 6
6 -
 7
7 -
 8
8 -
 9
9 -
 10
10 -
 11
11 -
 12
12 -
 13
13 -
 14
14 -
 15
15 -
16
-
17
-
18
-
19
-
20
-
21
-
22
-
23
-
24
-
25
-
26
-
27
-
28
-
29
-
30
-
31
-
32
-
33
-
34
-
35
-
36
-
37
-
38
-
39
-
40
-
41
-
42
-
43
-
44
-
45
-
46
-
47
-
48
-
49
-
50
-
51
-
52
-
53
-
54
-
55
-
56
 |
 |

10
Assembly
The only assembly necessary before using the vacuum is to attach the
handle. Follow these steps:
1.
Stand the vacuum up-right.
±.
Snap the wire connectors together.
3.
Gently lift the handle and place the
aluminum tube over the main shaft of
the vacuum.
4.
Slide aluminum tube down onto the
main shaft while pressing in the handle
attachment screw.
5.
Use provided hex wrench (hanging from
handle) turn clockwise to tighten.
Aluminum tube
Handle attachment screw
Main shaft
Hex wrench
Handle
assembly
Wire
connectors