Metabo KFM 9-3 RF Operating Instructions - Page 14
Setting
 |
View all Metabo KFM 9-3 RF manuals
Add to My Manuals
Save this manual to your list of manuals |
Page 14 highlights
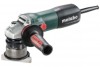
en ENGLISH 2. Screw knurled screw (15) into one of the threaded holes. 3. Set the parallel guide/ripping fence (16) by turning to the desired angle. 4. Firmly tighten the knurled screw (15). 7. Setting Remove the battery pack from the machine / pull the plug out of the socket before making any adjustments, changing tools, carrying out maintenance or cleaning. Indexable inserts, holders for indexable inserts, workpiece and chips can be hot after work. Wear protective gloves. Danger of crushing! Wear protective gloves. 7.1 Adjust scales (only when required) The scales (12), (14) come with the correct settings from the factory. However, should they be adjusted, see chapter 9.3. 7.2 Set chamfer height Read the set chamfer height at the graduated scale (12): 1. Read the set chamfer height at the graduated scale (12). See illustration: Set chamfer height = 0.7 mm. (The scale (14) is used for the rough orientation during the setting process). 12 0 I 3. Carry out trial cut. 8. Use 8.1 Switching On and Off Always guide the machine with both hands. Switch on first, then guide the accessory towards the workpiece. Avoid unintentional start-up of the machine: always switch off the machine, if the plug is pulled from the mains socket or if there was a power cut / if the battery pack was removed from the machine. In continuous operation, the machine continues running if it is forced out of your hands. Therefore, always hold the machine with both hands using the handles provided, stand securely and concentrate. Avoid the machine swirling up or taking in dust and chips. After switching off the machine, only place it down when the motor has come to a standstill. Machines with slide switch: 4 Switching on: Push the sliding switch (4) forward. For continuous activation, now tilt downwards until it engages. Switching off: Press the rear end of the slide switch (4) and release it. 14 Change the chamfer height by turning the adjusting ring: 2. Push the adjusting ring (13) downwards and turn. 13 The chamfer height can be set in 0.1 mm (0.004") steps. Each full rotation results in a change of the chamfer height by 3.0 mm (1/8"). Remove max. 3.0 mm per cutting operation. Create larger chamfer heights in several cutting operations. Do not exceed the maximum permitted chamfer height (see chapter Technical 14 Specifications). 8.2 Working Directions 1. Check indexable inserts (20). Change damaged or worn indexable inserts. 2. Set the chamfer height (see section 7.2). 3. Always hold the machine with both hands on the intended handles, take a secure stance and concentrate on the work. 4. First switch on, then place the machine with the support surface (17) onto the workpiece and only then put the tool close to the workpiece. 5. When cutting, always work against the run of the indexable inserts (see illustration). Otherwise there is the risk of a kickback. Guide the machine evenly at a speed suitable for the material being processed. Do not tilt, apply excessive force or sway from side to side. 6. Guide the machine in such a way that the parallel guide (16) is in contact with the workpiece. If you work without parallel guide: Guide the machine in such a way that the ball-bearing stationary seal ring (19) is in contact with the workpiece.
-
 1
1 -
2
-
3
-
4
-
5
-
6
-
7
-
8
-
 9
9 -
 10
10 -
 11
11 -
 12
12 -
 13
13 -
 14
14 -
 15
15 -
 16
16 -
 17
17 -
 18
18 -
 19
19 -
20
-
21
-
22
-
23
-
24
-
25
-
26
-
27
-
28
-
29
-
30
-
31
-
32
-
33
-
34
-
35
-
36
-
37
-
38
-
39
-
40
-
41
-
42
-
43
-
44
-
45
-
46
-
47
-
48
-
49
-
50
-
51
-
52
-
53
-
54
-
55
-
56
-
57
-
58
-
59
-
60
-
61
-
62
-
63
-
64
-
65
-
66
-
67
-
68
-
69
-
70
-
71
-
72
-
73
-
74
-
75
-
76
-
77
-
78
-
79
-
80
-
81
-
82
-
83
-
84
-
85
-
86
-
87
-
88
-
89
-
90
-
91
-
92
-
93
-
94
-
95
-
96
-
97
-
98
-
99
-
100
-
101
-
102
-
103
-
104
-
105
-
106
-
107
-
108
 |
 |
