Lantronix SLC 16 Lantronix SLC - User Guide - Page 34
Restoring Factory Defaults - default password
 |
View all Lantronix SLC 16 manuals
Add to My Manuals
Save this manual to your list of manuals |
Page 34 highlights
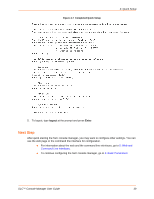
4: Quick Setup able to Telnet or SSH to the SLC console manager through your network connection, or access the web interface through a web browser. Restoring Factory Defaults To use the LCD display to restore factory default settings: 1. Press the right arrow button to move to the last option, Release. 2. Use the down arrow to move to the Restore Factory Defaults option. A prompt for the 6-digit Restore Factory Defaults password displays. 3. Press Enter to enter edit mode. 4. Using the left and right arrows to move between digits and the up and down arrows to change digits, enter the password (the default password is 999999). Note: The Restore Factory Defaults password is only for the LCD. You can change it at the command line interface using the admin keypad password command. 5. Press Enter to exit edit mode. If the password is valid, a Save Settings? Yes/No prompt displays. 6. To initiate the process for restoring factory defaults, select Yes. When the process is complete, the SLC device reboots. Method # 2 Quick Setup Using the Web After the unit has an IP address, you can use the Quick Setup tab to configure the remaining network settings. This page displays the first time you log into the SLC console manager only. Otherwise, the SLC Home Page displays. For information about the web interface, see 5: Web and Command Line Interfaces. To complete the Quick Setup tab: 1. Open a web browser (Netscape Navigator 6.x and above or Internet Explorer 5.5. and above, with JavaScript enabled). 2. In the URL field, type https:// followed by the IP address of your SLC console manager. Note: The web server listens for requests on the unencrypted (HTTP) port (port 80) and redirects all requests to the encrypted (HTTPS) port (port 443). 3. Log in using sysadmin as the user name and PASS as the password. The first time you log in to the SLC console manager, the Quick Setup tab automatically displays as shown in Figure 4-5. Otherwise, the Home page displays. SLC™ Console Manager User Guide 34
-
 1
1 -
2
-
3
-
4
-
5
-
6
-
7
-
8
-
9
-
10
-
11
-
12
-
13
-
14
-
15
-
16
-
17
-
18
-
19
-
20
-
21
-
22
-
23
-
24
-
25
-
26
-
27
-
28
-
 29
29 -
 30
30 -
 31
31 -
 32
32 -
 33
33 -
 34
34 -
 35
35 -
 36
36 -
 37
37 -
 38
38 -
 39
39 -
40
-
41
-
42
-
43
-
44
-
45
-
46
-
47
-
48
-
49
-
50
-
51
-
52
-
53
-
54
-
55
-
56
-
57
-
58
-
59
-
60
-
61
-
62
-
63
-
64
-
65
-
66
-
67
-
68
-
69
-
70
-
71
-
72
-
73
-
74
-
75
-
76
-
77
-
78
-
79
-
80
-
81
-
82
-
83
-
84
-
85
-
86
-
87
-
88
-
89
-
90
-
91
-
92
-
93
-
94
-
95
-
96
-
97
-
98
-
99
-
100
-
101
-
102
-
103
-
104
-
105
-
106
-
107
-
108
-
109
-
110
-
111
-
112
-
113
-
114
-
115
-
116
-
117
-
118
-
119
-
120
-
121
-
122
-
123
-
124
-
125
-
126
-
127
-
128
-
129
-
130
-
131
-
132
-
133
-
134
-
135
-
136
-
137
-
138
-
139
-
140
-
141
-
142
-
143
-
144
-
145
-
146
-
147
-
148
-
149
-
150
-
151
-
152
-
153
-
154
-
155
-
156
-
157
-
158
-
159
-
160
-
161
-
162
-
163
-
164
-
165
-
166
-
167
-
168
-
169
-
170
-
171
-
172
-
173
-
174
-
175
-
176
-
177
-
178
-
179
-
180
-
181
-
182
-
183
-
184
-
185
-
186
-
187
-
188
-
189
-
190
-
191
-
192
-
193
-
194
-
195
-
196
-
197
-
198
-
199
-
200
-
201
-
202
-
203
-
204
-
205
-
206
-
207
-
208
-
209
-
210
-
211
-
212
-
213
-
214
-
215
-
216
-
217
-
218
-
219
-
220
-
221
-
222
-
223
-
224
-
225
-
226
-
227
-
228
-
229
-
230
-
231
-
232
-
233
-
234
-
235
-
236
-
237
-
238
-
239
-
240
-
241
-
242
-
243
-
244
-
245
-
246
-
247
-
248
-
249
-
250
-
251
-
252
-
253
-
254
-
255
-
256
-
257
-
258
-
259
-
260
-
261
-
262
-
263
-
264
-
265
-
266
-
267
-
268
-
269
-
270
-
271
-
272
-
273
-
274
-
275
-
276
-
277
-
278
-
279
-
280
-
281
-
282
-
283
-
284
-
285
-
286
-
287
-
288
-
289
-
290
-
291
-
292
-
293
-
294
-
295
-
296
-
297
-
298
-
299
 |
 |
