Hitachi CPX5 Network Guide - Page 24
History], Connect], 8 Confirming the connection to your destination, Register to profile]
 |
UPC - 050585151185
View all Hitachi CPX5 manuals
Add to My Manuals
Save this manual to your list of manuals |
Page 24 highlights
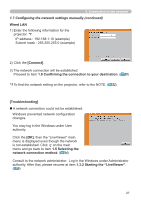
1. Connection to the network 1.6 Manual configuration (continued) 1.6.2 History connection The "LiveViewer" can memory the network settings when connecting to the projector as a history record. After that, selecting a history record can quickly connect the network with the projector. 1) Select the [History]. 2) Choose a history record listed in the window. 3) Click the [Connect]. 4) The network connection will be established. Proceed to item 1.8 Confirming the connection to your destination. ( 30) If you want to copy a history record to a profile data, select one of the history record and click the [Register to profile]. The profile data cannot be erased automatically. NOTE • The number of the history record is maximum 10 for each network adapter. When the 11th data is stored, the oldest record among the 10 will be overwritten. • The date & time information in each history record is renewed when the network is connected by using the history record. • If the DHCP is set on in the projector, the network connection between the projector and computer may not be established since IP address may be varied. • Even if you use the profile connection, it will be memorized as a history record. 24
-
 1
1 -
2
-
3
-
4
-
5
-
6
-
7
-
8
-
9
-
10
-
11
-
12
-
13
-
14
-
15
-
16
-
17
-
18
-
 19
19 -
 20
20 -
 21
21 -
 22
22 -
 23
23 -
 24
24 -
 25
25 -
 26
26 -
 27
27 -
 28
28 -
 29
29 -
30
-
31
-
32
-
33
-
34
-
35
-
36
-
37
-
38
-
39
-
40
-
41
-
42
-
43
-
44
-
45
-
46
-
47
-
48
-
49
-
50
-
51
-
52
-
53
-
54
-
55
-
56
-
57
-
58
-
59
-
60
-
61
-
62
-
63
-
64
-
65
-
66
-
67
-
68
-
69
-
70
-
71
-
72
-
73
-
74
-
75
-
76
-
77
-
78
-
79
-
80
-
81
-
82
-
83
-
84
-
85
-
86
-
87
-
88
-
89
-
90
-
91
-
92
 |
 |
