HP OfficeJet Pro 9120b User Guide - Page 102
Resolve print issues, Check power connection and restart printer, HP Print and Scan Doctor
 |
View all HP OfficeJet Pro 9120b manuals
Add to My Manuals
Save this manual to your list of manuals |
Page 102 highlights
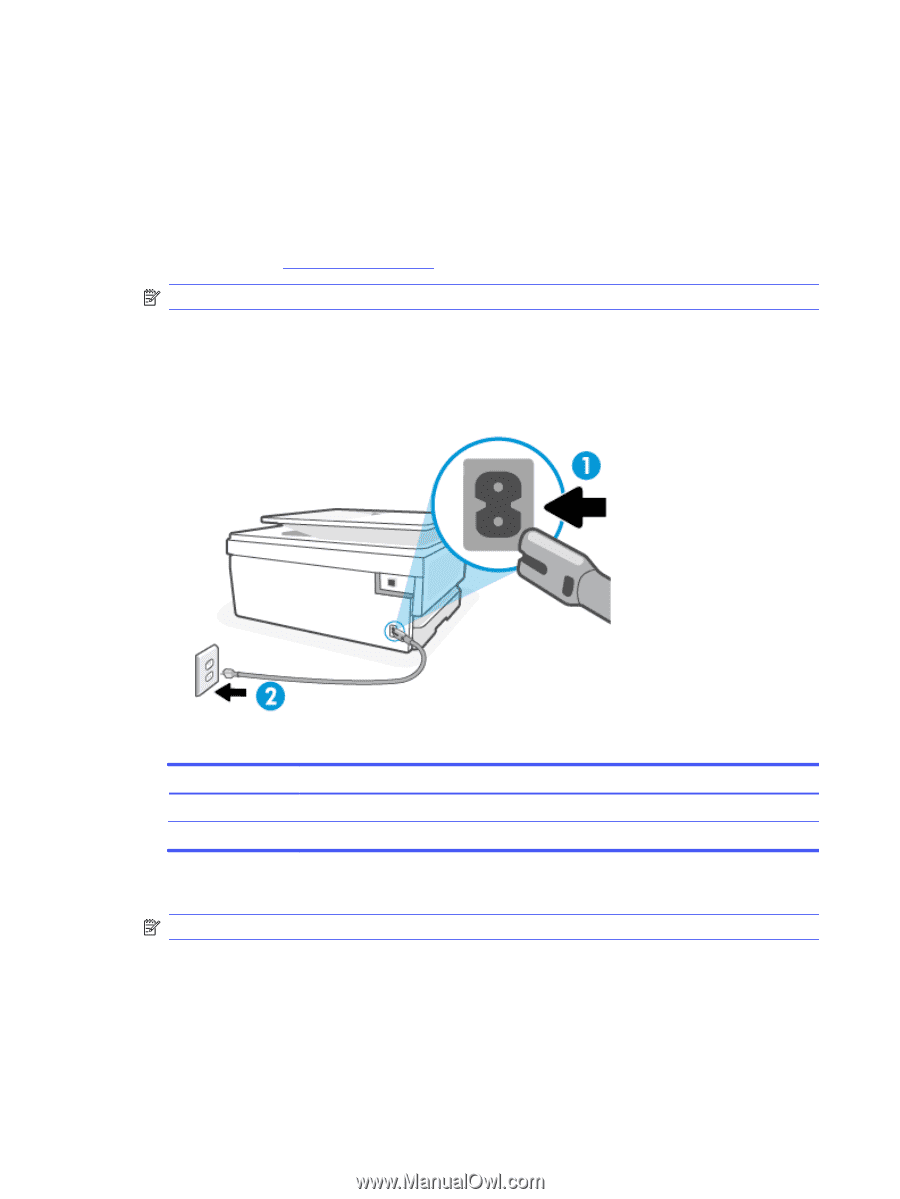
Resolve print issues Make sure that the printer is turned on and that there is paper in the tray. If you are still unable to print, try the following in order: 1. Check for error messages and resolve them by following the on-screen instructions. 2. If your computer is connected to the printer with a USB cable, disconnect and reconnect the USB cable. If your computer is connected to the printer with a Wi-Fi connection, confirm that the connection is working. 3. Download and run HP Print and Scan Doctor to help diagnose and fix issues automatically. NOTE: This tool is for the Windows operating system, and is only available in some languages. Check power connection and restart printer Follow these steps to check power connection and restart printer. 1. Make sure the power cord is firmly connected to the printer. Table 9-2 Printer ports Port Description 1 Power connection to the printer 2 Connection to a power outlet 2. Look at the Power button located on the printer. If it is not lit, the printer is turned off. Press the Power button to turn on the printer. NOTE: If the printer is not receiving electrical power, connect it to another power outlet. 3. With the printer turned on, disconnect the power cord from the back of the printer. 4. Unplug the power cord from the wall outlet. 5. Wait at least 15 seconds. 6. Plug the power cord back into the wall outlet. 94 Chapter 9 Solve a problem
-
 1
1 -
2
-
3
-
4
-
5
-
6
-
7
-
8
-
9
-
10
-
11
-
12
-
13
-
14
-
15
-
16
-
17
-
18
-
19
-
20
-
21
-
22
-
23
-
24
-
25
-
26
-
27
-
28
-
29
-
30
-
31
-
32
-
33
-
34
-
35
-
36
-
37
-
38
-
39
-
40
-
41
-
42
-
43
-
44
-
45
-
46
-
47
-
48
-
49
-
50
-
51
-
52
-
53
-
54
-
55
-
56
-
57
-
58
-
59
-
60
-
61
-
62
-
63
-
64
-
65
-
66
-
67
-
68
-
69
-
70
-
71
-
72
-
73
-
74
-
75
-
76
-
77
-
78
-
79
-
80
-
81
-
82
-
83
-
84
-
85
-
86
-
87
-
88
-
89
-
90
-
91
-
92
-
93
-
94
-
95
-
96
-
 97
97 -
 98
98 -
 99
99 -
 100
100 -
 101
101 -
 102
102 -
 103
103 -
 104
104 -
 105
105 -
 106
106 -
 107
107 -
108
-
109
-
110
-
111
-
112
-
113
-
114
-
115
-
116
-
117
-
118
-
119
-
120
-
121
-
122
-
123
-
124
-
125
-
126
-
127
-
128
-
129
-
130
-
131
-
132
-
133
-
134
-
135
-
136
-
137
-
138
-
139
 |
 |