HP C7745NB HP SureStore Tape Autoloader Model 1/9 Upgrade and Parts Replacemen - Page 44
Installing a Drive Module
 |
View all HP C7745NB manuals
Add to My Manuals
Save this manual to your list of manuals |
Page 44 highlights
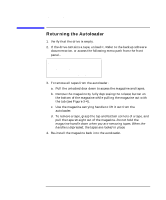
Figure 3-3 Replacing Autoloader Parts Removing and Installing Drive Modules Installing a Drive Module 1. Hold the drive module with one hand on the drive module handle while the other hand supports the drive (see Figure 3-3). 2. Install the drive module by inserting the rail at the top of the drive module into the slot at the top of the drive module opening. There will be some resistance as the drive connector engages with the connector on the autoloader. Installing a Drive Module 3-6 Chapter 3
-
 1
1 -
2
-
3
-
4
-
5
-
6
-
7
-
8
-
9
-
10
-
11
-
12
-
13
-
14
-
15
-
16
-
17
-
18
-
19
-
20
-
21
-
22
-
23
-
24
-
25
-
26
-
27
-
28
-
29
-
30
-
31
-
32
-
33
-
34
-
35
-
36
-
37
-
38
-
 39
39 -
 40
40 -
 41
41 -
 42
42 -
 43
43 -
 44
44 -
 45
45 -
 46
46 -
 47
47 -
 48
48 -
 49
49 -
50
-
51
-
52
-
53
-
54
-
55
-
56
-
57
-
58
-
59
-
60
-
61
-
62
-
63
 |
 |

Replacing Autoloader Parts
Removing and Installing Drive Modules
Chapter 3
3-6
Installing a Drive Module
1. Hold the drive module with one hand on the drive module handle
while the other hand supports the drive (see Figure 3-3).
2. Install the drive module by inserting the rail at the top of the drive
module into the slot at the top of the drive module opening. There will
be some resistance as the drive connector engages with the connector
on the autoloader.
Figure 3-3
Installing a Drive Module