Canon SD430 Software Starter Guide (For the Canon Digital Camera Solution Disk - Page 82
Registering the Target Device with the Camera
 |
UPC - 013803059397
View all Canon SD430 manuals
Add to My Manuals
Save this manual to your list of manuals |
Page 82 highlights
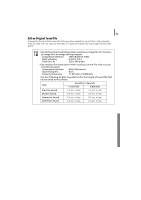
78 Wireless Network Settings for the Computer and Camera Registering the Target Device with the Camera Attach the camera to the computer using the interface cable and register the target device (computer to be connected wirelessly) with the camera. Configure the settings using the Camera Wireless Setup program (a wireless configuration utility). This step is only required the first time you register a target device. • The camera cannot connect wirelessly to computers that have not been registered as target devices. • The camera can register up to 7 devices. A Wireless Network Already in Use B 1:1 Direct Connection between Camera and Computer Both A and B share steps 1-8. For Step 9 onward go to A Wireless Network Already in Use (p. 81) or B 1:1 Direct Connection between Camera and Computer (p. 83). 1 A If your wireless network is already in use, confirm that the computer and router are correctly connected and that the router's wireless settings are correctly configured. B If there is a 1:1 direct connection between the camera and computer, confirm that the computer's wireless networking function is working. 2 Attach the supplied interface cable to the computer's USB port and the camera's DIGITAL terminal. 3 Turn on the camera and set it to the playback mode. The camera's (Print/Share) button will light blue. Power Button The Camera Control Window will appear on the computer screen. Leave this window as is without closing it. Playback Mode
-
 1
1 -
2
-
3
-
4
-
5
-
6
-
7
-
8
-
9
-
10
-
11
-
12
-
13
-
14
-
15
-
16
-
17
-
18
-
19
-
20
-
21
-
22
-
23
-
24
-
25
-
26
-
27
-
28
-
29
-
30
-
31
-
32
-
33
-
34
-
35
-
36
-
37
-
38
-
39
-
40
-
41
-
42
-
43
-
44
-
45
-
46
-
47
-
48
-
49
-
50
-
51
-
52
-
53
-
54
-
55
-
56
-
57
-
58
-
59
-
60
-
61
-
62
-
63
-
64
-
65
-
66
-
67
-
68
-
69
-
70
-
71
-
72
-
73
-
74
-
75
-
76
-
 77
77 -
 78
78 -
 79
79 -
 80
80 -
 81
81 -
 82
82 -
 83
83 -
 84
84 -
 85
85 -
 86
86 -
 87
87 -
88
-
89
-
90
-
91
-
92
-
93
-
94
-
95
-
96
-
97
-
98
-
99
-
100
-
101
-
102
-
103
-
104
-
105
-
106
-
107
-
108
-
109
-
110
-
111
-
112
-
113
-
114
-
115
-
116
-
117
-
118
-
119
-
120
-
121
-
122
-
123
-
124
-
125
-
126
-
127
-
128
-
129
-
130
 |
 |
