Canon SD430 Software Starter Guide (For the Canon Digital Camera Solution Disk - Page 20
computer system administrator after restarting to carry out - review
 |
UPC - 013803059397
View all Canon SD430 manuals
Add to My Manuals
Save this manual to your list of manuals |
Page 20 highlights
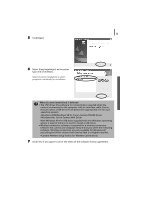
16 Using the Software on the Windows Platform - Preparations 8 Review the installation settings and click [Next]. Follow the onscreen instructions to proceed. The items displayed here differ according to the software installed. 9 When the installation is over, select [Yes, I want to restart my computer now.] and click [Finish]. If the camera is connected via a wireless network, please check your firewall settings before restarting the computer. See Firewalls (p. 105). At this stage, do NOT remove the Solution Disk from the CD-ROM drive yet. Users of Windows XP and Windows 2000 must log in as an Administrator (computer system administrator) after restarting to carry out the subsequent procedures. 10 Remove the disk from the CD-ROM drive when your normal desktop screen appears after restarting. If a security software warning message appears after you restart the computer, read Firewalls (p. 105) and change the settings. This concludes the software installation. Continue by connecting the camera to the computer so that the USB driver can be utilized. If you installed a USB driver, so far the required files have only been copied to your computer. You must now connect the camera to the computer with the interface cable to complete the installation and prepare the driver for use.
-
 1
1 -
2
-
3
-
4
-
5
-
6
-
7
-
8
-
9
-
10
-
11
-
12
-
13
-
14
-
 15
15 -
 16
16 -
 17
17 -
 18
18 -
 19
19 -
 20
20 -
 21
21 -
 22
22 -
 23
23 -
 24
24 -
 25
25 -
26
-
27
-
28
-
29
-
30
-
31
-
32
-
33
-
34
-
35
-
36
-
37
-
38
-
39
-
40
-
41
-
42
-
43
-
44
-
45
-
46
-
47
-
48
-
49
-
50
-
51
-
52
-
53
-
54
-
55
-
56
-
57
-
58
-
59
-
60
-
61
-
62
-
63
-
64
-
65
-
66
-
67
-
68
-
69
-
70
-
71
-
72
-
73
-
74
-
75
-
76
-
77
-
78
-
79
-
80
-
81
-
82
-
83
-
84
-
85
-
86
-
87
-
88
-
89
-
90
-
91
-
92
-
93
-
94
-
95
-
96
-
97
-
98
-
99
-
100
-
101
-
102
-
103
-
104
-
105
-
106
-
107
-
108
-
109
-
110
-
111
-
112
-
113
-
114
-
115
-
116
-
117
-
118
-
119
-
120
-
121
-
122
-
123
-
124
-
125
-
126
-
127
-
128
-
129
-
130
 |
 |
