Canon REALiS LCOS 4K5020Z 4K6020Z 4K5020Z Users Manual - Page 91
Adjusting Projected Images with Partial Distortion Correction, Correcting Partial Distortion
 |
View all Canon REALiS LCOS 4K5020Z manuals
Add to My Manuals
Save this manual to your list of manuals |
Page 91 highlights
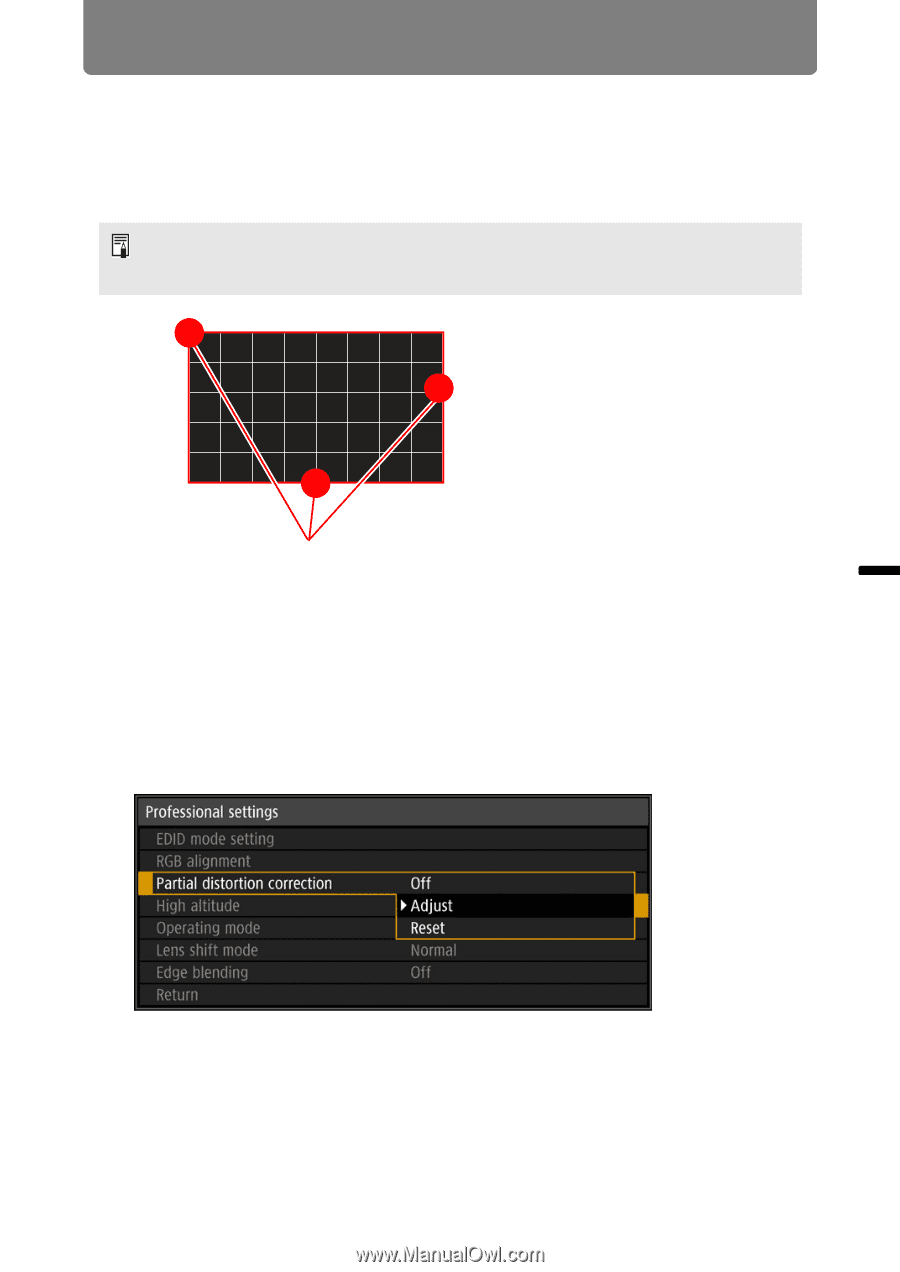
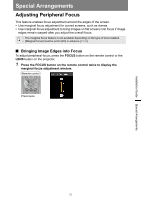
Installation Guide Adjusting the Image Adjusting the Image Adjusting Projected Images with Partial Distortion Correction This feature enables precise correction of partial projected image distortion in your specified areas. Red, green, and blue are adjusted together. • Correction separate from [Advanced registration] is possible. • Correction is not possible from adjustment points on the outermost edge toward the outside of the projected image. Cannot be specified outside ■ Correcting Partial Distortion Select one of the 54 adjustment points (in a 6 x 9 grid) for precise distortion correction. 1 In the [Install settings] menu, select [Professional settings] > [Partial distortion correction] > [Adjust]. The projector enters partial distortion correction point selection mode, and a window is displayed for selection of areas to correct. 89
-
 1
1 -
2
-
3
-
4
-
5
-
6
-
7
-
8
-
9
-
10
-
11
-
12
-
13
-
14
-
15
-
16
-
17
-
18
-
19
-
20
-
21
-
22
-
23
-
24
-
25
-
26
-
27
-
28
-
29
-
30
-
31
-
32
-
33
-
34
-
35
-
36
-
37
-
38
-
39
-
40
-
41
-
42
-
43
-
44
-
45
-
46
-
47
-
48
-
49
-
50
-
51
-
52
-
53
-
54
-
55
-
56
-
57
-
58
-
59
-
60
-
61
-
62
-
63
-
64
-
65
-
66
-
67
-
68
-
69
-
70
-
71
-
72
-
73
-
74
-
75
-
76
-
77
-
78
-
79
-
80
-
81
-
82
-
83
-
84
-
85
-
 86
86 -
 87
87 -
 88
88 -
 89
89 -
 90
90 -
 91
91 -
 92
92 -
 93
93 -
 94
94 -
 95
95 -
 96
96 -
97
-
98
-
99
-
100
-
101
-
102
-
103
-
104
-
105
-
106
-
107
-
108
-
109
-
110
-
111
-
112
-
113
-
114
-
115
-
116
-
117
-
118
-
119
-
120
-
121
-
122
-
123
-
124
-
125
-
126
-
127
-
128
-
129
-
130
-
131
-
132
-
133
-
134
-
135
-
136
-
137
-
138
-
139
-
140
-
141
-
142
-
143
-
144
-
145
-
146
-
147
-
148
-
149
-
150
-
151
-
152
-
153
-
154
-
155
-
156
-
157
-
158
-
159
-
160
-
161
-
162
-
163
-
164
-
165
-
166
-
167
-
168
-
169
-
170
-
171
-
172
-
173
-
174
-
175
-
176
-
177
-
178
-
179
-
180
-
181
-
182
-
183
-
184
-
185
-
186
-
187
-
188
-
189
-
190
-
191
-
192
-
193
-
194
-
195
-
196
-
197
-
198
-
199
-
200
-
201
-
202
-
203
-
204
-
205
-
206
-
207
-
208
-
209
-
210
-
211
-
212
-
213
 |
 |