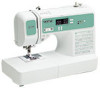
Brother International XR3240 Operation Manual - Page 51
Basic Stitching
 |
View all Brother International XR3240 manuals
Add to My Manuals
Save this manual to your list of manuals |
Page 51 highlights
BASIC STITCHING Straight stitches are used for sewing plain seams. Three stitches are available for basic stitching. Straight Pattern Presser Foot Twin Needle Walking Foot Reverse (Rev.)/ Reinforcement (Reinf.) Stitching Stitch Name Pattern No. Application Stitch Width [mm (inch)] Auto Manual Stitch Length [mm (inch)] Auto Manual Left Center J 00 Basic stitching, sewing gathers or pintucks, etc. 0.0 (0) 0.0-7.0 (0-1/4) 2.5 (3/32) 0.2-5.0 (1/64-3/16) ** Yes ( J ) * Yes Rev. J 01 Basic stitching and sewing gathers or pintucks 0.0 (0) 0.0-7.0 (0-1/4) 2.5 (3/32) 0.2-5.0 (1/64-3/16) ** Yes ( J ) * Yes Reinf. 3 J 02 Attaching zippers, basic stitching, and sewing gathers or pintucks, etc. 3.5 (1/8) 0.0-7.0 (0-1/4) 2.5 (3/32) 0.2-5.0 (1/64-3/16) ** Yes ( J ) * Yes Rev. Triple stretch stitch J 03 *Do not use reverse stitching. Attaching sleeves, sewing inseams, sewing stretch fabrics and decorative stitching 0.0 (0) 0.0-7.0 (0-1/4) 2.5 (3/32) 1.5-4.0 (1/16-3/16) ** Yes No ( J ) **Select a stitch width of 5.0 mm (3/16 inch) or less. Reinf. CAUTION ● Be sure to turn off the main power before replacing the presser foot. Otherwise, injuries may occur if the foot controller or (start/stop button) is accidentally pressed and the machine starts sewing. Basic stitching Baste or pin together the fabric pieces. a When sewing is finished, cut the thread. f • For details, refer to "Starting to sew" (page 41). Attach zigzag foot "J". b Select a stitch. c • For details, refer to "Selecting a stitch" (page 39). Lower the needle into the fabric at the d beginning of the stitching. Start sewing. e • For details, refer to "Starting to sew" (page 41). • For details on sewing reverse/reinforcement stitches, refer to "Sewing reinforcement stitches" (page 42). ■ Changing the needle position With the straight stitch (left needle position) and the triple stretch stitch, the needle position can be adjusted. Pressing the "+" side of the stitch width adjustment key moves the needle to the right; pressing the "-" side of the stitch width adjustment key moves the needle to the left. a Stitch width b Stitch width adjustment key c Left needle position d Right needle position 49
-
 1
1 -
2
-
3
-
4
-
5
-
6
-
7
-
8
-
9
-
10
-
11
-
12
-
13
-
14
-
15
-
16
-
17
-
18
-
19
-
20
-
21
-
22
-
23
-
24
-
25
-
26
-
27
-
28
-
29
-
30
-
31
-
32
-
33
-
34
-
35
-
36
-
37
-
38
-
39
-
40
-
41
-
42
-
43
-
44
-
45
-
 46
46 -
 47
47 -
 48
48 -
 49
49 -
 50
50 -
 51
51 -
 52
52 -
 53
53 -
 54
54 -
 55
55 -
 56
56 -
57
-
58
-
59
-
60
-
61
-
62
-
63
-
64
-
65
-
66
-
67
-
68
-
69
-
70
-
71
-
72
-
73
-
74
-
75
-
76
-
77
-
78
-
79
-
80
-
81
-
82
-
83
-
84
-
85
-
86
-
87
-
88
-
89
-
90
-
91
-
92
-
93
-
94
-
95
-
96
-
97
-
98
-
99
-
100
-
101
-
102
-
103
-
104
-
105
-
106
-
107
-
108
-
109
-
110
-
111
-
112
-
113
-
114
-
115
-
116
 |
 |
