2012 Yamaha Motorsports Grizzly 700 4x4 EPS Owners Manual - Page 25
2012 Yamaha Motorsports Grizzly 700 4x4 EPS Manual

Page 25 highlights
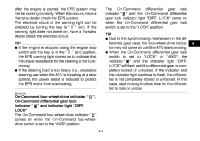
Clock mode Pushing the "CLOCK" button switches the display between the clock mode "CLOCK" and the hour meter mode "HOUR" in the following order: CLOCK → HOUR → CLOCK To set the clock 1. Set the display to the clock mode. 2. Push the "SELECT" button and "RESET" button together for at least three seconds. 3. When the hour digits start flashing, push the "RESET" button to set the hours. 4. Push the "SELECT" button, and the minute digits will start flashing. 5. Push the "RESET" button to set the minutes. 6. Push the "SELECT" button and then release it to start the clock. Fuel meter The fuel meter indicates the amount of fuel in the fuel tank. The display segments of the fuel meter disappear from "F" (full) towards "E" (empty) as the fuel level decreases. When the "E" segment disappears and the fuel level warning indicator flashes, refuel as soon as possible. TIP This fuel meter is equipped with a self-diagnosis system. If the electrical circuit is not working correctly, all the display segments and fuel level warning indicator will start flashing. If this occurs, have a Yamaha dealer check the electrical circuit. 4 1. Fuel level warning indicator 2. Fuel meter 3. "E" segment 4-6
-
 1
1 -
2
-
3
-
4
-
5
-
6
-
7
-
8
-
9
-
10
-
11
-
12
-
13
-
14
-
15
-
16
-
17
-
18
-
19
-
 20
20 -
 21
21 -
 22
22 -
 23
23 -
 24
24 -
 25
25 -
 26
26 -
 27
27 -
 28
28 -
 29
29 -
 30
30 -
31
-
32
-
33
-
34
-
35
-
36
-
37
-
38
-
39
-
40
-
41
-
42
-
43
-
44
-
45
-
46
-
47
-
48
-
49
-
50
-
51
-
52
-
53
-
54
-
55
-
56
-
57
-
58
-
59
-
60
-
61
-
62
-
63
-
64
-
65
-
66
-
67
-
68
-
69
-
70
-
71
-
72
-
73
-
74
-
75
-
76
-
77
-
78
-
79
-
80
-
81
-
82
-
83
-
84
-
85
-
86
-
87
-
88
-
89
-
90
-
91
-
92
-
93
-
94
-
95
-
96
-
97
-
98
-
99
-
100
-
101
-
102
-
103
-
104
-
105
-
106
-
107
-
108
-
109
-
110
-
111
-
112
-
113
-
114
-
115
-
116
-
117
-
118
-
119
-
120
-
121
-
122
-
123
-
124
-
125
-
126
-
127
-
128
-
129
-
130
-
131
-
132
-
133
-
134
-
135
-
136
-
137
-
138
-
139
-
140
-
141
-
142
-
143
-
144
-
145
-
146
-
147
-
148
-
149
-
150
-
151
-
152
-
153
-
154
-
155
-
156
-
157
-
158
-
159
-
160
-
161
-
162
-
163
-
164
-
165
-
166
-
167
-
168
-
169
-
170
-
171
-
172
-
173
-
174
 |
 |
