2009 Yamaha Motorsports Stratoliner S Owners Manual - Page 63
2009 Yamaha Motorsports Stratoliner S Manual

Page 63 highlights
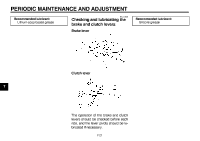
PERIODIC MAINTENANCE AND ADJUSTMENT EAU21960 EAU22072 EAU22271 Cast wheels To maximize the performance, durability, and safe operation of your vehicle, note the following points regarding the specified wheels. G The wheel rims should be checked for cracks, bends or warpage before each ride. If any damage is found, have a Yamaha dealer replace the wheel. Do not attempt even the smallest repair to the wheel. A deformed or cracked wheel must be replaced. G The wheel should be balanced whenever either the tire or wheel has been changed or replaced. An unbalanced wheel can result in poor performance, adverse handling characteristics, and a shortened tire life. G Ride at moderate speeds after changing a tire since the tire surface must first be "broken in" for it to develop its optimal characteristics. Clutch lever Since this model is equipped with a hydraulic clutch, adjusting the clutch lever free play is not needed. However, it is necessary to check the clutch fluid level and check the hydraulic system for leakage before each ride. If the clutch lever free play does become excessive, and shifting becomes rough or clutch slippage occurs, causing poor acceleration, there may be air in the clutch system. If there is air in the hydraulic system, have a Yamaha dealer bleed the system before operating the motorcycle. Adjusting the rear brake light switch 1. Rear brake light switch 2. Rear brake light switch adjusting nut The rear brake light switch, which is activated by the brake pedal, is properly adjusted when the brake light comes on just before braking takes effect. If necessary, adjust the brake light switch as follows. Turn the rear brake light switch adjusting nut while holding the rear brake light switch in place. To make the brake light come on earlier, turn the adjusting nut in direction (a). To make the brake light come on later, turn the adjusting nut in direction (b). 7 7-16
-
 1
1 -
2
-
3
-
4
-
5
-
6
-
7
-
8
-
9
-
10
-
11
-
12
-
13
-
14
-
15
-
16
-
17
-
18
-
19
-
20
-
21
-
22
-
23
-
24
-
25
-
26
-
27
-
28
-
29
-
30
-
31
-
32
-
33
-
34
-
35
-
36
-
37
-
38
-
39
-
40
-
41
-
42
-
43
-
44
-
45
-
46
-
47
-
48
-
49
-
50
-
51
-
52
-
53
-
54
-
55
-
56
-
57
-
 58
58 -
 59
59 -
 60
60 -
 61
61 -
 62
62 -
 63
63 -
 64
64 -
 65
65 -
 66
66 -
 67
67 -
 68
68 -
69
-
70
-
71
-
72
-
73
-
74
-
75
-
76
-
77
-
78
-
79
-
80
-
81
-
82
-
83
-
84
-
85
-
86
-
87
-
88
-
89
-
90
-
91
-
92
-
93
-
94
-
95
-
96
-
97
-
98
-
99
-
100
 |
 |
