2009 Mercedes SL-Class Owner's Manual - Page 137
2009 Mercedes SL-Class Manual

Page 137 highlights
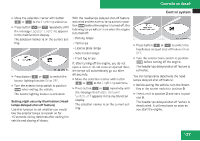
Controls in detail Control system X Press button è or ÿ repeatedly until the Vehicle status message memory menu appears in the multifunction display. If conditions have occurred causing status messages to be recorded, the number of messages appears in the right multifunction display: when the SmartKey in the starter switch is turned to position 0 or removed from the starter switch. With KEYLESS-GO the number of messages will reappear when you turn off the engine by pressing the KEYLESS-GO start/stop button and open the driver's door. Except for high-priority messages, the vehicle status message memory will be cleared when you turn off the ignition. RLighting RVehicle submenu (Y page 138) submenu (Y page 140) submenu (Y page 140) RConvenience Resetting to factory settings You can reset the functions of all submenus to the factory settings. For safety reasons, the function Light Circuit Headlamp Mode in the Lighting submenu cannot be reset while driving. X Press button è or ÿ repeatedly until the Settings menu appears in the multifunction display. Settings menu Introduction 1 Number of recorded status messages X Press button j or k. The stored messages will now be displayed in the order in which they have occurred. For malfunction and warning messages, see "Vehicle status messages in the multifunction display" (Y page 255). i After you have scrolled through all recorded status messages, the first recorded message appears again. Should the vehicle's system record any conditions while driving, the number of messages will reappear in the multifunction display In the Settings menu there are two functions: The function To reset, press reset button for 3 seconds, with which you can reset all the settings to the original factory settings and a collection of submenus with which you can make individual settings for your vehicle. The following settings and submenus are available in the Settings menu: RResetting to factory settings (Y page 135) RSubmenus X in the Settings menu (Y page 136) cluster submenu (Y page 136) RInstrument Press the reset button in the instrument cluster for approximately 3 seconds. The request to press the reset button once more to confirm appears in the right multifunction display. Z 135
-
 1
1 -
2
-
3
-
4
-
5
-
6
-
7
-
8
-
9
-
10
-
11
-
12
-
13
-
14
-
15
-
16
-
17
-
18
-
19
-
20
-
21
-
22
-
23
-
24
-
25
-
26
-
27
-
28
-
29
-
30
-
31
-
32
-
33
-
34
-
35
-
36
-
37
-
38
-
39
-
40
-
41
-
42
-
43
-
44
-
45
-
46
-
47
-
48
-
49
-
50
-
51
-
52
-
53
-
54
-
55
-
56
-
57
-
58
-
59
-
60
-
61
-
62
-
63
-
64
-
65
-
66
-
67
-
68
-
69
-
70
-
71
-
72
-
73
-
74
-
75
-
76
-
77
-
78
-
79
-
80
-
81
-
82
-
83
-
84
-
85
-
86
-
87
-
88
-
89
-
90
-
91
-
92
-
93
-
94
-
95
-
96
-
97
-
98
-
99
-
100
-
101
-
102
-
103
-
104
-
105
-
106
-
107
-
108
-
109
-
110
-
111
-
112
-
113
-
114
-
115
-
116
-
117
-
118
-
119
-
120
-
121
-
122
-
123
-
124
-
125
-
126
-
127
-
128
-
129
-
130
-
131
-
 132
132 -
 133
133 -
 134
134 -
 135
135 -
 136
136 -
 137
137 -
 138
138 -
 139
139 -
 140
140 -
 141
141 -
 142
142 -
143
-
144
-
145
-
146
-
147
-
148
-
149
-
150
-
151
-
152
-
153
-
154
-
155
-
156
-
157
-
158
-
159
-
160
-
161
-
162
-
163
-
164
-
165
-
166
-
167
-
168
-
169
-
170
-
171
-
172
-
173
-
174
-
175
-
176
-
177
-
178
-
179
-
180
-
181
-
182
-
183
-
184
-
185
-
186
-
187
-
188
-
189
-
190
-
191
-
192
-
193
-
194
-
195
-
196
-
197
-
198
-
199
-
200
-
201
-
202
-
203
-
204
-
205
-
206
-
207
-
208
-
209
-
210
-
211
-
212
-
213
-
214
-
215
-
216
-
217
-
218
-
219
-
220
-
221
-
222
-
223
-
224
-
225
-
226
-
227
-
228
-
229
-
230
-
231
-
232
-
233
-
234
-
235
-
236
-
237
-
238
-
239
-
240
-
241
-
242
-
243
-
244
-
245
-
246
-
247
-
248
-
249
-
250
-
251
-
252
-
253
-
254
-
255
-
256
-
257
-
258
-
259
-
260
-
261
-
262
-
263
-
264
-
265
-
266
-
267
-
268
-
269
-
270
-
271
-
272
-
273
-
274
-
275
-
276
-
277
-
278
-
279
-
280
-
281
-
282
-
283
-
284
-
285
-
286
-
287
-
288
-
289
-
290
-
291
-
292
-
293
-
294
-
295
-
296
-
297
-
298
-
299
-
300
-
301
-
302
-
303
-
304
-
305
-
306
-
307
-
308
-
309
-
310
-
311
-
312
-
313
-
314
-
315
-
316
-
317
-
318
-
319
-
320
-
321
-
322
-
323
-
324
-
325
-
326
-
327
-
328
-
329
-
330
-
331
-
332
-
333
-
334
-
335
-
336
-
337
-
338
-
339
-
340
-
341
-
342
-
343
-
344
-
345
-
346
-
347
-
348
-
349
-
350
-
351
-
352
-
353
-
354
-
355
-
356
-
357
-
358
-
359
-
360
-
361
-
362
-
363
-
364
 |
 |
