Viking VQGI5421 Installation / Use and Care Instructions - Page 33
Cleaning Your Grill
 |
View all Viking VQGI5421 manuals
Add to My Manuals
Save this manual to your list of manuals |
Page 33 highlights
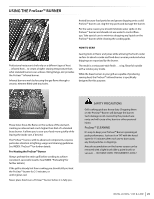
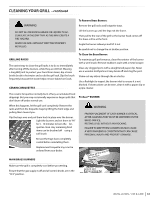
CLEANING YOUR GRILL ...continued WARNING DO NOT ALLOW EXCESS GREASE OR LIQUIDS TO ACCUMULATE IN THE DRIP TRAY AS THIS MAY CREATE A FIRE HAZARD. NEVER USE GRILL WITHOUT DRIP TRAY PROPERLY INSTALLED. GRILLING RACKS The easiest way to clean the grill racks is to do so immediately after turning off the burners, while they are still hot. Wearing a long BBQ mitt to protect your hand from steam, dip a brass bristle brush in hot water and scrub the grill rack. Dip the brush frequently because the steam helps remove baked-on foods. CERAMIC BRIQUETTES To Remove Brass Burners: Remove the grill racks and briquette trays. Lift the burner up until the legs exit the frame. Then pull to the rear of the grill so the burner head comes off the brass orifice at the front. Angle the burner sideways and lift it out. Be careful not to change the air shutter position. To Clean the Brass Burner: To maximize grill performance, clean the exterior of the burner with a wire brush. Remove stubborn scale with a metal scraper. Clear any clogged ports with a straightened paper clip. Never use a wooden toothpick as it may break off and clog the port. Shake out any debris through the air shutter. Use a flashlight to inspect the burner inlet to ensure it is not blocked. If obstructions can be seen, clean it with a paper clip or a pipe cleaner. The ceramic briquettes normally burn off any accumulated food drippings. But you may occasionally experience larger spills that don't burn off under normal use. ProSear™ BURNER When this happens, let the grill cool completely. Remove the racks and then the briquette trays by lifting the front edge and pulling them toward you. Flip the trays over and put them back in place over the burner. Light the burners and set them to "HI" for 5 - 10 minutes to burn the briquettes clean. Any remaining food items can be brushed off using a soft brush. Be sure the trays have completely cooled before reinstalling them. WARNING PROPER PLACEMENT OF EACH BURNER IS CRITICAL. AFTER CLEANING THEY MUST BE CENTERED ON THE BRASS ORIFICE, RESTING LEVEL WITHOUT ANY ROCKING. FAILURE TO MEET THESE CONDITIONS MAY CAUSE A VERY DANGEROUS CONDITION THAT CAN CAUSE PERSONAL INJURY AND PROPERTY DAMAGE. Replacement briquette trays can be ordered from your dealer. MAIN BRASS BURNERS Othrieficveenatllutrhi e way into Make sure the grill is completely cool before proceeding. Ensure that the gas supply is off and all control knobs are in the "OFF" position. Legs in slot Burner sitting flat | INSTALLATION / USE & CARE 33
-
 1
1 -
2
-
3
-
4
-
5
-
6
-
7
-
8
-
9
-
10
-
11
-
12
-
13
-
14
-
15
-
16
-
17
-
18
-
19
-
20
-
21
-
22
-
23
-
24
-
25
-
26
-
27
-
 28
28 -
 29
29 -
 30
30 -
 31
31 -
 32
32 -
 33
33 -
 34
34 -
 35
35 -
 36
36 -
 37
37 -
 38
38 -
39
-
40
-
41
-
42
-
43
-
44
 |
 |
