URC KP-4000C Owners Manual - Page 11
In-Wall Installation
 |
View all URC KP-4000C manuals
Add to My Manuals
Save this manual to your list of manuals |
Page 11 highlights
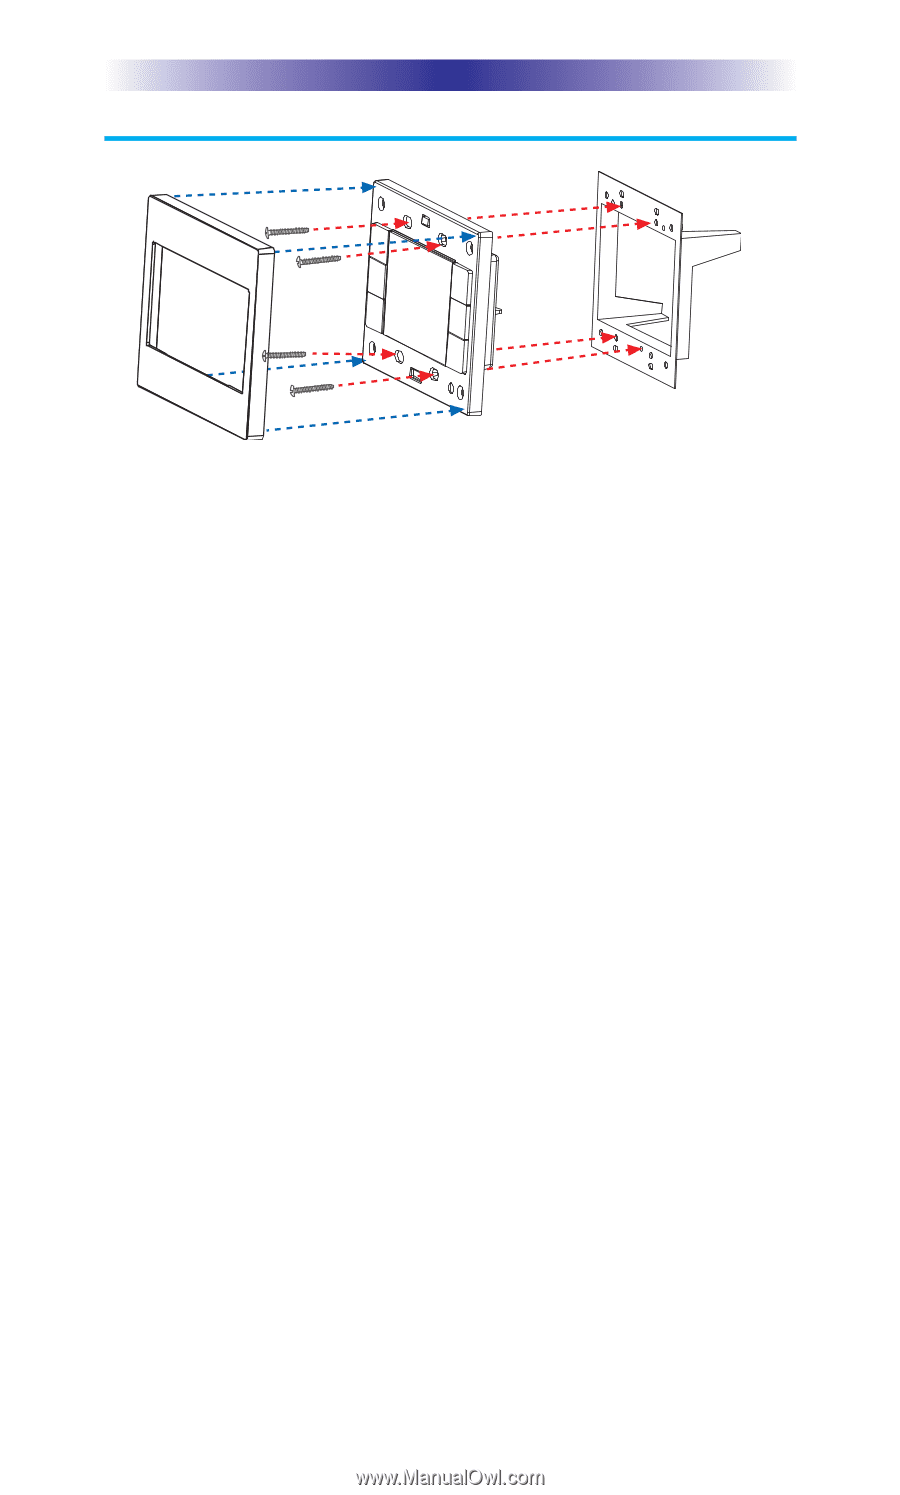
KP-4000 NETWORK KEYPAD In-Wall Installation Magnetic cover plate KP-4000 Two-Gang Wall Box 1. The KP-4000 installs in a standard two gang box. If in a retrofit installation, cut in and install a standard two gang p-ring or retro fit box (not included) into the wall. 2. Make connections for IR Out/RFTX-1, LAN, or Power Supply. For connections, refer to page 5. 3. Next, secure KP-4000 onto p-ring or retro fit box with the 4 included screws. 4. Finally attach the magnetic cover plate to the four screws secured into the KP-4000. Page 8
-
 1
1 -
2
-
3
-
4
-
5
-
 6
6 -
 7
7 -
 8
8 -
 9
9 -
 10
10 -
 11
11 -
 12
12 -
 13
13 -
 14
14 -
 15
15 -
 16
16 -
17
-
18
-
19
-
20
-
21
-
22
-
23
-
24
 |
 |
Page 8
KP-4000 N
ETWORK
K
EYPAD
1. The KP-4000 installs in a standard two gang box. If in a retrofit
installation, cut in and install a standard two gang p-ring or retro
fit box (not included) into the wall.
2. Make connections for IR Out/RFTX-1, LAN, or Power Supply. For
connections, refer to page 5.
3. Next, secure KP-4000 onto p-ring or retro fit box with the 4
included screws.
4. Finally attach the magnetic cover plate to the four screws secured
into the KP-4000.
Two-Gang
Wall Box
KP-4000
Magnetic
cover plate
In-Wall Installation