Sony SNC-RS46N User Manual (RH-RS Users Guide) - Page 124
Audio upload tab, Enable, Obtain an IP address automatically, IP address, Model, Serial, Status, Ready
 |
View all Sony SNC-RS46N manuals
Add to My Manuals
Save this manual to your list of manuals |
Page 124 highlights
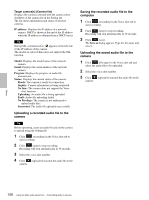
Others Notes • An error dialog appears if the specified IP address in the camera list is assigned for a device other than the network camera, or does not exist in the network. • You cannot add new cameras if the maximum of 256 cameras has been reached. Delete Click this button to delete the selected camera(s) from the camera list. Note on switching the tab If an error occurs when you switch from the Setting tab to the Audio upload tab or the Voice alert tab, the camera is shown in red. In this case, check the camera settings and the user ID and password settings. Audio upload tab Use this menu to transmit audio from the computer to the camera. You can transmit audio to multiple cameras displayed in the camera list simultaneously. Before transmitting, set Audio upload to Enable on the Common tab of the Camera menu. (start) / (stop) Click (start) to start audio transmission. The transmission speed is displayed in the Bitrate box during transmission. You can adjust the microphone volume and enable/disable muting, if necessary. To stop audio transmission, click (stop). Notes • Audio transmission stops if you switch the tab during transmission. • Audio may be interrupted when the IP address is changed if Obtain an IP address automatically (DHCP) is set on IP address in the Network menu. • Audio may be interrupted if you transmit it to many cameras simultaneously. Sound adjustment and indicators Adjust the microphone input volume by moving the slider bar. You can adjust the volume even during transmission. Click to enable/disable sound muting. The microphone input volume level is displayed. The transmission rate is displayed in the Bitrate box. Click this button to hide the camera list. Click it again to display the camera list. Target camera(s) (Camera list) Displays the cameras selected with the camera select checkbox of the camera list in the Setting tab. The list shows the information and status of the selected cameras. IP address: Displays the IP address of the network camera. "DHCP" is shown at the end of the IP address when the IP address is obtained with a DHCP server. Tip During SSL communication, appears on the left side of the IP address of the camera. The model on sale in China does not support the SSL function. Model: Displays the model name of the network camera. Serial: Displays the serial number of the network camera. Status: Displays the current status of the camera. Ready: The camera is ready for connection. Connected: Camera connection was successful. Fault: Camera connection failed. Sending: Audio data is being transmitted. 124 Using the SNC audio upload tool - Transmitting Audio to Camera
-
 1
1 -
2
-
3
-
4
-
5
-
6
-
7
-
8
-
9
-
10
-
11
-
12
-
13
-
14
-
15
-
16
-
17
-
18
-
19
-
20
-
21
-
22
-
23
-
24
-
25
-
26
-
27
-
28
-
29
-
30
-
31
-
32
-
33
-
34
-
35
-
36
-
37
-
38
-
39
-
40
-
41
-
42
-
43
-
44
-
45
-
46
-
47
-
48
-
49
-
50
-
51
-
52
-
53
-
54
-
55
-
56
-
57
-
58
-
59
-
60
-
61
-
62
-
63
-
64
-
65
-
66
-
67
-
68
-
69
-
70
-
71
-
72
-
73
-
74
-
75
-
76
-
77
-
78
-
79
-
80
-
81
-
82
-
83
-
84
-
85
-
86
-
87
-
88
-
89
-
90
-
91
-
92
-
93
-
94
-
95
-
96
-
97
-
98
-
99
-
100
-
101
-
102
-
103
-
104
-
105
-
106
-
107
-
108
-
109
-
110
-
111
-
112
-
113
-
114
-
115
-
116
-
117
-
118
-
 119
119 -
 120
120 -
 121
121 -
 122
122 -
 123
123 -
 124
124 -
 125
125 -
 126
126 -
 127
127 -
 128
128 -
 129
129 -
130
-
131
-
132
-
133
-
134
-
135
 |
 |
