Sharp PN-HM751 PN-HB Series PN-HM Series Software Guide - Page 33
Monitor control using LAN/RS-232C commands
 |
View all Sharp PN-HM751 manuals
Add to My Manuals
Save this manual to your list of manuals |
Page 33 highlights
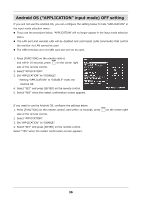
Monitor control using LAN/RS-232C commands LAN control and RS-232C control cannot be performed simultaneously. Set the control route with "SETUP" - "COMMUNICATION SETTING" - "MONITOR CONTROL SELECT" in the OSD menu. If you want to control the monitor using LAN commands, configure the following setting. 1) Turn on the monitor power, and press [CONTENT MENU] on the remote control to display the "CONTENT MENU" screen. 2) Select "Setup". 3) Select "Telnet Server". 4) Set "Telnet Server" to "ON". 5) Set a "User name" and "Password" if needed. By default, a "User name" and "Password" are not set. 6) Press [CONTENT MENU] on the remote control to return to the CONTENT MENU" screen. MENU 7) Press on the center right side of the remote control to display the OSD menu, and set "SETUP" - "COMMUNICATION SETTING" - "MONITOR CONTROL SELECT" to "LAN". MENU 8) Press on the center right side of the remote control to close the OSD menu. If "Ethernet" or "Wireless LAN" is set to "OFF" in the Android "Settings" screen, the LAN port or wireless LAN will be disabled and commands (LAN commands) that control the monitor via LAN cannot be used. 31
-
 1
1 -
2
-
3
-
4
-
5
-
6
-
7
-
8
-
9
-
10
-
11
-
12
-
13
-
14
-
15
-
16
-
17
-
18
-
19
-
20
-
21
-
22
-
23
-
24
-
25
-
26
-
27
-
 28
28 -
 29
29 -
 30
30 -
 31
31 -
 32
32 -
 33
33 -
 34
34 -
 35
35 -
 36
36 -
 37
37 -
 38
38 -
39
-
40
 |
 |
