Ryobi P7181K Operation Manual - Page 6
Operation
 |
View all Ryobi P7181K manuals
Add to My Manuals
Save this manual to your list of manuals |
Page 6 highlights
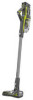
OPERATION To connect: Switch off unit and remove the battery pack. Align the pins on the roller bar with the receptacle in the stick vacuum or extension wand. Press together until it clicks into place. Replace battery pack. To remove: Switch off unit and remove the battery pack. Depress locking tab and pull to remove. ATTACHING AND REMOVING THE EXTENSION WAND AND ACCESSORY TOOLS See Figure 6, page 9 The extension wand and accessory tools can be used together or separately for a variety of cleaning tasks. To connect: Switch off unit and remove the battery pack. For the extension wand, align the pins on the extension wand with the receptacle in the stick vacuum. Press together until it clicks into place. For accessory tools, insert the tool into the outlet of the stick vacuum or the extension wand. Press together until it fits securely. Replace battery pack. To remove: Switch off unit and remove the battery pack. Depress locking tab and pull to remove. EMPTYING/REMOVING/REATTACHING THE DUST BOWL See Figures 7 - 10, pages 9 - 10. The dust bowl should be checked, emptied, and cleaned periodically for maximum dust collection. To empty: Remove the battery pack. Hold unit over waste receptacle. Press lock button on bottom of bowl to release spring loaded door. Shake lightly or tap sides to dislodge debris. Close door, pressing firmly until lock button engages. To remove: Remove the battery pack. Push the release button located on the side of the vacuum. Pull the dust bowl down and out. To reattach: Position the two sections as shown. Align the slot on the bottom of dust bowl with the tab on the bottom of motor housing, then snap the two sections together. REMOVING BLOCKAGES AND CLEANING THE ROLLER BAR See Figure 11, page 10. Obstructions in the roller bar may activate the overload protection sensor and must be removed. The roller bar will stop and the light on the roller bar illuminates red. To reset: Remove the battery pack. Remove the roller bar assembly from the wand or stick vacuum base and clear any obstructions with a blunt object. Wait at least 1 minute before reattaching the assembly. REMOVING THE ROLLER BRUSH FOR CLEANING See Figure 12, page 10. The roller brush is located inside the roller bar assembly. The roller bar assembly has a tool-free end cap, allowing the roller brush to be easily removed for cleaning. To remove: Rotate the end cap 90 degrees counterclockwise to release the roller brush. NOTE: There is a slot in the end cap that can be used with a coin to twist the end cap rather than using fingers. NOTE: Use scissors to remove any threads or hair wrapped around the roller brush using the scissor grooves. To reattach: Insert the roller brush on the side opposite of the end cap. Drop roller brush into opening and turn the end cap clockwise with finger or coin to tighten. For use with P726 or P7191 Roller Bar 6 - English
-
 1
1 -
 2
2 -
 3
3 -
 4
4 -
 5
5 -
 6
6 -
 7
7 -
 8
8 -
 9
9 -
 10
10 -
 11
11 -
 12
12 -
13
-
14
-
15
-
16
-
17
-
18
-
19
-
20
-
21
-
22
-
23
-
24
 |
 |
